|
Making alebrijes is a style of folk art that originated in Mexico almost a hundred years ago. The craft was first created by artist Pedro Linares, and the imaginative and brightly-colored creatures were inspired by a dream. Linares came from a family of piñata-makers, and he began making the colorful animals using the same paper-mache method used for piñatas. Later other artists began carving alebrijes from wood. The sculptures have become an icon in Mexican culture, and alebrijes even have a part in Disney's movie Coco! Let's watch a couple of clips about how Coco's artists and animators got their inspiration while remaining respectful of Mexico's culture and traditions: Here's more about the history of alebrijes and about their creator Pedro Linares: This map of Mexico shows where Pedro Linares lived and where he created his alebrijes- in the state of Oaxaca.  This video clip from a news program will show us how the art of alebrijes has been passed down through families . We'll see some traditional artisans at work! This clip takes us inside a studio where artisans are carving alebrijes from wood. One special celebration in Mexico is a parade called La Noche de los Alebrijes (Night of the Alebrijes). Take a look inside this art gallery to see some incredible (and BIG!) alebrijes sculptures! This read-aloud features the story of Miguel, the young boy from the movie Coco, as he learns about his culture's traditional alebrijes. Now that you've learned the history and tradition of alebrijes, here's how we'll make our own versions: Step 1: Step 2: Step 3: And here are some photographs to inspire you:           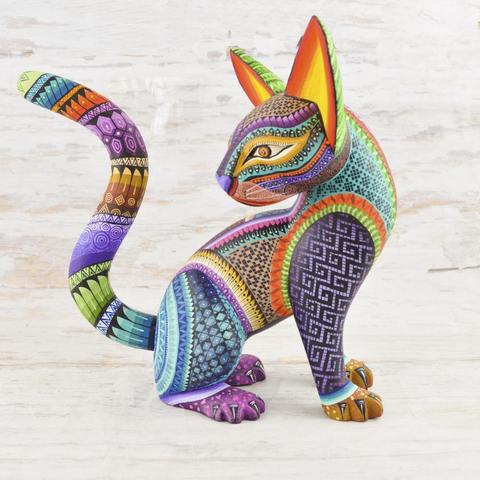   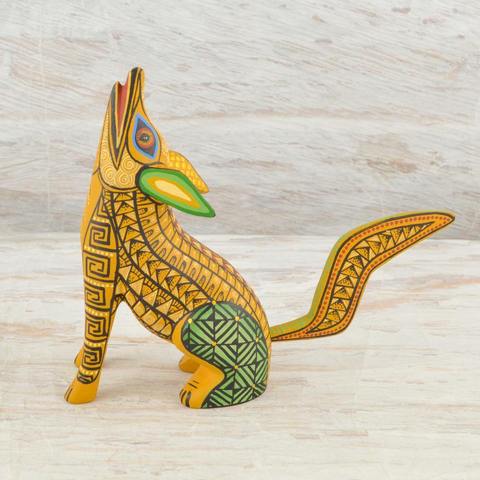            
0 Comments
Everytime we do this activity, my kids AMAZE me with their creative solutions! This video explains the directions: Now that we're all in the mood for doodling, here's a really silly book to enjoy! What is art? That's a big question, with a lot of different answers... One thing I tell my students is that the good thing about art is that there's not only ONE right answer- we can all come up with different answers and different ideas, and they can ALL be right! This drawing activity is designed to help students gain confidence and a willingness to try a new idea, different from anyone else's ideas. If everyone's artwork looked the same, it would be a boring world! I will give students a series of prompts, and with each one they'll add something to their drawing. The prompts will start out simple- "Draw a line all the way across your paper." Someone will always ask the question- "Does it have to be up-and-down, or side-to-side?" Or, "Does it have to be a straight line?" My answer is always, "You're the artist, you decide!" I encourage students to not copy their neighbors, and be confident in choosing their own answers to each prompt. Another benefit of this activity is that it makes a great review of art vocabulary- we use terms like line, shape, horizontal, vertical, diagonal, primary/secondary colors, contrast, variety, and point-of-view. After finishing several prompts, we'll gather together and look at what each of us has created. I ask the students to notice how each artwork is unique- no one's drawing looks exactly the same, even though every student heard the exact same prompts! We talk about how making art is an opportunity to share your own ideas and express your unique way of looking at our world. Here are some of the drawing prompts I use- though I think of new ones every time I lead this activity! Draw a line that goes all the way across your paper. Draw any shape. Draw a line that looks happy. Draw a shape that seems sad. Use a primary color to draw a zig-zag line. Use a secondary color to fill in a space. Turn your paper sideways. Use a dark marker to write your name in a corner. Draw a star and color it in. Draw your initial. Make it a block letter that is bigger than your hand. Draw something you ate for breakfast. Draw something you could see at the zoo. Draw something that tastes sweet. Draw something that can fall from the sky. Draw something that comes up from the ground. Draw something that’s hot. Draw something cold. Draw something wet. Draw something slimy. Pretend you are riding in a hot air balloon, and you look down at the ground. Draw what you see. Draw something you only see at night. Draw something that starts with the first letter of your name. Close your eyes and listen to what’s around you. Draw something you hear. Draw a circle. Now make it in to something. Draw something underwater. Draw something pink. Draw something spotted. Draw something that you are afraid of. This is a simple book, but I often use it at the beginning of the school year to introduce students to some of the art-making tools we'll be using. This activity is designed to introduce the use of paintbrushes to our beginning students, as well as provide practice and reinforcement of craftsmanship skills for more experienced painters. To begin, draw one continuous line squiggling and zig-zagging all over the paper, being sure to not lift the pencil until the line ends. Next, trace over that line with a paintbrush. Use one color at a time until the entire line is covered! The goal is to cover the line with a smooth and even layer of paint, showing how well you can control the paintbrush. Here's an example painted by a Hendrix kindergartner:  This artwork belongs to a second grader. It shows growth in the smoothness of the line, as well as being able to make a thinner line with less of the brush touching the paper. That shows better control of the brush!  And this example was made by a fourth grader! Notice the very thin and delicate lines. She was working so carefully that she didn't even have time to finish!  Remember- your paintbrush is like a ballerina, keep it up on its tippy-toes!  And don't let your paintbrush have a "bad hair day"!  Watch this video for step-by-step directions: Part of being an artist is taking great care of your materials, and learning how to treat a paintbrush gently is an important skill. Are you curious about how paintbrushes are made? This video takes us inside a paintbrush factory! Here's a fun book that uses one continuous line for all of the illustrations. And here's a great song to sing, all about different kinds of lines! Today's project: Share about yourself in an inventive way! Draw your name, but instead of using regular letters, build the letters out of objects that tell about you! These objects will be symbols that represent you. Here are some examples made by other artists:   Watch these videos to get started:  To get started, think about some of your favorite things... - favorite sports - favorite foods - favorite games - favorite activities - favorite holidays - favorite places to visit - favorite book or movie If you have extra time, write a few sentences on the back of your paper describing the symbols you chose and why they are important to you. Here are some examples of students at work...      And here are some finished artworks! These artists also use lettering in their artwork. Watch these videos for some interesting ideas!
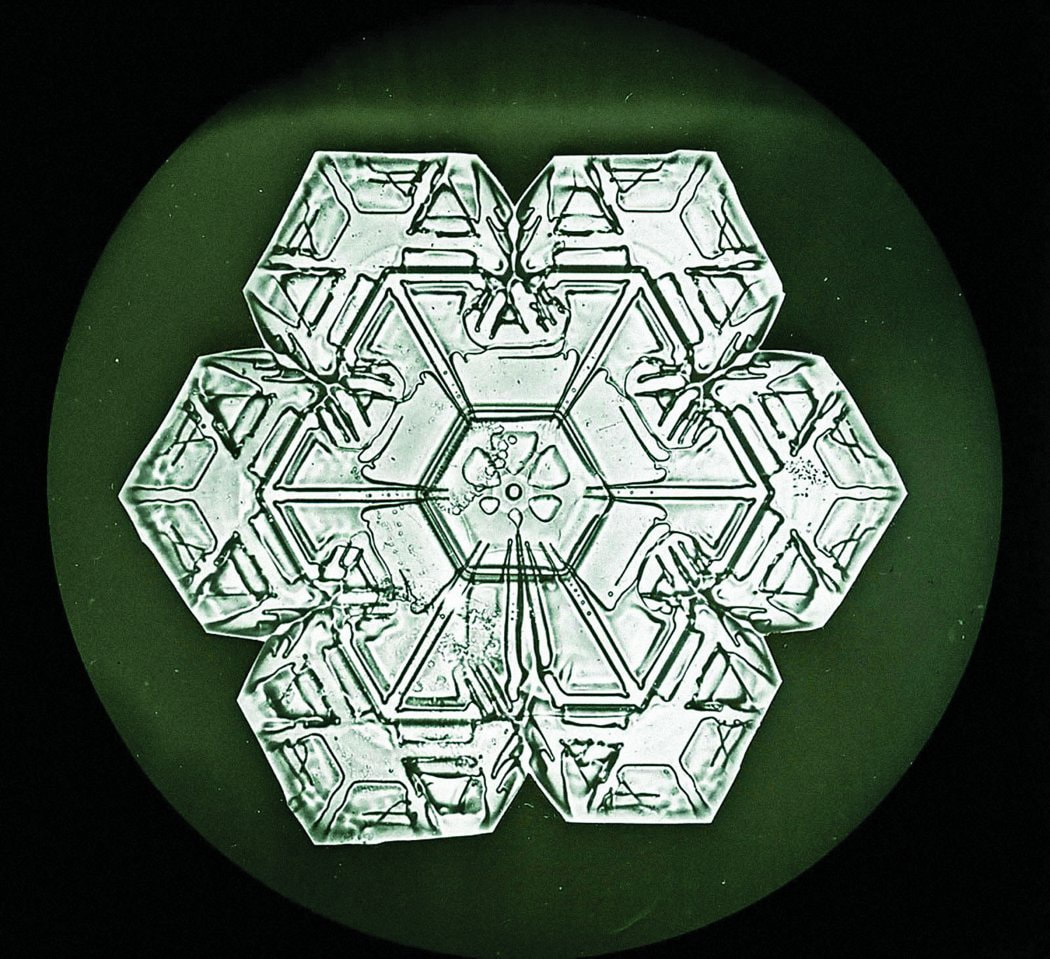
Photographs by Wilson "Snowflake" Bentley Just like snowflakes, each of us is one-of-a-kind! Let's celebrate that by creating beautiful snowflake artworks. Learn about Wilson "Snowflake" Bentley, an artist who discovered how to photograph snowflakes. See a time-lapse video of snowflakes forming under a microscope! This is an informational video about how snowflakes are formed. One of my favorite things about this season is the colorful lights!  Let's make some lights of our own! Here's an example I borrowed from another art teacher- ours won't look quite the same, but close! (Click on the picture to see more.) 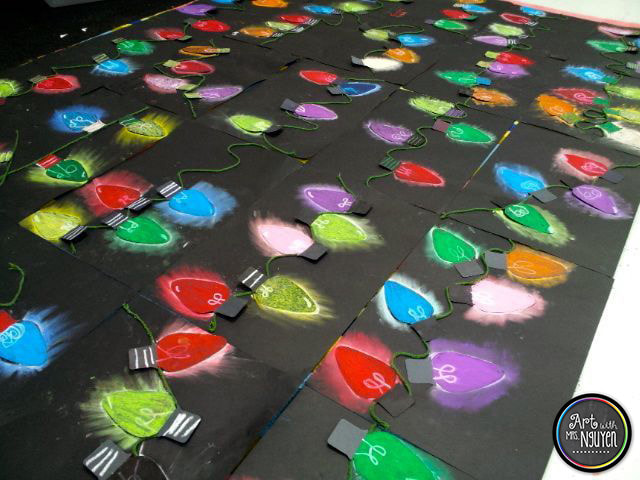 Here's how to get started: Here are step-by-step examples:  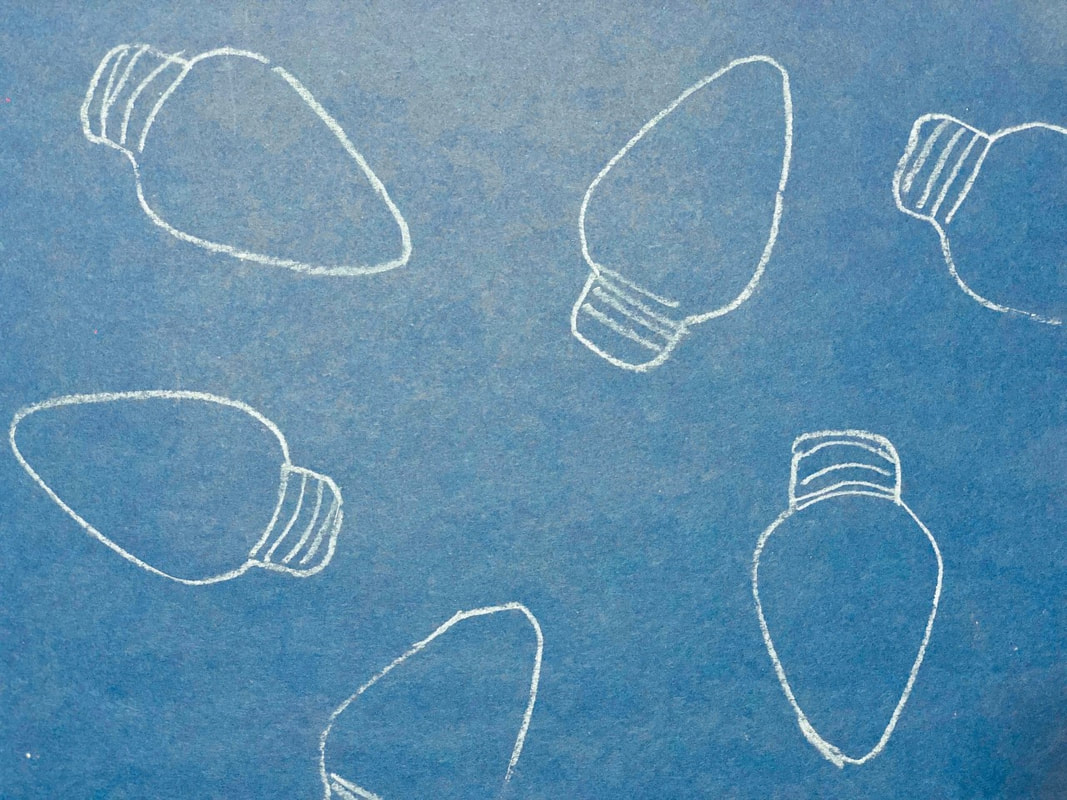       Here are some amazing examples of holiday lights! Here's an extra project if you need a little more holiday fun: This is a special Christmas story... my favorite thing about it is that it's told with no words- just images. It shows you how Art can be a way to communicate! |
ResourcesA collection of resources and ideas for creating art. Archives
April 2024
Categories |


 RSS Feed
