|
Fourth graders jumped right into this project at the start of the school year. Their work is finally finished and ready to share! The title of this project is "Meaningful Places. " I asked the students to think of a place that had meaning for them. Some students chose the country of their heritage, others chose previous homes or favorite vacation spots, and some chose places connected to special memories. For inspiration, we looked at the work of some master landscape artists of the 20th century. We noticed how these artists used bright colors and bold outlines to bring strong emphasis to the shapes in their work.  Andre Derain Charing Cross Bridge 1906  Henri Matisse Forest at Fontainebleau 1909  Maurice de Vlaminck Restaurant la Machine at Bougival 1906 Students used their iPads to find an image to use as inspiration for their work. I printed each student a copy of their image and we used them as the base for the artworks. The next step was to add color using oil pastels. Students could choose to use natural colors or to be inventive with their color choices. We explored how colors could create contrast in the image. Students also experimented with blending and layering the oil pastels to create texture and shading.     The finishing touch was to outline the shapes with black glue. This created the bold shapes like in the master works we first looked at.   Here are some of the finished artworks! They will be on display at our upcoming festival later this week. I asked each student to write a short explanation to be displayed with their artwork.  "This is my apartment that I live in. It is near our school. We have a balcony. Our apartments are tan and brown. People come and visit us. We are very happy where we are. Our neighbors are really nice. Me, my mom, and our dog live in our apartment." - Indea  "This picture is like Myrtle Beach. I chose this place because it reminds me of my aunt. It is special to me because I saved a starfish there. It reminds me of my baby cousin." - Sonya  "I picked this picture because it is located in Mexico. It is cool to be in Mexico." - Ruben  "This picture is from Texas. I chose this place because it's where I was born. It is special to me because I was born there. It reminds me of summer." - Addyson  "I chose this picture of the Charleston bridge because I used to live there. I used to drive across that bridge to go to school. My mom used to work across that bridge." - Shepherd 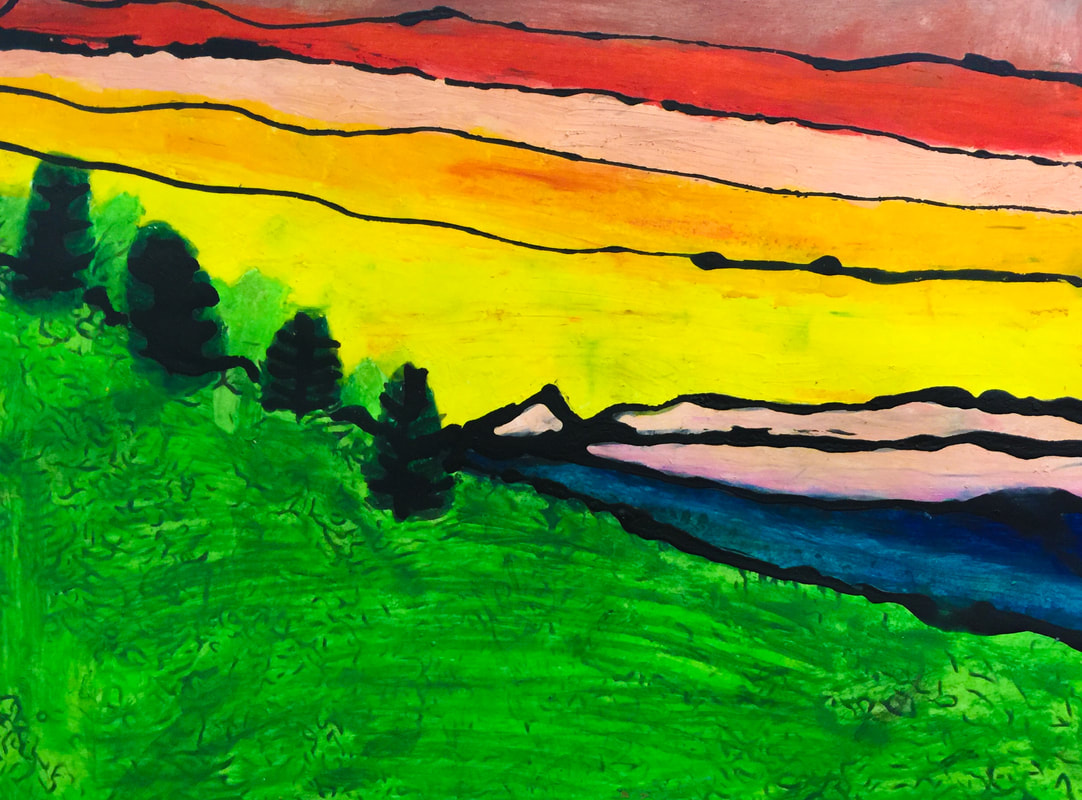 "My artwork is a sunset on the Cherokee village. I chose it because I have Cherokee in me and it is a very beautiful place. Their sunsets are very pretty and I love this place." - Chloe  "I chose this picture so people can see my home. It's special because it's where I live. It reminds me of my grandpa." - Jadyn 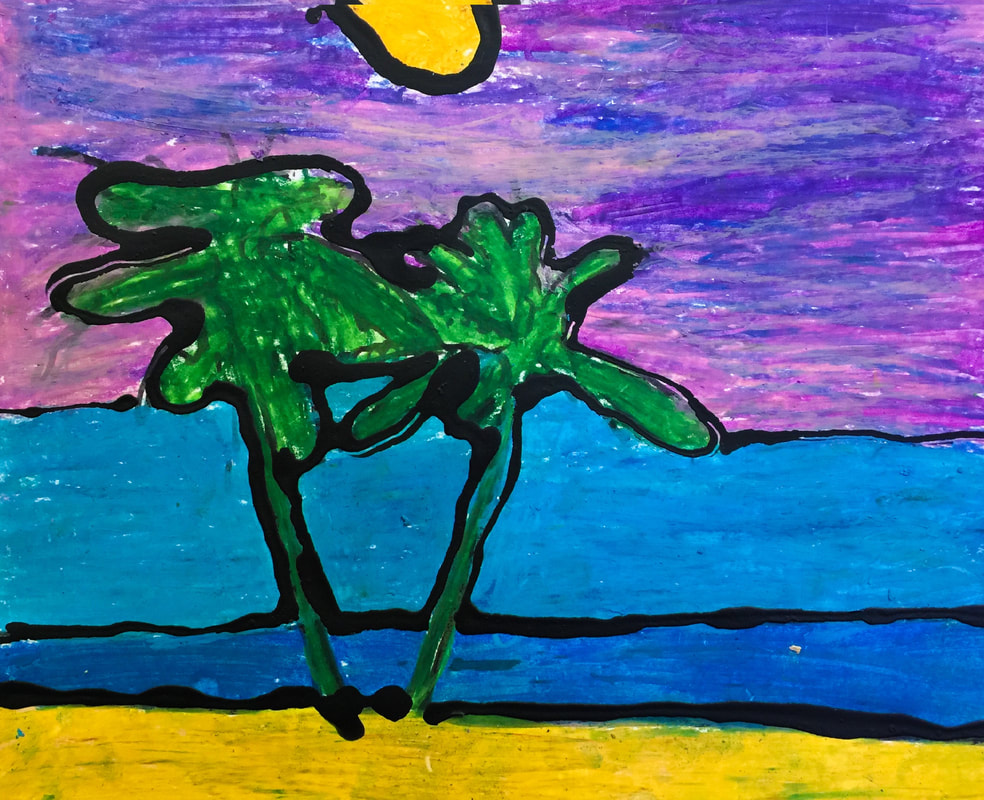 "This is a picture from Hawaii. I chose this place because it looks very pretty. It reminds me of a sunset on the ocean." - Ava 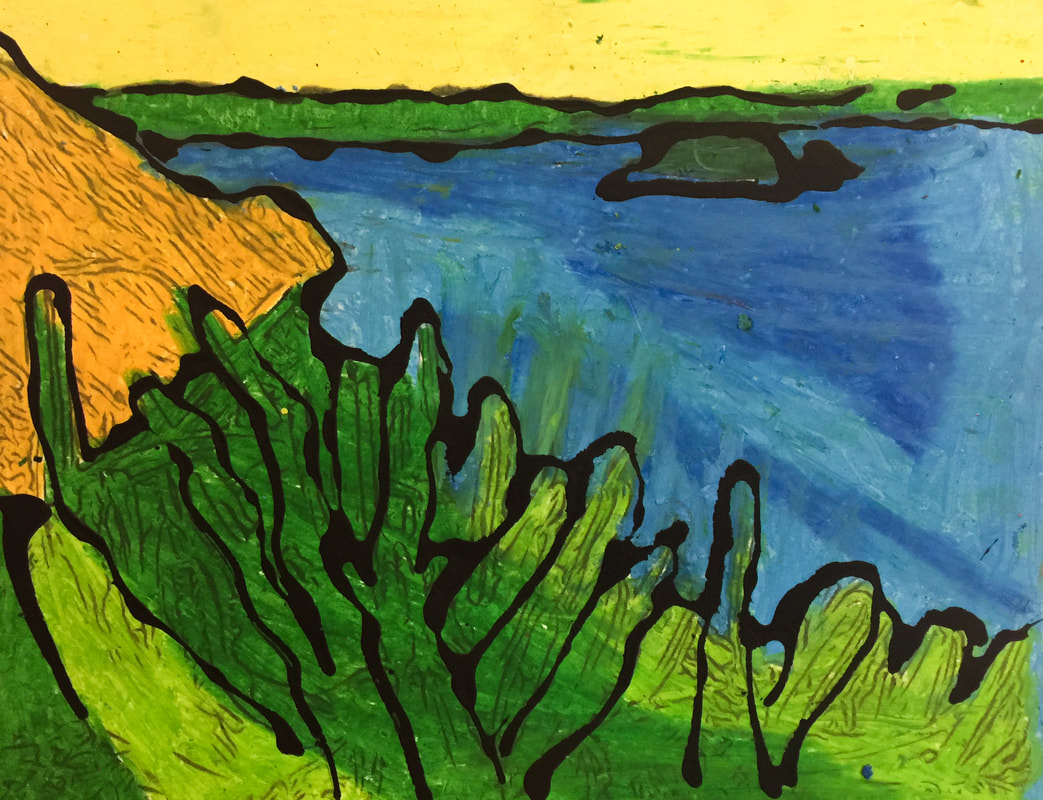 "This picture is from Mexico. I chose this place because I am going to Mexico in the summer. It is a special place because it reminds me of my grandma and grandpa. I love Mexico! " - Nelissa 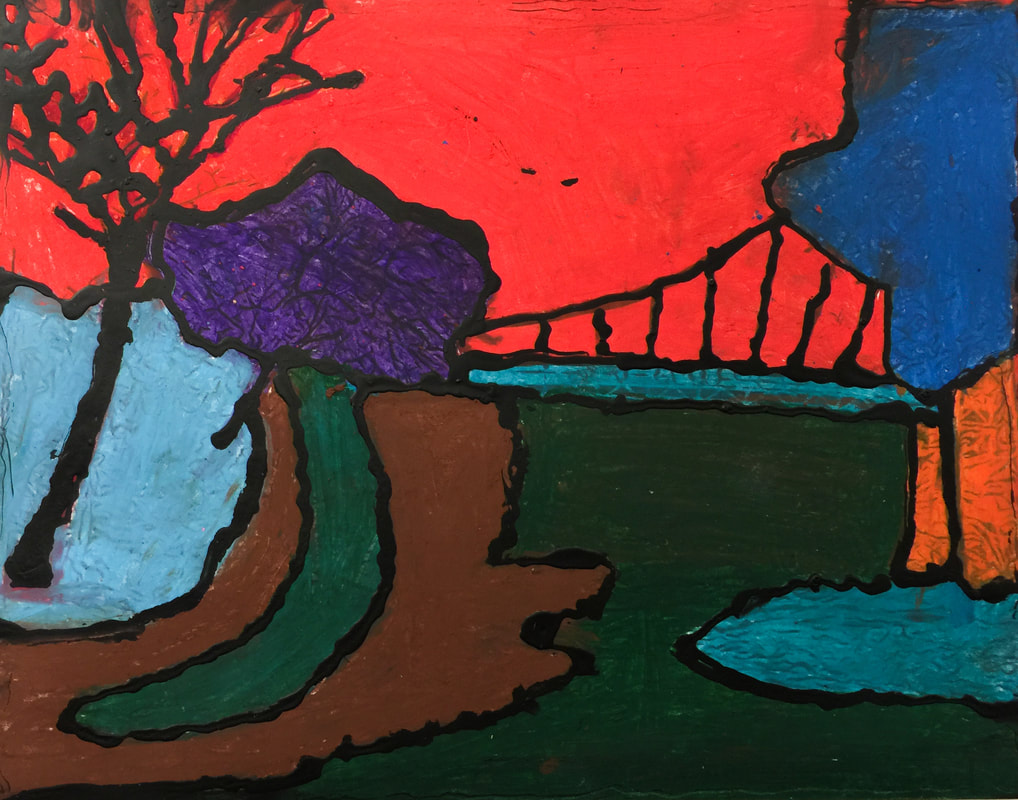 "This picture is from Greenville. I chose this place because I want to go there. It is special to me because I love adventure. It reminds me of my family." - Olga  "This is a picture of a beautiful place in Thailand." - Winston  "I chose this because it's where I'm from. It's Zimapan, Hidalgo in Mexico. I love that it's where my family is from." - Abigail  "I chose this place because I lived there. It is my apartment in Maryland. It's special to me because my brothers live there." - Carlos  "This picture is from California. I chose this place because it is a wonderful place to relax. It is special to me. It reminds me of a lake I live close to. " - Veronica  "This picture reminds me of my Grandpa because he lives in Mexico. It is sad because he will never come here to my house." - Marely  "This picture is from the beach. I got to go there last year. It was my first time to see the ocean." - Oswaldo  "I chose this picture because Mexico is where my mom was born. It is a special place because my family came from Mexico. This is special because we do some of the celebrations that Mexico does." - Moises  "This picture reminds me of a time that I went to a cabin with my family. I was five years old and the cabin we went to was haunted with a friendly ghost." - Shaniya  "This is a city in Mexico. I chose this because my grandma, grandpa, aunt, and mom are from Mexico." - Arisdelsy  "This is Knoxville, Tennessee. It is the capital of my home state. It reminds me of the first home I had. I've been there once. We went there when I was eight." - Grayson  "When I was little my dad would take me and my sisters to the mountains. We would sleep in a cabin and my dad and cousin would teach us survival skills and help us make breakfast on a fire. " - Jacoby  "This picture is from Cambodia. I chose this place because it is thousands of years old. It's special because my people respect the Angkor Wat." - Ardynn  "I chose this picture from Mexico because it is meaningful to me. I like the ocean and the sand and the beautiful sky." - Samuel  "I chose this picture because I learned that I had African in me and I didn't know. So this picture is of an African landscape with mountains." - Maranda  "The Great Smoky Mountains is a place me and my family go every year. We usually stay in a cabin and spend time together."
- Abbey
1 Comment
 This year Hendrix participated in International Dot Day 2017. On this day each year, artists all over the world celebrate the creativity and inspiration found in Peter H. Reynolds' book The Dot.  The Dot is the story of a young artist named Vashti who thinks she can't draw. Her teacher tries to help her by saying "Just make a mark and see where it takes you!" Vashti angrily jabs her pencil into her paper, leaving a black dot behind. The next time Vashti comes to Art, she sees her black dot hanging on the wall! She says to herself "Hmmph. I can make a better dot than that!" And she does! Her teacher's encouragement and support was all Vashti needed to be successful. By the end of the story, Vashti has taken on the role of teacher, and the book ends with her helping a little boy learn to "make his mark!" The book has inspired artists all over the world, and each year in September, International Dot Day is celebrated! This year over 10 million artists in over 170 countries were part of the celebration- and our Hendrix artists were included in that number!  Hendrix artists celebrated by making their own dot-inspired artworks. These paintings will be on display at our school during the month of September. I am looking forward to this being a new tradition for our school!              After we finished our paintings, students loved hearing this message of inspiration from The Dot author Peter H. Reynolds! It was almost like getting to meet him ourselves! We are already excited to celebrate International Dot Day 2018!  I wanted to take a minute to explain the behavior expectations for when your children are in the Art room. I always express to students that the Art room is a shared space, and about 700 students use it each week. This means we have to make good use of the limited time we have together and make each class period as productive as possible, as well as take good care of our materials and equipment so everything will be ready for the next group of kids! Each classroom in our school begins the year by developing a list of expectations called an "Essential Agreement." This is IB terminology for behaviors each member of our class agrees are necessary for a functional and pleasant place to learn. I ask each student to sign their name to our Art Room Essential Agreement. This signature creates a contract between each student and the other members of the class. I explain to the students that it's like making a promise. When misbehaviors occur, I can remind each student of the promise he or she made to follow our expectations.  In each class session, I select one student to honor for doing a particularly good job. Their reward is a cupcake sticker. Let me explain what cupcakes have to do with making art! It's all based on this rubric:  I explain to students that making Art is like decorating cupcakes. Sometimes students turn in work that is like the first cupcake on this poster- it's not even finished. The next category is what we call the "sloppy cupcake". The student made minimal effort and did not take pride in their work. I describe the third cupcake as being "fine". It's finished, all the requirements have been met, but it's nothing special. This represents artwork that's good, but not great. The final category on the rubric is our "fancy cupcake." THIS represents the kind of work I'm looking for- work that goes above and beyond expectations! This quality of work is what I reward with a matching cupcake sticker. So if you see your child bring home a sticker like this, understand that it represents a job very well done! It's important that children understand that this reward is NOT based on talent or skill, it's earned through EFFORT. All students, even those who struggle with Art and may not have a lot of natural talent, will earn a cupcake sticker at least once each year. I make sure that every student in the class is honored one time before any student earns a second sticker. As you may know, Hendrix participates in the Positive Behavioral Interventions and Supports program. The "PBIS" philosophy encourages good choices in our students. PBIS supports the use of a common language between all areas of a school. That common language is evident in what we call our "PACK expectations". We ask students to be "Part of the PACK" here at school. PACK is an acronym for being principled, appreciative, cooperative, and knowledgeable. Each area of our school has a system of expectations using this vocabulary. Our PACK expectations for Special Area classes are described in this chart:  Each time students attend a Special Area class, the teacher records their behavior on this chart and returns it to the classroom teacher. This helps us all maintain high standards for our students' behavior in all areas of the school. Each Special Area teacher tracks the points earned by each homeroom class, and the classes work toward earning reward days. In Art, our reward days involve fun activities like playdough, painting with shaving cream, or drawing outside with sidewalk chalk! Occasionally students fail to follow the expected behaviors in the Art room. When that happens, students first receive a warning. I keep cards with a stop sign picture on them, and if a student is making a bad choice (such as talking when they're not supposed to, or mistreating supplies, or not following directions) I place a stop sign card on that student's desk. This is a visual reminder that they need to "stop what they are doing and make a better choice," as the card reads. Usually this is all it takes to get a student back on track! If the problem behavior continues, that student will lose the privilege of making Art for the remainder of the day, and will instead complete one of these "Better Choices Sheets." This form is designed to help a student think about what happened and realize why it was a problem, as well as give them a chance to explain what was going on and how the problem started. I have two versions of Better Choices Sheets- one for older students, and one for younger kids with pictures to circle instead of writing a sentence. The form has a place for me to describe to parents what happened, and asks the parent to sign the form and have their student return it to me the next day. Fortunately these Better Choices Sheets are not a common occurrence here in our Art room- students would much rather be participating in making Art!  Parents, if you ever have a question or concern about our routines or expectations in the Art room, please let me know! Second graders are finishing up an IB unit called "Kids.gov". This unit deals with leadership and how a leader's decisions impact the citizens and the community. The students learn about the responsibilities of leaders and the rights of citizens. In the Art room, we talked about how artists form a community of their own. People who love and appreciate Art have a responsibility to inform others about why Art is important in a society. We learned that this is called being an advocate for the Arts. To begin our lesson, I asked the kids to imagine what our world would be like if Art didn't exist. This video really brought that idea to life - Our students were amazed to realize just how much Art is present in everything we do. From the fashion designers who make our clothing, the architects who design our structures, the product designers who make machines and equipment, the interior designers who create the spaces we live in, the packaging designers and graphic artists who design the things we purchase, and even the media artists who create our entertainment, Art is EVERYWHERE!! I asked students to think of something that happens in their daily life. I asked them to illustrate that activity in two ways- one WITH the influence of Art, and one WITHOUT.     Students had the opportunity to share their ideas with their classmates.   While the first part of the lesson was designed to increase appreciation for the Arts, the second part was geared towards teaching advocacy. Now that students understood WHY Art is important, I wanted them to feel the responsibility for sharing that importance with others. This was the connection to the IB unit- as members of the art-making community, we have the responsibility to help others see why Art is needed in our society. This is advocacy! I shared with our students that there are children all over the country, and even in our own state, who don't get to go to Art class in their schools. Our kids were so sad to hear that! One second-grader even asked if it was because they didn't have art supplies- he volunteered to donate his extra crayons from home! (THIS is the kind of action we want to see in our students!!) I told them that in these situations, the leaders of the schools probably felt that it was important to put the school's money towards other things- likely reading and math. Students were thankful that we live in a part of the state where our leaders see the value of including the Arts in educating our kids! Our second activity was to make these mini-posters stating why Art is important. (These small artworks are actually called Artist Trading Cards, a new activity we are starting here at Hendrix. A separate post on these "ATCs" is coming soon!) Students were to design a card and then trade it with a friend. When trading the cards, they were to tell one reason they felt Art was important for kids. In having these conversations, students are being leaders in the Arts community and advocating for something they believe in!             Even the Art teacher made a card to trade!! If you're interested in more information about why advocating for the Arts in schools is a good thing, check out this video! Here's a link to one of my favorite articles encouraging Arts Education, and an infographic full of support for the Arts!  This week was "Open House" at Hendrix! I love when families get to visit our Art room. It's important to me that parents understand what their child will truly be learning in Art this year. Yes, we're going to make nice-looking artwork, but there's a lot of important learning happening! Making art involves a lot of science and math, and there are many opportunities to practice writing skills. We also learn to look closely at artwork and interpret the artist's message- which helps build skills used to analyze literature. In addition to all that, students also develop real-world skills like coming up with original ideas, collaborating successfully with others, and learning to persevere through challenges instead of giving up. This is why I think the Art room is one of the most special places in our whole school! Open House allows me to give parents a preview of some of the learning experiences their child will have in Art. I set out examples of some activities we've already completed this year, and have information ready about upcoming projects. I also let parents know the month that each grade level's Art Show will be occurring. And I make sure parents know how to find this blog!  Examples of finished projects for parents to see.     For parents who were unable to visit during Open House, here's a tour of our Art room!     This is the IB Connections board. Each grade level's current unit is displayed, including the central idea, lines of inquiry and key concepts. Having this information easily accessible helps me easily integrate the learning from the main classroom with the activities and projects in the Art room. It also helps students grasp how their learning is connected- how concepts from one subject area easily transfer to other areas.  Students in the art room continue to develop in the IB learner profile. These traits encourage life-long learning. Another art teacher generously shared these posters, which outline characteristics of an IB learner and how they relate to art-making.  Attitudes of an IB learner are similarly displayed.  This palette-shaped poster is a fun way to remember the attitudes and profile words!  Another aspect of an IB classroom is creating an Essential Agreement together. These expectations are ones that the students and teacher agree are necessary for a productive and pleasant classroom environment. An important part of an Essential Agreement is that all members of the classroom sign his or her name. By signing, each student enters into a contract and is agreeing to follow these expectations.  This is the display space at the front of our classroom. These posters contain information to help students make decisions about their artwork- when it is completed, how to take artwork from just "good enough" to amazing, and how to fix mistakes that occur in their work.  I need to further explain this cupcake poster. You may see your child come home with a cupcake sticker like the one pictured, and your child will explain that they won the "cupcake award" in Art. This cupcake is a symbol for incredible work that day in Art! The different types of cupcakes on this poster function as a rubric for students to check their level of success. When I explain it to students, I say that sometimes students turn in artwork that looks like the first cupcake- their work is not even finished, and they have made little to no effort. The next cupcake symbolizes work that is technically complete- all the necessary parts are there- but the artist was sloppy and did not do their best work. I explain that the third cupcake represents artwork that is "fine". The artist completed everything I asked them to do, but did nothing extra. The artwork may be good, but not great. It stops just short of being special. The last cupcake- we call it the "fancy cupcake"- symbolizes work that is extraordinary. It goes above and beyond expectations. Each week I choose one student in each class who truly gave their all to the day's activity and honor them with a cupcake sticker. I make sure every single student in our school receives the cupcake award at least once each year. It's awarded based on effort, not skill!  I often refer to these posters explaining the elements and principles of Art! We call these the building blocks of art-making. You can compare making art to cooking- the finished artwork is the food you eat. The elements are like the ingredients- line, shape, form, color, texture, and value. The principles are the recipe- the way you mix the ingredients together. Artists make decisions about balance, variety, emphasis, unity, proportion, pattern, and rhythm. Just like there are infinite possibilities in cooking, there are infinite possibilities for making art!  Did you know that approximately 6,500 works of art are created each year in this art room?! With that many pieces of paper being moved around, organization is a necessity! These tubs are labeled with each classroom teacher's name, and in-progress works of art are stored here from week to week.  Students have a good bit of choice and freedom in this art room. While each project has specific expectations, older students are often free to choose the medium (art-making material) that they wish to use. For example, some students prefer the spontaneity and adaptability of painting, while others are more comfortable with the precision and control of colored pencils. The materials on this shelf are available for students to access themselves- including crayons, markers, permanent markers, scissors, glue sticks, rulers, colored pencils, and paint. Students know how to go and get what they need, and they also know the expectations for how each material should be cared for and cleaned up. (They do have limited access to the paint- they can get it out themselves, but have to have permission from me first!)  Another way I offer choice to students is through this shelf of resources. The binders on the top are full of reference images. I sorted through my collection of magazines and calendars to find photos of all different types of objects that students may want to draw. It took weeks of organizing one summer, but now if a student says, "How do I draw a giraffe?" or "How do I draw a bridge?" I can tell them to go find a photo in the binder to use as inspiration! The books on the lower shelves are ones I have collected through the years. Some of them are artist biographies or collections of artwork, some are tutorials about different art-making techniques, some are non-fiction books about different countries and cultures. And some are storybooks! Students can also use these books as inspiration, or they can enjoy looking at them if they finish their work early.  Another option for students who finish early are the puzzles and games in these drawers. Most of them are designed to build spatial reasoning and pattern-matching skills, which are helpful in art-making.  Now I want to share some of the fun and unique things that make our Art room special! This is my wall of color words. My goal is to have the names of the colors displayed in the native languages of all of our Hendrix students. Most of the translations have been given to me by the families of my students, though I've had to do internet research for a few words. I've tried to be as accurate as possible! Currently the languages that are represented are Spanish, Vietnamese, Cambodian, German, Russian, Ukrainian, Armenian, Japanese, American Sign Language, Arabic, Hindi, Hmong, Thai, Braille, and Dutch. I would love to add more!   I've had fun collecting these brightly colored crayons- each of them is 12" tall, so they make a fun display!  I think this is the most special part of our Art room. This is my graduation wall... it showcases the graduation poster that our district publishes each year, and I've highlighted the names of each student I've taught- "my" kids. I keep a document listing the name and expected graduation year of every student I've taught- it's currently at 2,717 names, and I haven't yet added the students who are new to me this year!
This wall also displays the group photo of each Art Club group. This is the graduation year for my very first Art Club! They were my fourth graders in my first year teaching, and now they are graduating from high school! I am still in touch with a few of these students, and it's been so fun to watch them grow up! I try very hard to make our Art room a happy place where students feel comfortable and able to succeed. I hope I have accomplished that goal! To enhance their study of Native American culture, third grade artists got to make their own Native American paintbrushes this week! Long ago, people had to use whatever resources were available to meet their needs. They had to make the tools that were needed to get the job done. Paintbrushes were one of those tools! To start, we looked at modern-day paintbrushes and learned some terminology:  Students had already studied Tomie DePaola's book The Legend of the Indian Paintbrush. It tells the story of a young boy named Little Gopher and his journey to capture the beautiful colors of a sunset. The book describes how Little Gopher makes paintbrushes from animal hair and bone, and stretches buckskins for painting surfaces.   I asked students to create their own paintbrushes from natural materials like Little Gopher did in the story. Each brush needed to have a handle, bristles, and a ferrule- the part that attaches the bristles to the handle. I provided a few supplies- rubber bands and tape- but the method of construction was up to each student.       The next step was to actually try painting with these brushes! Each student used bright colors of paint to try to replicate Little Gopher's sunset painting.    We had just enough time left to do a little reflecting on these hand-crafted paintbrushes compared to modern-day brushes. Most students were thankful we live in a time where we can buy the things we need instead of having to make them!  "This was an awesome experience but I would rather be here because I could not live a day there. I love being creative but that's too much. It's easier being here. I love doing that kind of stuff but I'd rather do it here."  "In the old days people had to make paintbrushes. In the now days people buy paintbrushes from stores. I would buy a paintbrush. People don't make paintbrushes in the now days. They don't want to make paintbrushes. "  "It was so cool to build a paintbrush by myself. I am very glad I had the materials to build it. It was a fun experience, though I am glad I live in the time I am in." To further compare paintbrush-crafting methods of then and now, we finished up with this "How It's Made" clip of a modern-day paintbrush factory! Last year's group of third graders had a similar experience with making paintbrushes- click here to see examples! Kindergarten students have been learning about patterns in art. We learned that patterns are made from repeating shapes, and that they are often found in nature but can be man-made too. To start off this unit, we looked at the book Spotty, Stripy, Swirly: What Are Patterns?      Students' next task was to find images of patterns in magazines. I told them they were going on a "pattern hunt" to cut out as many examples of patterns as they could find. This was our first time using scissors this year, so it was a chance for me to assess each students' experience with cutting and to encourage proper grip of the scissors.      The next day of the lesson involved students recreating a pattern out of paper. Students chose a black-and-white version of a simple pattern and then had to cut out those shapes and arrange them on a background. Each student had to interpret their pattern for themselves instead of copying an example, so this was a pretty challenging project. It was a lot to expect of kindergarten students after only a few weeks of school! I was so pleased and surprised with how well most students accomplished the task!            One of my goals this year is to be more intentional about critiquing artwork with my students- analyzing artwork for its successes and identifying areas that could be improved. We often share our work with each other in class, but it often stops there- with just sharing. A true critique needs participation from the viewer, and is a much deeper and purposeful way of looking at art. A well-done critique benefits both the artist and the viewer. First we talked about WHY we critique artwork in the first place. I shared this video- the story of Austin's butterfly and how the critique process shaped his success. It's a GREAT example of having a growth mindset. It's only a few minutes long- it's really worth watching! Today's activity was a small step in the right direction. I introduced a critique method called "Two Stars and a Wish." The viewer makes two positive comments about something he finds successful about the work (these are the "stars") and then one suggestion for improvement (a "wish" to see something changed.)  Instead of critiquing classmates' artwork, I decided to have students critique works by master artists. One reason is that I want to show students that no matter how "good" a work is, there is always something that could be questioned. Chances are good that the artist made that decision on purpose and considers it successful, but the viewer has the right to have a different opinion. For example- one of the works we looked at as a class was one of Picasso's cubist portraits- where the eyes are both on the same side and the nose is off to the other side. One of the "wish" comments was "I wish he hadn't made the eyes crooked." I explained to students that even though Picasso structured the face that way intentionally, and that painting in that style made him famous, that we as the viewers are allowed to not like it. I wanted students to realize that liking or not liking a work of art is a choice each of us makes- our opinions aren't right or wrong. The second reason we began with critiques of master works rather than students' own works is that it's much less intimidating for them! If they can learn to make honest and thoughtful comments about a work they don't have an emotional connection to, then I'm hoping it will make it easier to share truthful opinions about friends' artworks and to hear comments about their own works. Students chose an artwork, wrote 2 stars and a wish, then shared their comments with a partner.    "I like the big 5. I like the details of the picture. I wish the picture had more color."  "I like how the leaves have designs. I like how the red leaf is crooked. I wish it had more color."  "The skull looks realistic. The skull is broken. (I wish) the background was changed to the sky."  "They put good details. They did good work. I wish they had put more color in the faces."  "I love that she put that fan there. I love the necklace that she has on her neck. I wish I knew her."  "The flowers are colorful. The door is colorful. The sunset is colorful. I wish it wasn't creepy."  "I like how he is smoothing it out. (the hat) I like how he drew the moon. I like how he looks at himself. I wish he didn't put a freckle."  "I like the girl's hair.
The mom's dress is so pretty. I wish the dress were pink." This activity is loosely tied to 1st grade's current focus on communities. Students are learning that in order for a community to function, its members must work together. Everyone must do their part, and people must be willing to share the responsibilities! And that is what I asked our kids to do with this project- they had to function as a team, kind of like a mini-community, in order to accomplish a task. They had to share their ideas, listen to others, and make compromises in order to meet their goal of creating a collaborative piece of art. Each team had a bucket containing the same supplies- pipe cleaners, popsicle sticks, newspaper, aluminum foil, and clear tape. They could make ANYTHING they could dream up- but, everyone in the team had to be on board with the idea and everyone had to participate equally.  For the first half of our class time, I had them work without any assistance or guidance from me. I wanted students to experience the inevitable problems, and to have to find solutions independently- I think this is one of the most important skills students can learn from making art.   After about 20 minutes of work, I had students leave their in-progress creations and gather back as a group to discuss the process so far. I asked them to share what problems their teams had encountered and what they had done to get back on track. One team shared that they had run out of tape, but they figured out how to wire pieces together with the pipe cleaners instead. Another team had a disagreement on what to make- one member wanted a princess while another member wanted animals for a zoo- I'll share their creative solution later! With some guidance, students have been able to verbalize how working on this group project was kind of like being part of a community- that you had to help each other and make sure everyone had what they needed. That was my goal for the lesson! After the discussions, teams had a few more minutes to finish their projects. We ended the lesson with an opportunity for each team to share what they made! Here are some of their very interesting creations--  A sled with two people wearing coats and scarves.  A mama snake with her egg in a nest.  I love this one!! It's a lightbulb- see the swirly yellow to show that it's glowing? And the silver ball at the bottom is the chain that you pull to turn the light on and off!  This is a monster- see the eyes made from tape dispensers? The black pipe cleaners are laser beams shooting from the eyes!  This is the beginnings of a city scene- can you see the red stoplight? And the car in the parking lot?  This was the solution to the princess-or-zoo question... In this scene, Rapunzel is being chased up her tower by a gorilla! But the prince is on his way to rescue her!! What a good compromise!  This is a solar eclipse! The shape on the right is the sun- see how the popsicle sticks make rays of sunlight? And the orange pipe cleaners are the sun glowing around the shadow. And the creation on the left is a pair of eclipse glasses!! I LOVED watching our kids work through this project- we'll definitely be doing this again!
This project for third graders was inspired by the book Looking Down by Steve Jenkins. It is a wordless picture book representing a view of the world from above. The first page shows Earth from very far away- it's just a tiny dot! Then we move closer and see the texture of the moon, then closer to see shapes of the continents. Then roads and cities appear along with bodies of water like rivers and streams. Each turn of the page brings the viewer in even closer. Eventually we see a young boy on the sidewalk in front of his house. The next page shows a magnifying glass in his hand. The final page is a detailed view of the ladybug he's studying so closely. Each illustration is created with beautifully textured collage artwork.       I chose this book to share with students because they are finishing up a unit on landforms- rivers, streams, islands, peninsulas, mountains, plateaus, and more. I asked the kids to list them all for me and they went on and on! I wanted them to understand how these landforms are represented on a map, and that we look at them from an aerial perspective- as if we're looking down from outer space. Each student (or pair of students) chose an image I printed out from Google Earth. They used collage techniques, similar to those in the book, to recreate the landforms in the image. Their goal was to represent the shapes and textures as accurately as possible.              This was a one-day version of a similar project we did last year- the previous version involved painting and took about five class periods to complete. We just didn't have that much time this year! In our next art session, I'm planning to show students these artworks by sculptor Laura Moriarty. Her work connects really well to students' current learning about how the mountains and valleys of the earth are formed. We didn't have enough time this week, so I'll be sure to squeeze it in next time! Moriarty's wax sculptures are inspired by the folding and buckling and layering of the earth's surface. They are gorgeous!!   Here's a video of the artist at work- the way she folds and layers the wax is designed to mimic the way the earth folds in on itself to create layers of rock. |
Archives
March 2018
Categories
All
|
 RSS Feed
