 Our first grade students are preparing for their upcoming Fine Arts Night, which will feature a musical production called "American Symbols on Parade" in addition to their Art Show. Their musical will present songs about the bald eagle, Statue of Liberty, and our Flag, along with other special symbols of our country. To go along with the theme, students created a painting of a rose- our national flower! I led each student through a guided drawing to show them each step of drawing the rose. They did an incredible job following along! I love to see that each rose drawing is still individual and unique, even though they followed the same instructions.    After the pencil drawings were complete, the next step was to trace the lines with permanent marker.   Next I asked the kids to try some basic shading with colored pencils. We talked about how the petals would be darker in the spots where the light doesn't reach. This shading was really challenging for first grade kids, but I think it made a big difference in making these roses look realistic. Some students really had a good grasp of the concept!    Then students painted their roses with liquid watercolor paint.    To create the background, students made their own leaf stamp out of styrofoam. They used this stamp to fill their paper with overlapping leaves.    The final step was to cut out some leaf shapes and add details to make the leaves look real. Then we assembled all the parts of the rose into a finished artwork!  Students explored a lot of skills through this rose project:
All of these skills worked together to create these incredible flowers! I know they will be a success at our Art Show, and I can't wait to see them on display! 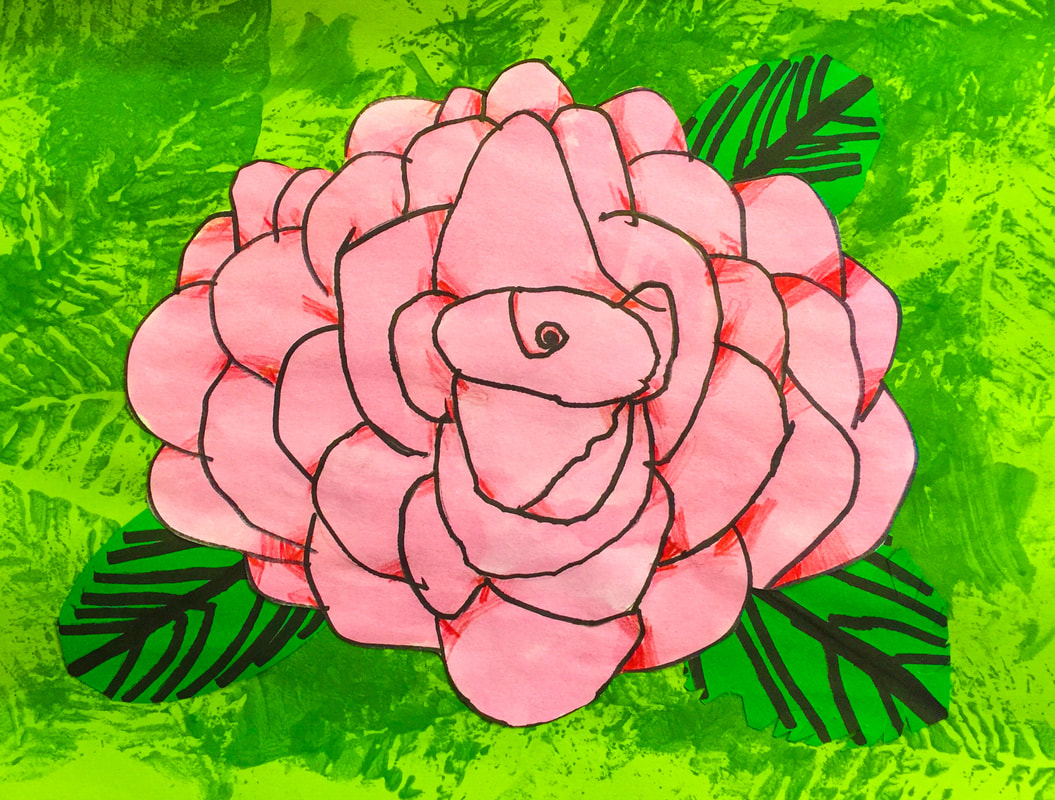   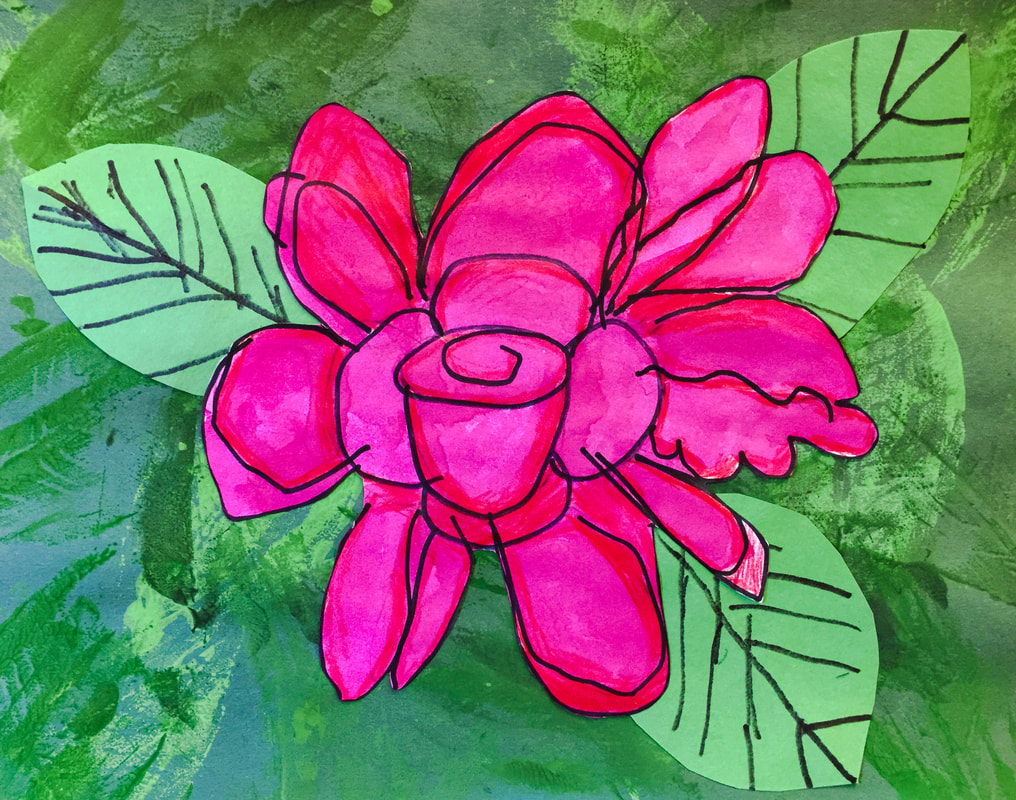           
0 Comments
This was actually one of the first projects I did with Art Club back in the fall, but I never posted about it on this blog. They learned so much from this project, and it's definitely one I'll do again!  The objective behind this lesson was to introduce my kids to the grid drawing method. This technique is one students wouldn't typically experience until middle school, but this group of artists was ready for it. The grid method is simply a way to enlarge shapes into a bigger version while using grid lines as a point of reference. Each student had a small card that had been gridded into 1" squares, and they arranged a selection of candy on the card. They drew the candy onto a much larger piece of paper that had similar gridded markings. By making the larger squares match the smaller squares, the students created an enlarged version of their candy still life. This method was a completely new technique for my students, so we started with these worksheets to help them grasp the concept of taking one square at a time, enlarging it, and making it match up with the next square.   Applying these skills to a real-life drawing was a very challenging task! I am so incredibly proud of how their drawings turned out. This experience really helped my kids learn to "see" like artists, and learn how to visually analyze a still life and recreate it accurately. This task really helped prepare them for the drawing challenges they would see later in the year!   Here are a few of the finished drawings. Remember, these are from the beginning of the school year. I wish we had time to do this project again now- it would be a great way to show their growth as artists. I know they could do even more amazing work now!        These beautifully painted flower vases were inspired by contemporary artist Heather Galler. Her use of color and pattern is so playful and bright. Her work takes an ordinary subject and turns it into something really special! As one of my kids said, "She made us look at these flowers in a whole new way!" This was our inspiration-  Visit Ms. Galler at this website to see more. Prints of her artwork are available- I just purchased a couple for our art room! Our goal in creating these paintings was to explore pattern. We started by creating the background with construction paper and liquid tempera paint. Students could create any design they wanted! I encouraged them to pay attention to their color choices- did they want their patterns to stand out or blend in?    Our next step was to create the flowers. We did these on squares of construction paper, which were then cut out and glued to the background.     Then we added leaves, and some students chose to embellish their work even more using oil pastels. The finishing touch was to outline the shapes with a line of black paint, just to help everything stand out more. I am THRILLED with how these paintings turned out! Every single day I am amazed by what our kids can accomplish- it makes my time with them so worthwhile!           Art Club continued developing their basic drawing skills through sketching these geometric forms. Each student arranged their own variety of forms and then drew them as accurately as possible. I encouraged them to pay attention to lines and angles as well as where the shapes touched.  Here is an example of a student's view. After sketching the forms, students then had to add value to their drawings to show the shadows and highlights. Finally, they made a second drawing, this time in color. The students did a beautiful job, and I continue to be amazed by their growth as artists!         I was so thrilled with the work Art Club students did on last week's paper curl drawings, and this week I wanted to challenge them with something even more advanced. This activity builds on the work with value and shading that we've done all year. Instead of shading a simple form though, the students had to observe and replicate the shading of folds of cloth. For most students, this was their first time experimenting with charcoal, which is an added challenge. This is really a high-school level drawing activity! In fact, I even had to do a project on drawing cloth when I was getting my art degree in college! So the fact that fourth grade students could begin to have success with this is very impressive. They still have lots of room to grow, but I am very proud of their beginning attempts.         I love challenging my Art Club members with observational drawing projects. It fascinates me that these students are only 9 and 10 years old, yet some of them have better understanding of space and form than many adults! The task that I gave them this week was very difficult, yet they EXCELLED. We looked at the artwork of contemporary artist L.C. Neill. She has a series of paintings featuring ribbons with very dramatic lighting.  Here's an example- "Silver and Copper" by LC Neill. We made our own version by curling strips of paper and then observing the light and shadows. I am SO PROUD of the results!         Fourth grade students made these drawings of fruits and vegetables to practice their observational drawing skills. They were challenged to use shading, texture, and color blending to make their drawings look as accurate as possible. We used artificial food as our models. Their drawings are amazing!!  |
Archives
March 2018
Categories
All
|
 RSS Feed
