|
The weather lately has been beautiful and spring-like! It has made it seem like winter is really over, even though the forecast calls for cold weather again soon. But to celebrate the nearness of Spring, and to tie in with Black History Month during February, we made paintings inspired by artist Alma Woodsey Thomas.  Alma Thomas got her inspiration from the natural world. She was born in Georgia, but spent most of her life in Washington, D.C., where she worked as an art teacher. She missed the green grass, sunshine, and trees, but could look out the window of her apartment and enjoy the garden planted below. The natural world was the inspiration for most of her paintings. Her painting style was unique. She built shape and form out of small dabs of paint, almost like puzzle pieces that fit together to make the image. Her works are abstract- meaning they don't look realistic. It's sometimes hard to tell what the painting is supposed to represent, but her descriptive titles help the viewer interpret her paintings. Here are some of Alma Woodsey Thomas's paintings, along with what inspired them-        For our own art-making, I asked students to think of something in nature that inspires them- something they feel strongly about and can remember in detail. It could be a happy spring day with birds singing, or the way the air smells after the rain, or maybe a scary, loud, thunderstorm! I gave them lots of ideas, but wanted them to choose for themselves. Their task was to represent their idea using only dots and dabs of color. We used oil pastels first, then painted over it with tempera cake paint. They did a great job!     
0 Comments
My younger students spent last week practicing drawing geometric forms. It teaches them to draw from observation- to notice the length of lines and the overlapping of shapes. It teaches them to draw what they actually see. We started by drawing cubes. It was interesting that in almost every class, a student told me, "But we already know how to draw cubes!" They meant this type of drawing:  I explained to them that this was a "math-style" cube. You draw it the same way, every time, without having to look at an actual cube. You are drawing it based on information from your BRAIN, rather than from your EYES. I asked each student to pick up one of the foam cubes and hold it in front of them at eye-level. Then we lifted them higher, and lower, and twisted them to the left and to the right. We observed how the lines and angles and shapes changed depending on how we looked at the cube. To start the drawing practice, I had students draw just the cubes to begin with. I set a timer for five minutes and asked them to draw the cube over and over until the timer stopped. It was not a race or a contest to see how many they could draw- instead, I wanted them to focus on drawing it more realistically and accurately each time. At the end, I asked the students to look back at their first cube and compare it to their last- most of them agreed, the more they drew it, the better they got!  a second grade example  a first grade example  a kindergarten example Next, students chose a variety of shapes and arranged them into an interesting composition. At the beginning of the week, I let each student pick from the whole tub of shapes, but as the week went on I made bags of shapes to save time, and just let them pick the color. 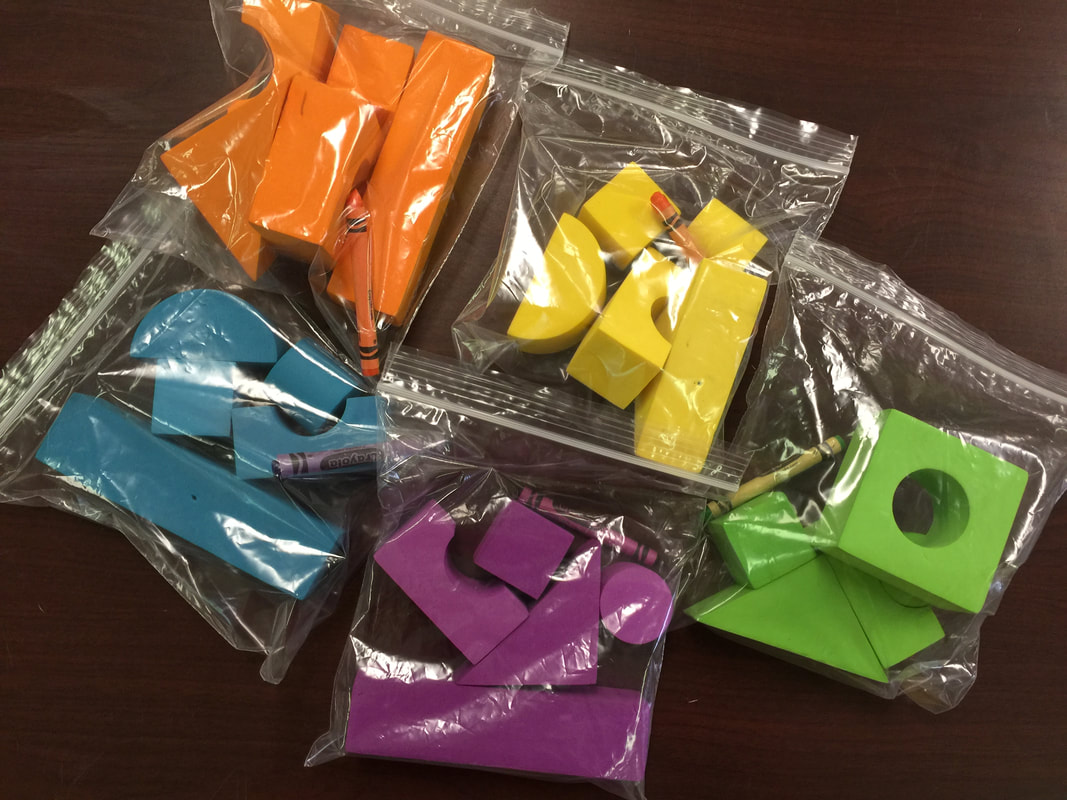  This drawing task was a challenge for kids- some of their brains were just not quite ready to grasp transferring a three-dimensional shape into a flat drawing. But some of them really got it! It was interesting to see the varying ability levels in each grade level. Some of the kindergarten students were more successful than some of the second graders! It just depends on how ready their brains were. But, it was a good exercise for all students. It helps them begin to look at objects like an artist. I tell them all the time, "You use your brain to make art just as much as you use your hands!" I worked very hard to keep it from being a frustrating lesson for the students who weren't quite ready. I made sure they each knew that I just wanted them to TRY this drawing, and that it was just practice and we wouldn't be hanging them up in the hallway.  second grade  first grade  first grade  kindergarten 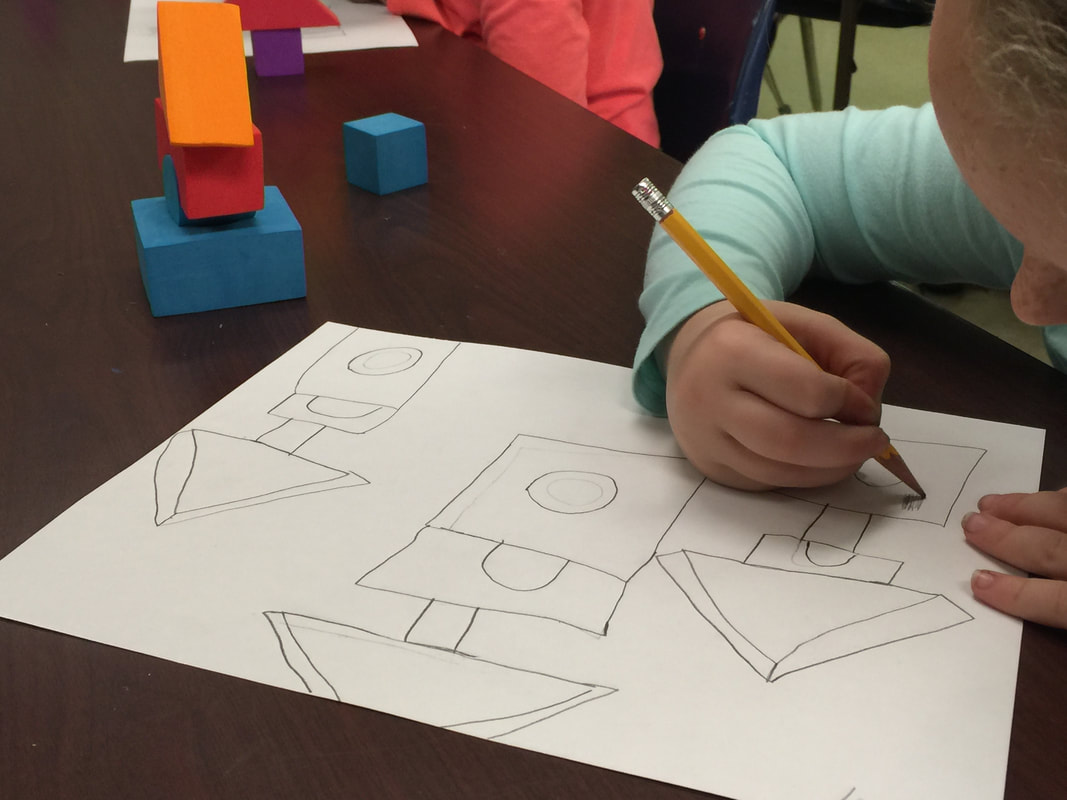 second grade  first grade  first grade  second grade The next step was to introduce kids to the concept of shading- showing the darks and lights, the highlights and shadows. Again, some kids were not quite ready to grasp this, but some did great!  first grade  kindergarten  first grade  kindergarten  second grade I am interested to see if this drawing practice makes a difference in the observational drawings we'll do in the future!
To support their current IB unit, first grade artists got to design their own money! First we looked at the design on our American money. We looked at the symbols and what they each represented, and talked about the important and respected leaders that are pictured. We watched this video explaining how money is made: Next we looked at some money from other places. We compared the symbols pictured on their money to the images represented on ours. Some of the money had buildings on it, some had people, and some had animals! We decided that when a country chooses what designs to put on their money, they are communicating what they think is important and what they consider valuable. 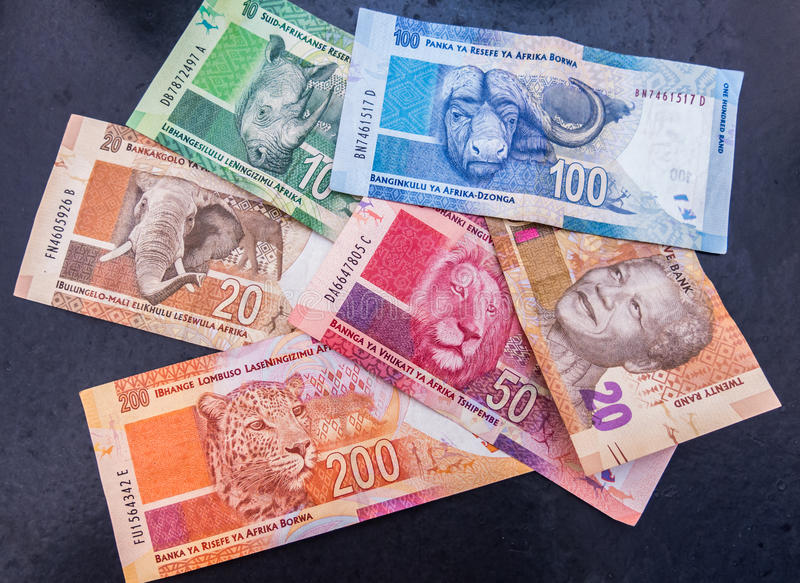 South Africa's money  Australia's money  Indonesia's money  Malaysia's money  Papua New Guinea's money Next, students designed their own money! They could use a place that really existed, or they could make up their own land. The example I drew for them was for South Carolina money, and the symbols I chose were a palmetto tree, peaches, the beach, and the mountains. Students loved coming up with their own ideas! Here are just a few examples:     This is one of my favorite projects for when I need a quick, one-day lesson, yet something that all students can be successful with. These are abstract designs using the letters of the students' names! To begin, students write the letters of their names in all different directions. I tell students to write a letter, then rotate their paper. Then write another letter, and rotate the paper again, continuing until their name is complete. The trick is to arrange the letters so they connect and form enclosed spaces. Often the student will need to write their name more than once, or write their middle or last name, to have enough letters to fill the space.   Students then color each enclosed space. I have taught this project using a variety of art materials, but the most successful has been oil pastels. The way the colors blend and create texture is a nice touch. Sometimes I have students choose a specific color scheme, but this time they just chose as many colors as they wished. It's nice to have students trace their lines with a black oil pastel to make them look more polished.     These designs are still a work in progress... we ran out of time and didn't get finished! We saved them to complete another day. I like to use this fun book as a closure activity for this lesson- the Turn Around, Upside-Down Alphabet Book!  To complement first grade's learning about our solar system, we made these beautiful interpretations of Vincent Van Gogh's Starry Night! One of my favorite tools to use with students is this interactive viewer. It has a function that lets you "zoom in" on paintings, and we used it to look very closely at Starry Night. We were looking for the swirly brushstrokes Van Gogh used to create the texture in his night sky. It's amazing how up-close we can get!!     I have actually seen the real Starry Night, when it was at the High Museum in Atlanta several years ago, and you certainly can't get this close to it in real life! To begin our own versions of the painting, students tried to mimic Van Gogh's swirling marks. We mixed and blended many shades of blue and white.    Next, we created the ground. We cut black construction paper and used crayon to make colorful marks that looked like the choppy textured brushstrokes Van Gogh used.  The next step really made these paintings come to life- we added the stars! We carefully observed how Van Gogh created rings around his stars using dashed lines to form concentric circles, like this:  This was my favorite part of the painting process- and the students' favorite, too! These skies are so beautiful!      For a finishing touch, we used colored paper to create a village below the starry sky.    Here are the finished landscapes!      As Van Gogh once said, "Looking at the stars always makes me dream..." To end the lesson on a fun note, we enjoyed these Starry-Night themed videos!  Our first grade students are preparing for their upcoming Fine Arts Night, which will feature a musical production called "American Symbols on Parade" in addition to their Art Show. Their musical will present songs about the bald eagle, Statue of Liberty, and our Flag, along with other special symbols of our country. To go along with the theme, students created a painting of a rose- our national flower! I led each student through a guided drawing to show them each step of drawing the rose. They did an incredible job following along! I love to see that each rose drawing is still individual and unique, even though they followed the same instructions.    After the pencil drawings were complete, the next step was to trace the lines with permanent marker.   Next I asked the kids to try some basic shading with colored pencils. We talked about how the petals would be darker in the spots where the light doesn't reach. This shading was really challenging for first grade kids, but I think it made a big difference in making these roses look realistic. Some students really had a good grasp of the concept!    Then students painted their roses with liquid watercolor paint.    To create the background, students made their own leaf stamp out of styrofoam. They used this stamp to fill their paper with overlapping leaves.    The final step was to cut out some leaf shapes and add details to make the leaves look real. Then we assembled all the parts of the rose into a finished artwork!  Students explored a lot of skills through this rose project:
All of these skills worked together to create these incredible flowers! I know they will be a success at our Art Show, and I can't wait to see them on display! 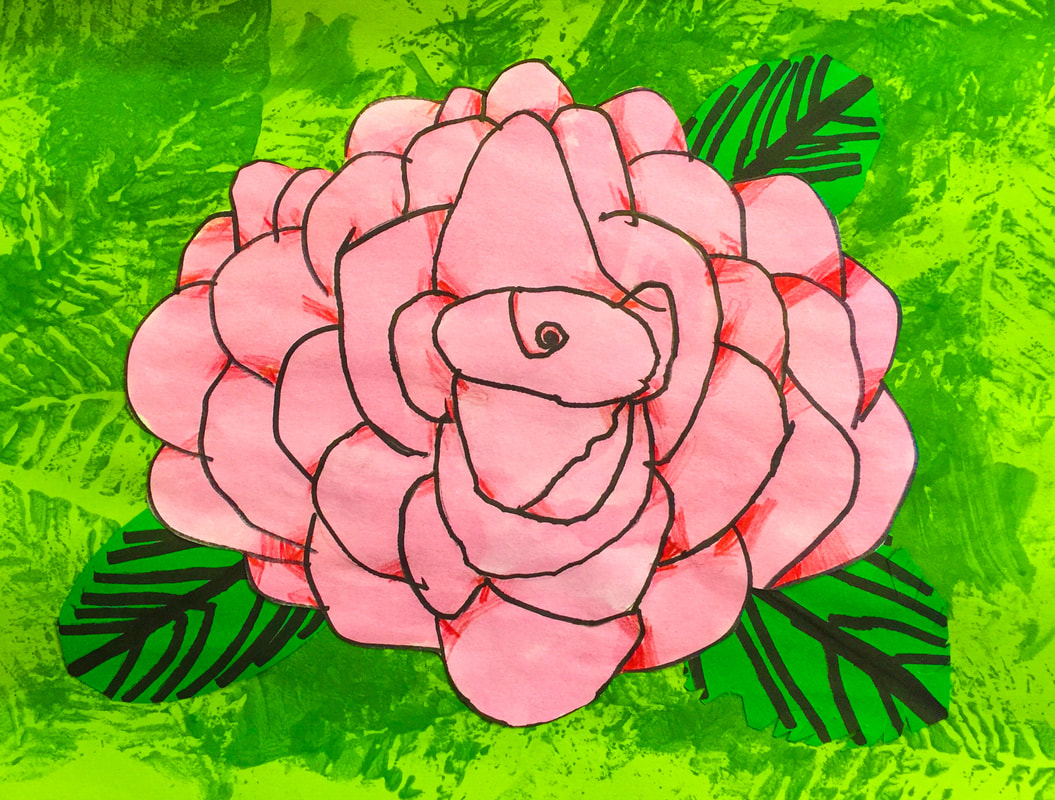   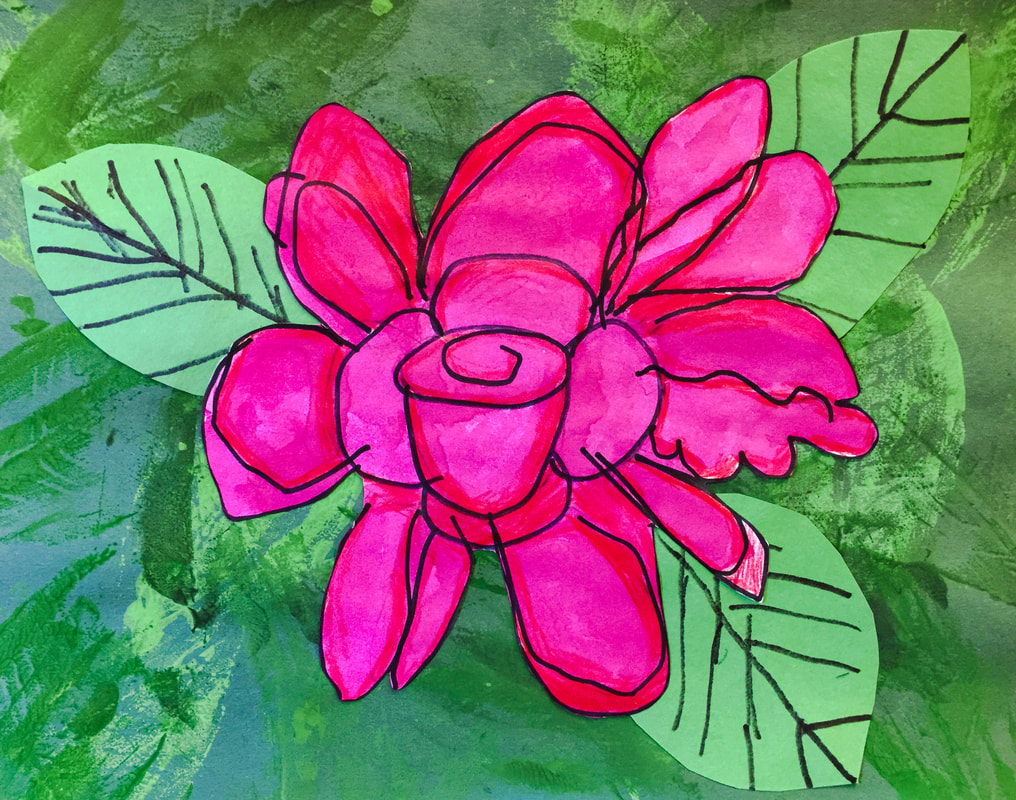             This year Hendrix participated in International Dot Day 2017. On this day each year, artists all over the world celebrate the creativity and inspiration found in Peter H. Reynolds' book The Dot.  The Dot is the story of a young artist named Vashti who thinks she can't draw. Her teacher tries to help her by saying "Just make a mark and see where it takes you!" Vashti angrily jabs her pencil into her paper, leaving a black dot behind. The next time Vashti comes to Art, she sees her black dot hanging on the wall! She says to herself "Hmmph. I can make a better dot than that!" And she does! Her teacher's encouragement and support was all Vashti needed to be successful. By the end of the story, Vashti has taken on the role of teacher, and the book ends with her helping a little boy learn to "make his mark!" The book has inspired artists all over the world, and each year in September, International Dot Day is celebrated! This year over 10 million artists in over 170 countries were part of the celebration- and our Hendrix artists were included in that number!  Hendrix artists celebrated by making their own dot-inspired artworks. These paintings will be on display at our school during the month of September. I am looking forward to this being a new tradition for our school!              After we finished our paintings, students loved hearing this message of inspiration from The Dot author Peter H. Reynolds! It was almost like getting to meet him ourselves! We are already excited to celebrate International Dot Day 2018!  I wanted to take a minute to explain the behavior expectations for when your children are in the Art room. I always express to students that the Art room is a shared space, and about 700 students use it each week. This means we have to make good use of the limited time we have together and make each class period as productive as possible, as well as take good care of our materials and equipment so everything will be ready for the next group of kids! Each classroom in our school begins the year by developing a list of expectations called an "Essential Agreement." This is IB terminology for behaviors each member of our class agrees are necessary for a functional and pleasant place to learn. I ask each student to sign their name to our Art Room Essential Agreement. This signature creates a contract between each student and the other members of the class. I explain to the students that it's like making a promise. When misbehaviors occur, I can remind each student of the promise he or she made to follow our expectations.  In each class session, I select one student to honor for doing a particularly good job. Their reward is a cupcake sticker. Let me explain what cupcakes have to do with making art! It's all based on this rubric:  I explain to students that making Art is like decorating cupcakes. Sometimes students turn in work that is like the first cupcake on this poster- it's not even finished. The next category is what we call the "sloppy cupcake". The student made minimal effort and did not take pride in their work. I describe the third cupcake as being "fine". It's finished, all the requirements have been met, but it's nothing special. This represents artwork that's good, but not great. The final category on the rubric is our "fancy cupcake." THIS represents the kind of work I'm looking for- work that goes above and beyond expectations! This quality of work is what I reward with a matching cupcake sticker. So if you see your child bring home a sticker like this, understand that it represents a job very well done! It's important that children understand that this reward is NOT based on talent or skill, it's earned through EFFORT. All students, even those who struggle with Art and may not have a lot of natural talent, will earn a cupcake sticker at least once each year. I make sure that every student in the class is honored one time before any student earns a second sticker. As you may know, Hendrix participates in the Positive Behavioral Interventions and Supports program. The "PBIS" philosophy encourages good choices in our students. PBIS supports the use of a common language between all areas of a school. That common language is evident in what we call our "PACK expectations". We ask students to be "Part of the PACK" here at school. PACK is an acronym for being principled, appreciative, cooperative, and knowledgeable. Each area of our school has a system of expectations using this vocabulary. Our PACK expectations for Special Area classes are described in this chart:  Each time students attend a Special Area class, the teacher records their behavior on this chart and returns it to the classroom teacher. This helps us all maintain high standards for our students' behavior in all areas of the school. Each Special Area teacher tracks the points earned by each homeroom class, and the classes work toward earning reward days. In Art, our reward days involve fun activities like playdough, painting with shaving cream, or drawing outside with sidewalk chalk! Occasionally students fail to follow the expected behaviors in the Art room. When that happens, students first receive a warning. I keep cards with a stop sign picture on them, and if a student is making a bad choice (such as talking when they're not supposed to, or mistreating supplies, or not following directions) I place a stop sign card on that student's desk. This is a visual reminder that they need to "stop what they are doing and make a better choice," as the card reads. Usually this is all it takes to get a student back on track! If the problem behavior continues, that student will lose the privilege of making Art for the remainder of the day, and will instead complete one of these "Better Choices Sheets." This form is designed to help a student think about what happened and realize why it was a problem, as well as give them a chance to explain what was going on and how the problem started. I have two versions of Better Choices Sheets- one for older students, and one for younger kids with pictures to circle instead of writing a sentence. The form has a place for me to describe to parents what happened, and asks the parent to sign the form and have their student return it to me the next day. Fortunately these Better Choices Sheets are not a common occurrence here in our Art room- students would much rather be participating in making Art!  Parents, if you ever have a question or concern about our routines or expectations in the Art room, please let me know! This activity is loosely tied to 1st grade's current focus on communities. Students are learning that in order for a community to function, its members must work together. Everyone must do their part, and people must be willing to share the responsibilities! And that is what I asked our kids to do with this project- they had to function as a team, kind of like a mini-community, in order to accomplish a task. They had to share their ideas, listen to others, and make compromises in order to meet their goal of creating a collaborative piece of art. Each team had a bucket containing the same supplies- pipe cleaners, popsicle sticks, newspaper, aluminum foil, and clear tape. They could make ANYTHING they could dream up- but, everyone in the team had to be on board with the idea and everyone had to participate equally.  For the first half of our class time, I had them work without any assistance or guidance from me. I wanted students to experience the inevitable problems, and to have to find solutions independently- I think this is one of the most important skills students can learn from making art.   After about 20 minutes of work, I had students leave their in-progress creations and gather back as a group to discuss the process so far. I asked them to share what problems their teams had encountered and what they had done to get back on track. One team shared that they had run out of tape, but they figured out how to wire pieces together with the pipe cleaners instead. Another team had a disagreement on what to make- one member wanted a princess while another member wanted animals for a zoo- I'll share their creative solution later! With some guidance, students have been able to verbalize how working on this group project was kind of like being part of a community- that you had to help each other and make sure everyone had what they needed. That was my goal for the lesson! After the discussions, teams had a few more minutes to finish their projects. We ended the lesson with an opportunity for each team to share what they made! Here are some of their very interesting creations--  A sled with two people wearing coats and scarves.  A mama snake with her egg in a nest.  I love this one!! It's a lightbulb- see the swirly yellow to show that it's glowing? And the silver ball at the bottom is the chain that you pull to turn the light on and off!  This is a monster- see the eyes made from tape dispensers? The black pipe cleaners are laser beams shooting from the eyes!  This is the beginnings of a city scene- can you see the red stoplight? And the car in the parking lot?  This was the solution to the princess-or-zoo question... In this scene, Rapunzel is being chased up her tower by a gorilla! But the prince is on his way to rescue her!! What a good compromise!  This is a solar eclipse! The shape on the right is the sun- see how the popsicle sticks make rays of sunlight? And the orange pipe cleaners are the sun glowing around the shadow. And the creation on the left is a pair of eclipse glasses!! I LOVED watching our kids work through this project- we'll definitely be doing this again!
Our schedule has changed a great deal this year. It's been quite an adjustment for both the teachers and the students, but things are settling into place well. We are now using a rotation schedule, and we have A-week, B-week, and C-week. One benefit of the new schedule is that students in 1st-4th grades will have hour-long sessions for Art this year, increased from the 45-minute classes we had in the past. Kindergartners will have half-hour sessions, but will come to Art twice as often. It works out that in each three-week cycle of the rotation, all students will have 2 1/2 hours of Art! Each Friday, all art classes will last only 30 minutes, and each classroom will have one Friday session in each three-week cycle. Since our "Friday Sessions" are so short, we'll use these days for skill-builder exercises, rather than continuing our regular art projects. I'm excited to get to try some new activities with students! This session's activity was based on a new book I discovered over the summer, called "Swatch: the Girl Who Loved Color." Here's a preview video from the publisher- "Swatch" is an imaginative little girl who sees colors as wild, free, creatures. She tries to tame the colors and trap them in jars. She soon realizes that the colors aren't meant to be tamed, and instead should remain free. She releases the colors and they swirl together, making a masterpiece.  Swatch describes her favorite colors with wonderful figurative language. She gives colors names like "rumble-tumble pink", "bravest green", and "in-between gray." After we read the book, students were asked to name their own color and write a description of it.                This artist even drew his own interpretation of Swatch, riding the colors through the sky!  And this artist drew herself as Swatch, complete with stripes of face paint like the character in the book! At the end of the lesson, students shared their color creations with each other.  |
Archives
March 2018
Categories
All
|
 RSS Feed
