|
My younger students spent last week practicing drawing geometric forms. It teaches them to draw from observation- to notice the length of lines and the overlapping of shapes. It teaches them to draw what they actually see. We started by drawing cubes. It was interesting that in almost every class, a student told me, "But we already know how to draw cubes!" They meant this type of drawing:  I explained to them that this was a "math-style" cube. You draw it the same way, every time, without having to look at an actual cube. You are drawing it based on information from your BRAIN, rather than from your EYES. I asked each student to pick up one of the foam cubes and hold it in front of them at eye-level. Then we lifted them higher, and lower, and twisted them to the left and to the right. We observed how the lines and angles and shapes changed depending on how we looked at the cube. To start the drawing practice, I had students draw just the cubes to begin with. I set a timer for five minutes and asked them to draw the cube over and over until the timer stopped. It was not a race or a contest to see how many they could draw- instead, I wanted them to focus on drawing it more realistically and accurately each time. At the end, I asked the students to look back at their first cube and compare it to their last- most of them agreed, the more they drew it, the better they got!  a second grade example  a first grade example  a kindergarten example Next, students chose a variety of shapes and arranged them into an interesting composition. At the beginning of the week, I let each student pick from the whole tub of shapes, but as the week went on I made bags of shapes to save time, and just let them pick the color. 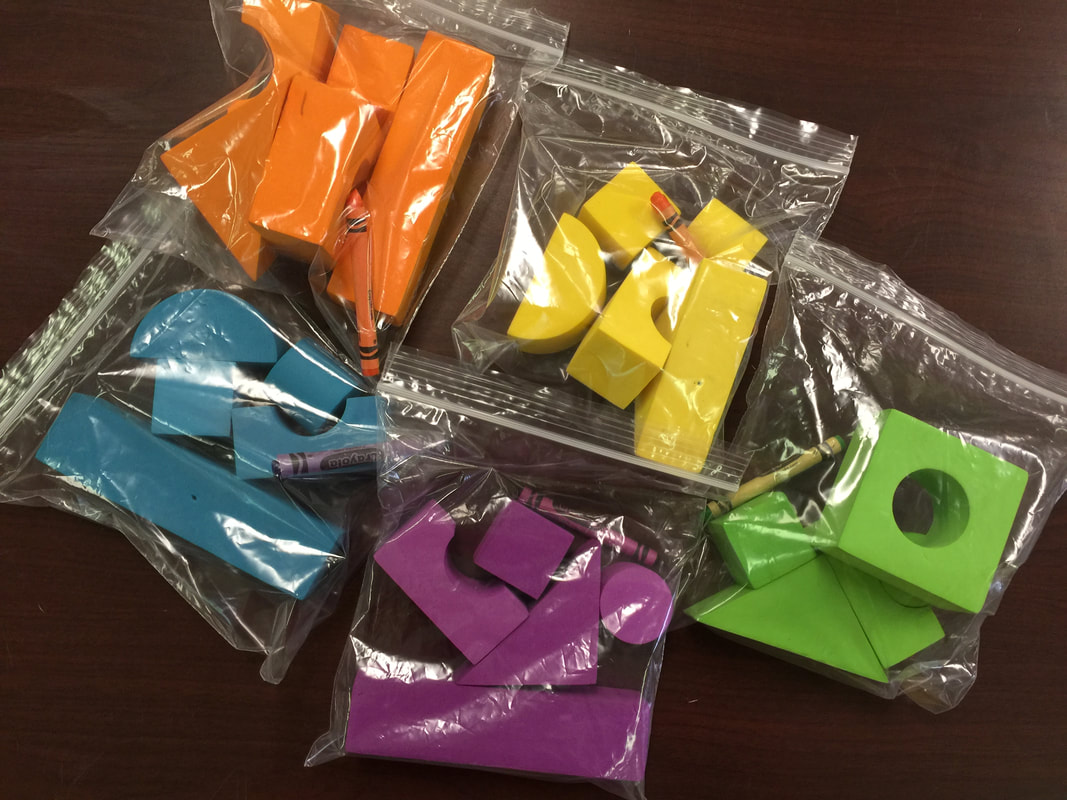  This drawing task was a challenge for kids- some of their brains were just not quite ready to grasp transferring a three-dimensional shape into a flat drawing. But some of them really got it! It was interesting to see the varying ability levels in each grade level. Some of the kindergarten students were more successful than some of the second graders! It just depends on how ready their brains were. But, it was a good exercise for all students. It helps them begin to look at objects like an artist. I tell them all the time, "You use your brain to make art just as much as you use your hands!" I worked very hard to keep it from being a frustrating lesson for the students who weren't quite ready. I made sure they each knew that I just wanted them to TRY this drawing, and that it was just practice and we wouldn't be hanging them up in the hallway.  second grade  first grade  first grade  kindergarten 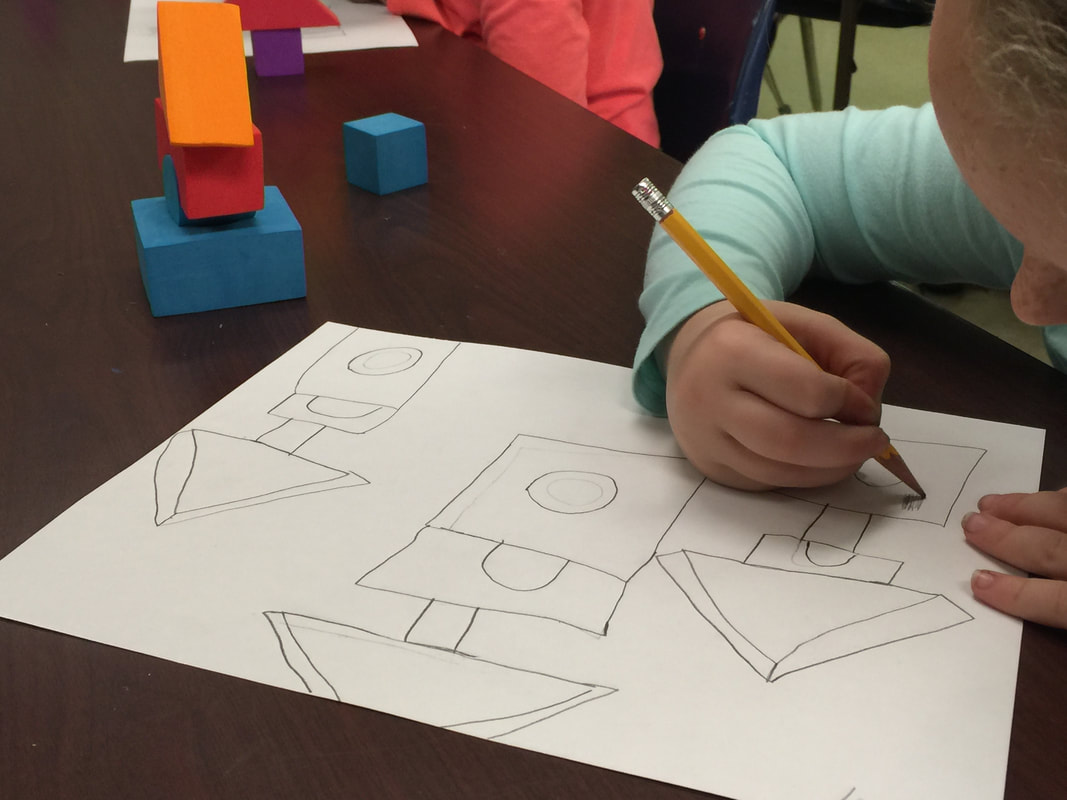 second grade  first grade  first grade  second grade The next step was to introduce kids to the concept of shading- showing the darks and lights, the highlights and shadows. Again, some kids were not quite ready to grasp this, but some did great!  first grade  kindergarten  first grade  kindergarten  second grade I am interested to see if this drawing practice makes a difference in the observational drawings we'll do in the future!
0 Comments
This was actually one of the first projects I did with Art Club back in the fall, but I never posted about it on this blog. They learned so much from this project, and it's definitely one I'll do again!  The objective behind this lesson was to introduce my kids to the grid drawing method. This technique is one students wouldn't typically experience until middle school, but this group of artists was ready for it. The grid method is simply a way to enlarge shapes into a bigger version while using grid lines as a point of reference. Each student had a small card that had been gridded into 1" squares, and they arranged a selection of candy on the card. They drew the candy onto a much larger piece of paper that had similar gridded markings. By making the larger squares match the smaller squares, the students created an enlarged version of their candy still life. This method was a completely new technique for my students, so we started with these worksheets to help them grasp the concept of taking one square at a time, enlarging it, and making it match up with the next square.   Applying these skills to a real-life drawing was a very challenging task! I am so incredibly proud of how their drawings turned out. This experience really helped my kids learn to "see" like artists, and learn how to visually analyze a still life and recreate it accurately. This task really helped prepare them for the drawing challenges they would see later in the year!   Here are a few of the finished drawings. Remember, these are from the beginning of the school year. I wish we had time to do this project again now- it would be a great way to show their growth as artists. I know they could do even more amazing work now!       I did a formal drawing assessment with this year's kindergartners. The goal was to track their growth in drawing people. In the third week of school, I had each kindergarten student draw themselves. I didn't show any examples or give any instruction, since I wanted to see what each student could do on their own. I used the information from this drawing assessment to plan drawing lessons for the rest of the year. Several months later, I asked students to draw themselves again. They have certainly made a lot of progress! I was amazed by the extreme amounts of growth some students showed. It's incredible to see the two drawings side-by-side! Here are some examples- the first drawing was made in August, and the second was made by the same child at the end of March.              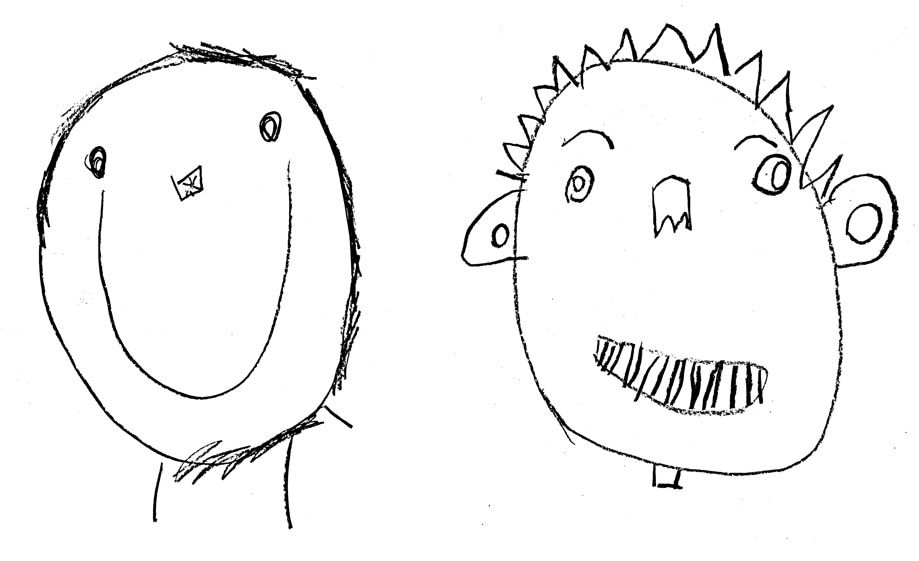             The timing of this project coincides with 3rd grade's focus on animals. When we started, classes had just visited the aquarium and got to see some interesting animals in real life! With that trip fresh in their minds, students began this drawing project. Our inspiration came from this example- it was made by a high school senior, so it really set the bar high for our 3rd graders! But I knew they could do it!  The students requested the species of animal they wanted to draw, and I found photographs for them. Then they had to make four separate drawings of that animal- one had to show the whole animal, and the others were to "zoom in" on some of that animal's characteristics. They were to especially focus on the animal's physical adaptations- camouflage patterns, scales, claws, webbed feet, etc. Here are some of the results!          This week's lesson finishes up our work with plants. See the other projects here and here! Students practiced being "scientific illustrators." These people are artists who are also scientists! Scientific illustrators are the people who draw diagrams in science textbooks, medical journals, and other informational texts. They help us understand how the world works! In today's activity, students needed to focus as much on looking as they did on drawing. I wanted them to forget every other flower drawing they had ever made, and instead, to really SEE the flower or plant that was in front of them. I wanted the students to look with fresh eyes and notice every single detail. Students chose several plants to study, and we used last week's eco-prints as our backgrounds. The drawings turned out amazing, and it's obvious that the kids were looking closely at details!      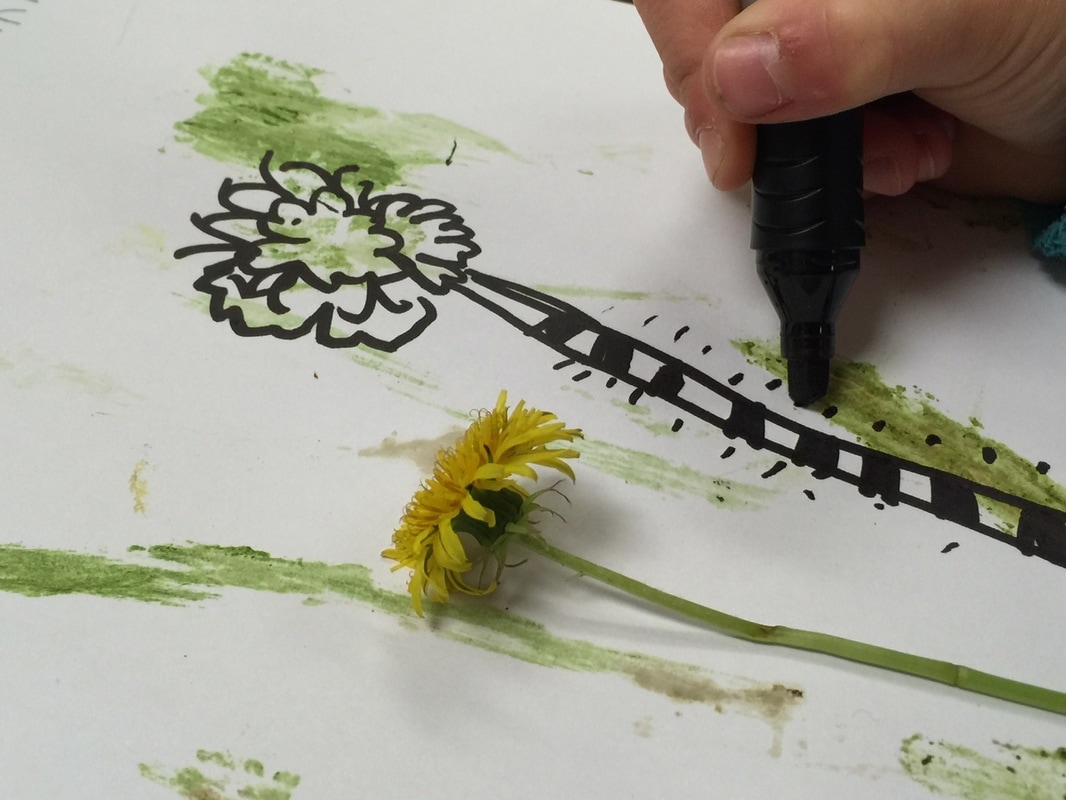   Art Club had a shortened meeting this week, so we had just enough time for this quick drawing exercise. First we watched this speed-drawing video of someone drawing a spoon, then I challenged my kids to do the same! I gave them gray-toned paper, which served as the mid-tones of the drawing. They had charcoal and white colored pencil to add the dark and light values. I wish we'd had longer than thirty minutes so the drawings could have been even more incredible!       Art Club continued developing their basic drawing skills through sketching these geometric forms. Each student arranged their own variety of forms and then drew them as accurately as possible. I encouraged them to pay attention to lines and angles as well as where the shapes touched.  Here is an example of a student's view. After sketching the forms, students then had to add value to their drawings to show the shadows and highlights. Finally, they made a second drawing, this time in color. The students did a beautiful job, and I continue to be amazed by their growth as artists!         I was so thrilled with the work Art Club students did on last week's paper curl drawings, and this week I wanted to challenge them with something even more advanced. This activity builds on the work with value and shading that we've done all year. Instead of shading a simple form though, the students had to observe and replicate the shading of folds of cloth. For most students, this was their first time experimenting with charcoal, which is an added challenge. This is really a high-school level drawing activity! In fact, I even had to do a project on drawing cloth when I was getting my art degree in college! So the fact that fourth grade students could begin to have success with this is very impressive. They still have lots of room to grow, but I am very proud of their beginning attempts.         I love challenging my Art Club members with observational drawing projects. It fascinates me that these students are only 9 and 10 years old, yet some of them have better understanding of space and form than many adults! The task that I gave them this week was very difficult, yet they EXCELLED. We looked at the artwork of contemporary artist L.C. Neill. She has a series of paintings featuring ribbons with very dramatic lighting.  Here's an example- "Silver and Copper" by LC Neill. We made our own version by curling strips of paper and then observing the light and shadows. I am SO PROUD of the results!         Fourth grade students made these drawings of fruits and vegetables to practice their observational drawing skills. They were challenged to use shading, texture, and color blending to make their drawings look as accurate as possible. We used artificial food as our models. Their drawings are amazing!!  |
Archives
March 2018
Categories
All
|
 RSS Feed
