|
This project was from nearly a month ago, but I am trying to get caught up on project posts! Kindergarten students made these heart paintings the week of Valentine's Day. It was a good opportunity to practice making patterns, and to explore the resist technique that happens when you paint on top of oil pastels. The paintings turned out beautifully, and the kids were really proud of their work!          
0 Comments
 I finally get to share these precious kindergarten self-portraits! This is my favorite kindergarten project yet. These paintings show such personality, and I know parents will treasure them! We painted the faces in a previous lesson, so the next step was to paint the shirt and add the face and hair. The reason this project was so successful was that I structured the day so that only a small group was painting at a time. I was able to focus my attention on about five students at a time, and ensure that each student had everything they needed. While I was working with the groups, the others got to enjoy a play-dough day. They loved it! Here are some in-progress pictures:     We made the backgrounds by scribbling colored chalk onto construction paper, then blending it with a paper towel.   And here are the finished self-portraits! I am so pleased with how they turned out.  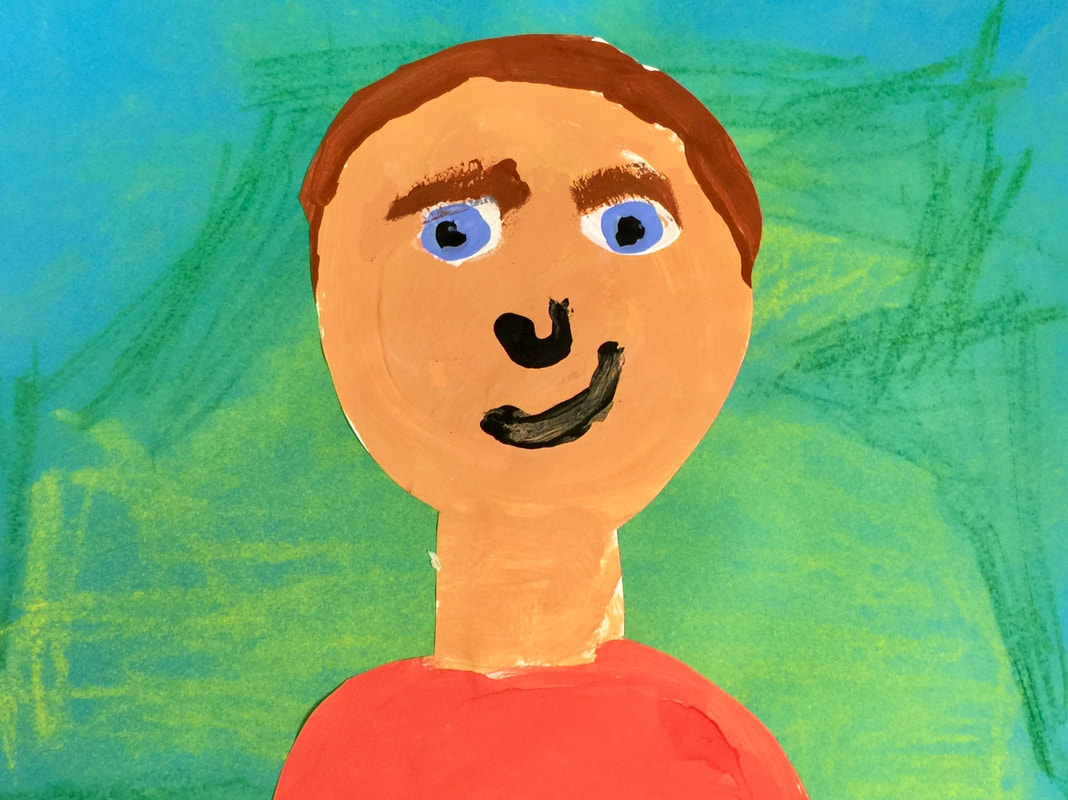    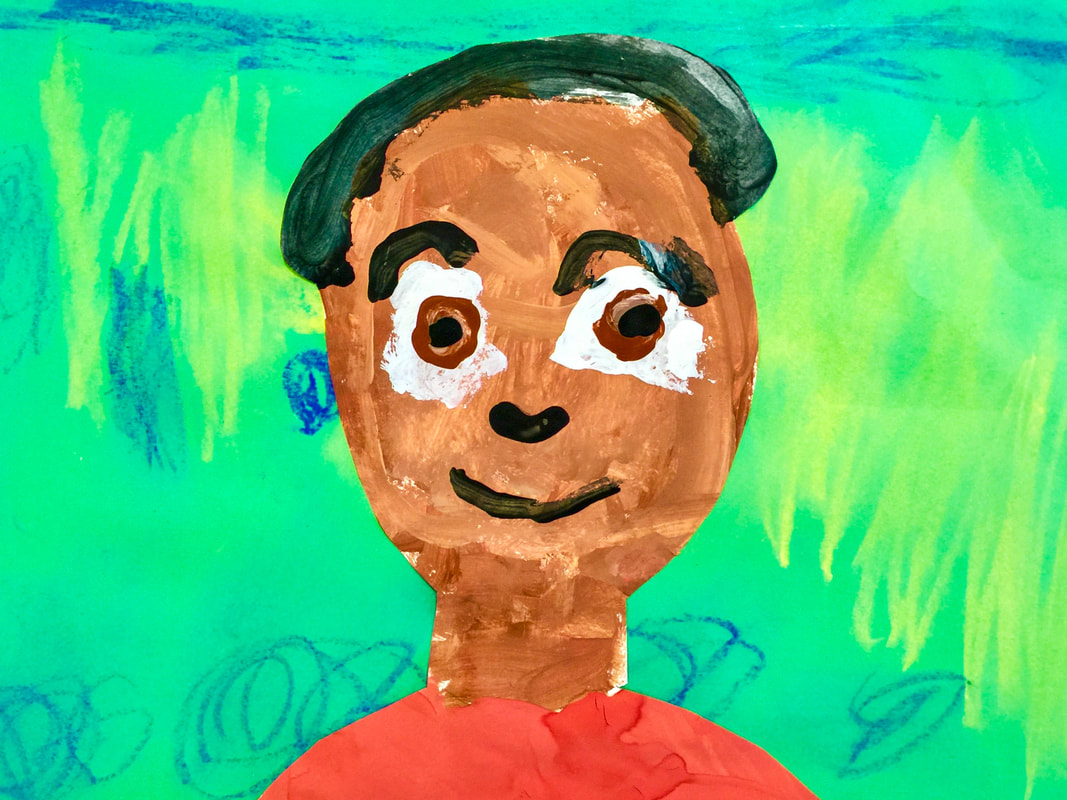        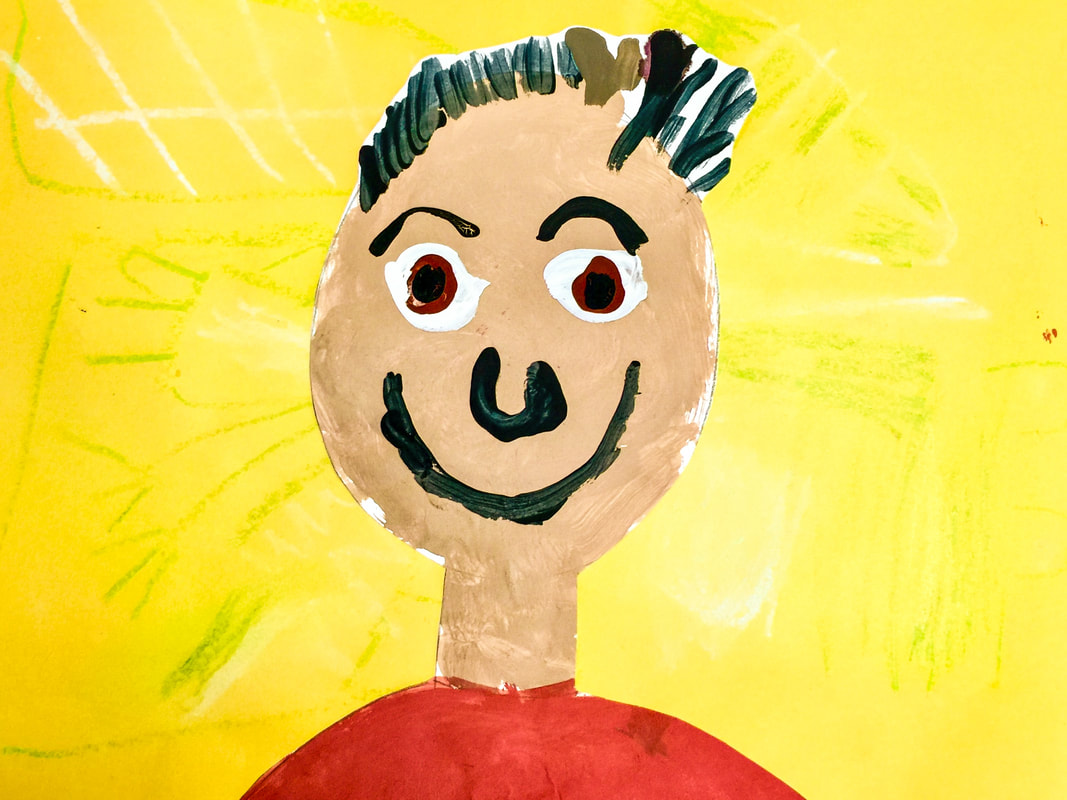  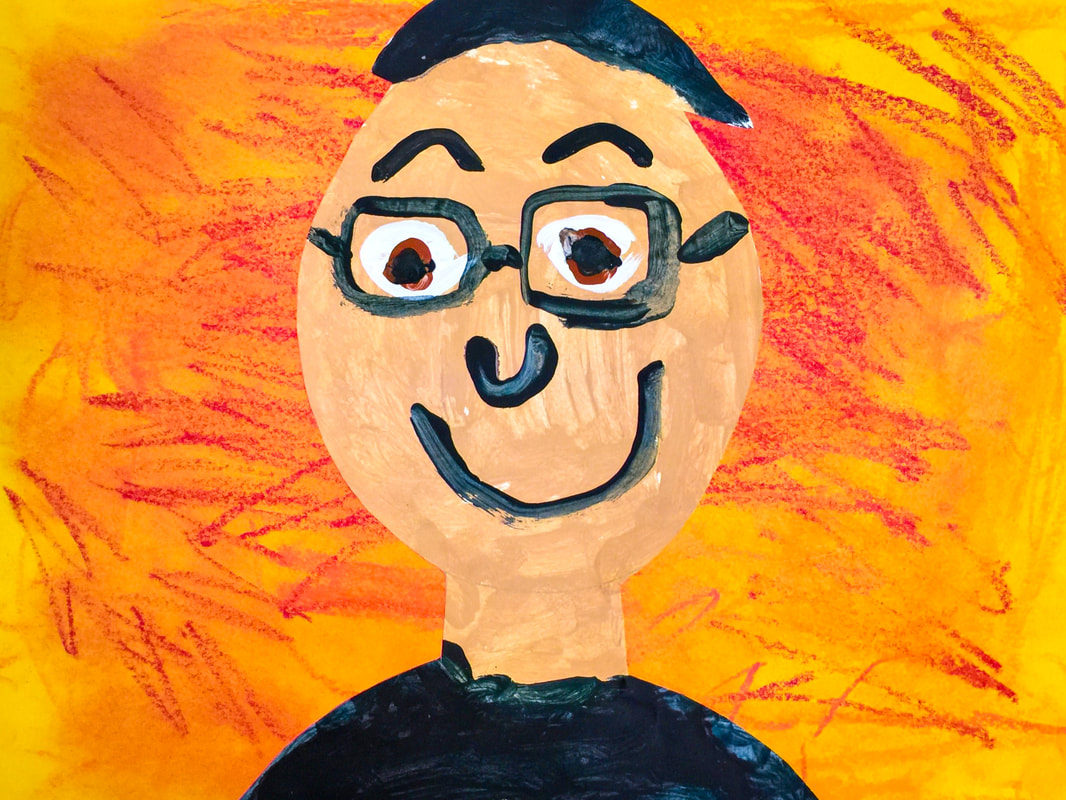  This kindergarten activity was the beginning step of the project that will be featured at this year's Art Show. We are going to be painting self-portraits! The lesson was an exploration of mixing skin tones. We started with the wonderful book, The Colors of Us, by Karen Katz. This book celebrates the differences in our skin colors and points out how beautiful the variations are. Each student received a paper plate with a blob of each primary color (red, blue, and yellow) plus white. I challenged them to mix and blend the colors until they had created the perfect color to represent their own skin.   The most fun part was that students got to paint on their hands to see how closely their color matched!    The lesson was about mixing colors, but the REAL lesson was that we are all made up of the SAME colors- just mixed into beautifully different combinations!    These paintings will be the beginning layer of our self-portraits. Next week we'll add the faces and hair.   This lesson was very interesting to reflect on. I did the same activity with both my fourth graders AND my kindergartners! My goal for my kindergartners was simply for them to realize that our human bodies are put together in a particular way- we have heads, torsos, and limbs. Young children often draw bodies in ways that don't make sense. Sometimes they draw big heads with tiny bodies underneath, or they draw normal-sized heads and torsos, yet scrunch the legs up to be very short. Or sometimes they even draw the arms and legs coming out of the head, skipping the torso altogether- like a Mr. Potato Head. These are all normal developmental stages that children naturally progress past. Through our practice in studying and drawing these manikins, I just wanted them to THINK about what they were drawing.       I repeated the same drawing activity with fourth graders. My objective for this lesson was a bit more specific. This grade level is beginning a new IB unit centered around the concept of "Structure"- how things are put together. They'll be investigating this concept in a variety of different subject areas. Through observing and drawing these manikins, I wanted students to think about the "structure" of the human figure- how our bodies are put together. They've studied the skeletal structure of our bodies in Dance, and learned how our muscles are connected to the bones, and that moving them together is what allows us to hold ourselves up yet still flex and bend. This drawing activity is an extension of that prior learning. Much like the kindergarten students, I wanted fourth graders to draw with accuracy in representing the head, torso, and arms and legs. As these students are quite a bit older, their drawings are much more realistic and have better form. I started each fourth grade class session by showing students examples of the kindergarten drawings- I challenged them by pointing out how much detail the younger students could capture, and said that if a five-year-old can draw like this, show us what someone twice that age could do! Here are my fourth graders at work:        This project is one that K5 students completed back before the winter break, but I'm just now getting around to sharing it. Their classroom lessons at the time involved understanding maps and how places are represented geographically, as well as learning about how communities function. In Art, we did a project inspired by the shape of South Carolina. I wanted students to be able to recognize our state's outline. I started the lesson by holding up a poster-board cut-out and asked students to identify the shape. I was surprised that not one single student got it on the first try, in any of our five classes! Their first answers were always a triangle or a heart. After I gave them a clue or two, eventually someone in each group was able to name it. Students started their artwork by tracing the shape onto colored paper.  The next task was to tear and glue tiny pieces of paper to fill the inside of the shape. We learned the vocabulary word "collage".  Students started by completing the outside edge first.   The other main objective for this lesson, in addition to recognizing the state's shape, was for students to be able to accurately judge shape and size. I wanted them to choose appropriately-sized pieces to fill their space. I told them it was like they were creating their own puzzle pieces. . . they had to look at the space on the paper and tear a piece that would fit perfectly in each little spot.  You can see that some kids were very careful to choose and place pieces with a lot of precision!  The tearing of the paper also helps develop fine motor skills and build strength in their hands. One student noticed that the paper he tore was already in the shape of South Carolina- he was so proud to show me!  It took two class sessions to get most of these finished, but by the end, students were very proud of their finished collages!  In the week between the first day of the lesson and the second, I asked students to be watching for the shape of our state in our community- on t-shirts, bumper stickers, and billboards. Many students came back ready to share the places where they had recognized South Carolina's shape!  As you might imagine, having this many tiny pieces of paper in our art room made for quite a mess. But kindergartners are great helpers, and with lots of little hands we were able to get the room back in order!    It was a successful project, and one that our kids really seemed to enjoy!.  My kindergarten kids just finished these collaborative collage projects featuring communities. In years past when I've done this project, I made sure to model everything for them- how to create a road, how to put windows on a house, how to cut shapes for a tree, etc. This year I didn't do any of that- instead, students created everything completely independently! The end products don't look as polished, but I think the learning was much greater. I did give them some thin black strips to make roads, and I pre-cut some paper into building-sized squares. I also showed them how to cut the squares diagonally to make triangles for roofs. Everything else is all theirs! Students worked in teams of three to create these communities. They started by gluing down the roads, and then from there, they could add anything they wanted! I did display some photographs of things that could be found in communities- like buildings, playgrounds, stop lights, trees, and cars- just to give them somewhere to start.  If someone had walked in the art room in the middle of all of this, they would have thought it was complete chaos! It was really noisy, kids were constantly moving around the room to get supplies from different stations, and there were definitely disagreements among team members about the best way to do things- not to mention the thousands of scraps of paper scattered on the floor. But- if you looked a little closer, you saw lots of great things happening, too:
                  I need to explain my system for distributing glue. We use "glue sponges"- a damp kitchen sponge cut in half, with a puddle of white liquid glue in the middle. Kids use one finger to scoop up a bit of glue and spread it on the back of their paper, then they clean their finger off with the damp sides of the sponge. When kids need a refill, they can help themselves with this glue dispenser. It's just a liquid soap bottle that's been filled with white glue. I tell kids they can get three pumps at a time. Sometimes they have to get help from a friend, like in the above photo- it's hard to be coordinated enough to manage both holding the sponge and pushing the top when you're only five years old! Here are just a few of the finished collages. The kids kept referring to them as their "maps", even though I never used that word with them. That just goes to show how they are connecting their learning in the classroom to what we are doing in Art!       
I developed this lesson based on a conversation with one of our kindergarten teachers a couple of years ago. We were talking about their unit on communities, and how one aspect of that unit involved learning to read and create maps. The teacher said that her students often have a hard time grasping that maps are drawn from ABOVE- instead, students tend to draw maps as scenes, with all the buildings sitting beside each other. I knew there had to be a way I could teach that concept through Art. Over the last couple of years, I have tried several different activities to teach about a "bird's eye view" and never quite found the right lesson for our kids. But this year, I think I might have found it! I am interested to hear from our kindergarten teachers if they notice an improvement in student's understanding of map-making. I had three goals for this lesson:
This was a two-part lesson. The activity for both weeks was to paint a tree. In week 1, we painted a tree from BELOW. In week 2, we painted trees from ABOVE! I wanted students to notice the differences in how the trees looked and be able to represent each view with an artwork. PART ONE: To start off week 1's lesson, I showed the students Georgia O'Keeffe's painting The Lawrence Tree. I didn't tell them what the painting was- instead, I asked them to interpret what they saw. Some kids had really creative interpretations- "an octopus!" was an answer I heard more than once! Eventually we came to the conclusion that it was a tree. By asking guiding questions like "What's unusual about this tree?" and "How does this tree look different from the one we see outside the window?" I was able to get kids to verbalize that the artist was under the tree and looking up into the night sky.  Georgia O'Keeffe The Lawrence Tree 1929 The painting experience for this part of the lesson was a lot of fun. We got to go outside and enjoy the beautiful fall weather! We sat under a tree and looked up. First we talked about some of the things we noticed- especially the shape and width of the trunk. We talked about how it looks really thick and strong at the bottom, but as you look further up into the tree, the trunk looks thinner and far away. I showed them The Lawrence Tree again, and we noticed how the trunk made the shape of a triangle. We also talked about the branches and twigs, and how they get smaller and more delicate as you look further up into the tree. Then it was time to paint! I didn't give much instruction or do any modeling of how to paint the tree; instead, I wanted students to create their own interpretation. Many of the kids really had a strong grasp of the concept, while others were not quite ready for it yet.      Next we came back inside and added some green leaves to complete our view of a tree from underneath.    We ended the day with a look at Tana Hoban's book Look Up, Look Down. It's a wordless book full of photographs that ask the viewer to decide whether we are looking UP or looking DOWN at the image. It was the perfect transition into next week's lesson!      PART TWO: In the second lesson of this unit, we looked at trees from ABOVE! First I asked students to summarize what we did the previous week. Then I told the that this week we would be looking at the opposite view- instead of going underneath a tree, this time we were going to go UP!  I told them we were going to pretend to go up in the sky on a hot air balloon. We watched this video to see what it would be like. I asked them to be sure to notice the trees and how they looked different depending on how high the balloon was. Then I gave each student an aerial photograph, similar to the scenes we saw in the video. I asked them to paint what they saw- focusing on realistic shapes and details. We talked about how the trees looked- why didn't we see any of the trunks? Then each student began working on their painting, representing the photo to the best of their ability.     As in the previous painting activity, some students had a clear understanding and it was evident in their work. Several students weren't quite ready to grasp this concept, and we will revisit it again. I am hoping that with some more intensive instruction from their teachers in the upcoming unit, that it will finally "click" for them! Here are some of the finished paintings, paired with the reference photo the student used.   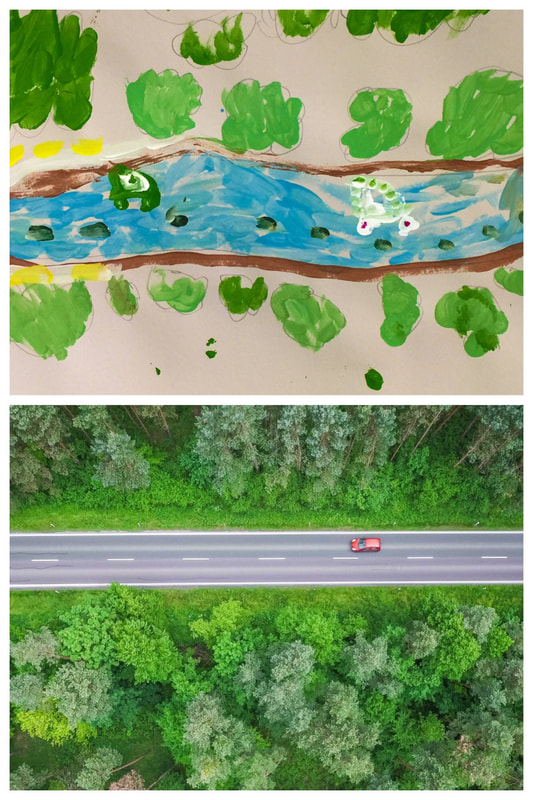  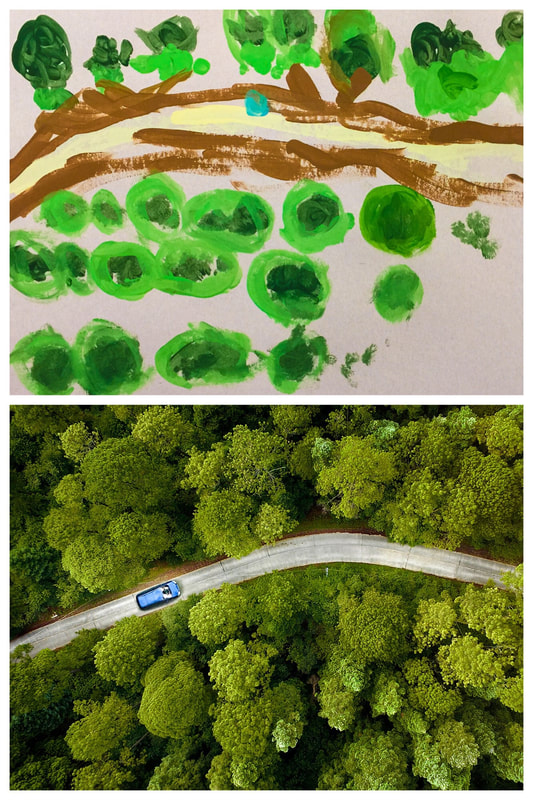 I want to share two more books I was able to use in this unit. The first is Looking Down by Steve Jenkins- one of my favorite illustrators. This wordless picture book is made of cut-paper illustrations showing our world from varying distances. Each page takes us closer and closer (or further and further, depending on whether you start at the front or the back.) For this lesson, I shared the book beginning at the back- we started with this close-up view of a ladybug. Each page takes you higher to see more and more of the picture. The scenes where you can see the whole neighborhood were helpful when I talked about maps with the students.                Below is a link to a video read-aloud of the last book I shared. This is They All Saw a Cat by Brenden Wenzel. This book was recommended to me by another art teacher. It's a great visual representation of perspective- how we each see things from a unique point-of-view. This was a quick one-day project I did to reinforce the concept of symbols. In their home classroom, students have learned about symbols in all different ways- road signs, symbols in math like plus signs, symbols that represent our country like the bald eagle, even symbols that stand for words- like in the language our Japanese buddies use! In this lesson, students recognized that a heart is a symbol for love. I showed them a picture of what our real hearts look like inside our bodies, and made sure they knew that our biological hearts are different from the heart shape we normally draw! That shape is used as a symbol to represent that we love something. Students drew or traced a heart and filled the shape with symbols representing things that they love- their families, favorite activities, special holidays, favorite foods, special places they visit... anything they could think of to represent themselves. We finished up by painting with tempera cake paints.         My goal for this activity was to show kindergartners how Art can be a way to communicate. Students have been learning about communication in many forms- writing, speaking, singing, even through picture symbols. In this lesson, they experienced art-making to communicate feelings. We looked at several examples of art that portrayed a clear mood. This led to lots of good discussion- we looked at this painting, Picasso's The Old Guitarist, and they immediately said "he's sad!" When I asked them HOW they knew he was sad, they had great answers. Students explained that his head was hanging down, he looks tired, and his clothes are ragged and dirty. It took a little guiding to get them to realize the significance of the color blue, and that it was a symbol for sadness.  This talk of colors led us into the next discussion. We looked at this painting with the bold red slashes, and discussed how red is often a symbol for anger. I told them that sometimes when we're really mad, we even say "I'm seeing red!!" 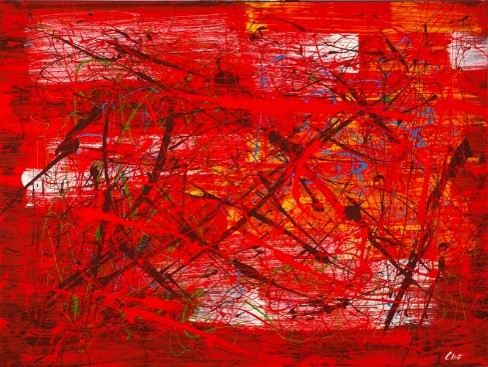 I had each student pretend to hold an imaginary paintbrush and slash their arm through the air like they were making the marks in this painting. I asked them to think about a time they were really mad, and let that energy come out in the movements they were making. Then we looked at some paintings with bright happy colors. One student commented that when you're feeling happy, you might want to jump up and down, and it looked like the shapes in this painting were bouncing and jumping! What a great observation!  We also looked at dark, scary, paintings:  And lonely, empty, artworks:  And artworks that were almost vibrating with excitement!  Then it was time for students to make some expressive marks of their own. I played several selections of music, each with a different emotion- happy, sad, angry, scared, excited, calm, and proud. Each student interpreted that emotion through the marks that they made. Here's a short video demonstrating some of their interpretations! The second day's activity was an extension of learning from the first day. This time instead of focusing specifically on expressing emotion, students painted to music and responded to it. Their goal was to represent the sounds they were hearing with lines on their paper. I told them to picture their paintbrush dancing to the music! Here is the second short video. I was pleased with how thoughtful the students' marks were, and they LOVED painting this way! For a fun end to our lesson, I shared the video below with students. It's a good example of making marks in response to sounds. Each unique sound is represented by an individual line that reflects the changes in pitch and tempo. We talked about how each line was like a symbol for the sound it represented. This project is one I keep coming back to year after year. It is so much fun for the kids, yet it has them practicing so many skills! I like to time this project with kindergarten's study of patterns, which they just finished up last week. We talk about the rainbow as a type of pattern- the colors repeat in the same order every time. Students begin their paintings with a squiggle line going all the way across their papers. Next, they'll make a matching squiggle line using the next color in the spectrum. These lines will repeat until the entire paper is filled with rainbow squiggles!  The main learning objective of this project is for students to learn the correct order of the colors in the rainbow. I introduce the concept of the color wheel, and explain that it's like a round rainbow. This understanding will be important as students are later introduced to the science of color and how primary and secondary colors work. In making these paintings, students are also learning how to successfully handle a paintbrush. Their goal is to place lines of color next to one another- very close, but not touching! Painting with that amount of control takes a lot of small-muscle movements in the hand, and is a great exercise for developing fine motor skills. Students also learned important painting routines, like remembering to wash their brush before switching colors and treating the brush gently instead of scrubbing it across the paper!     It was so interesting to see some students begin their paintings with a color other than red. Though red is typically the color you start with when naming the colors in order, I explain to the students that when looking at the colors in color-wheel form, it's a never-ending repeating pattern. Once you get to the last color, you are right back where you started and can just keep going! This means that no matter what color you start with, the colors before and after will always be the same. Seeing students take these different approaches is evidence that they are truly understanding the learning, instead of just copying from an example!     |
Archives
March 2018
Categories
All
|


 RSS Feed
