|
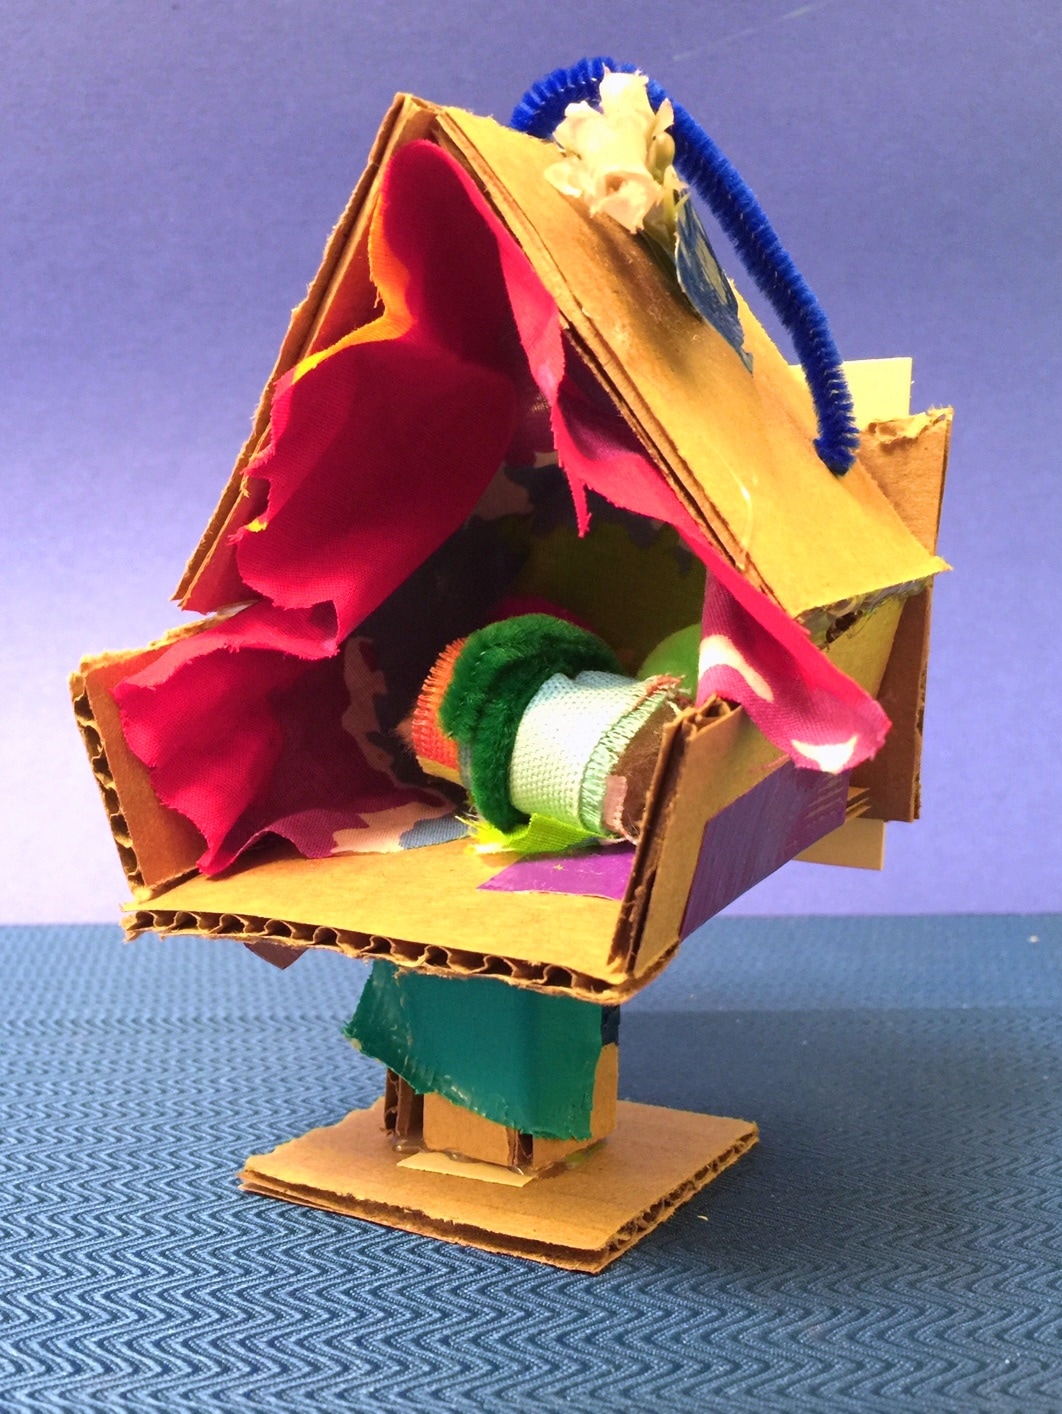
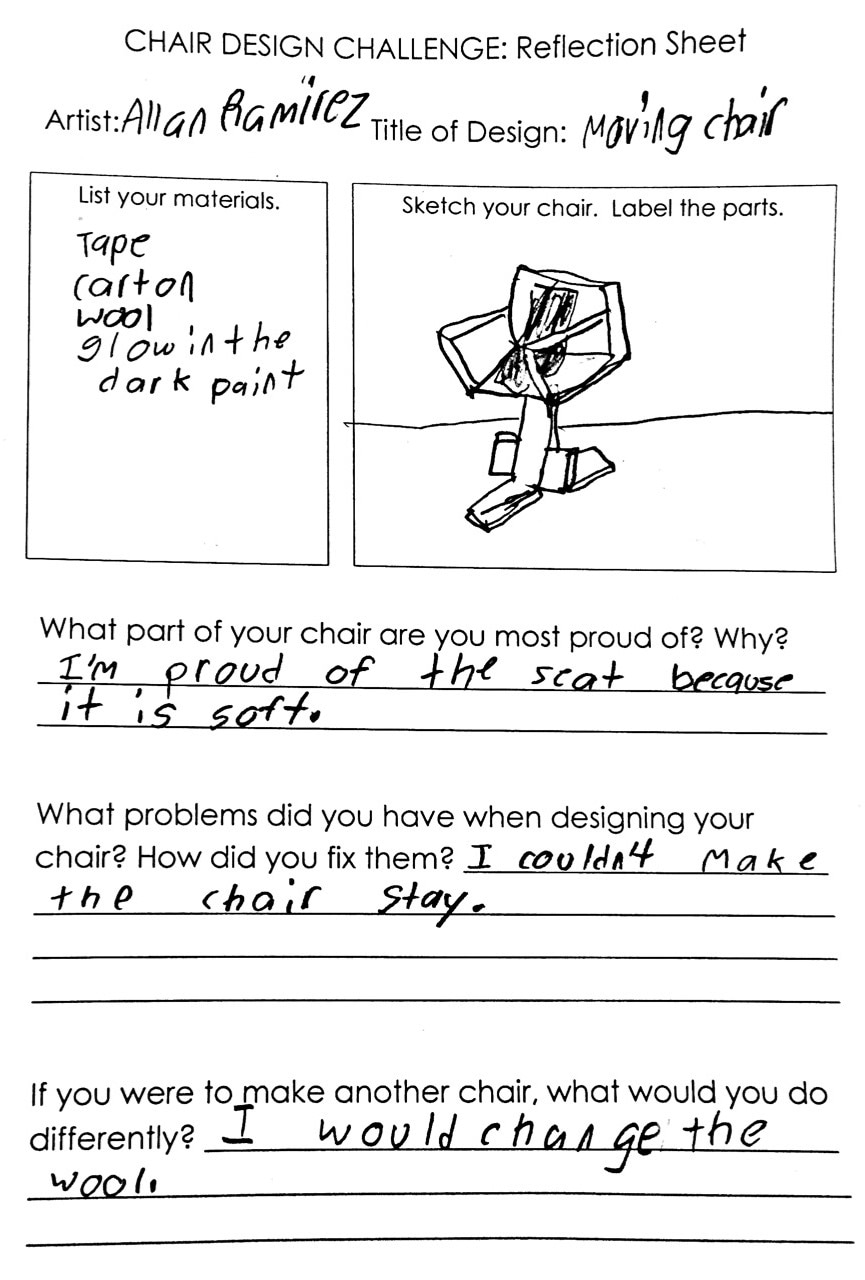
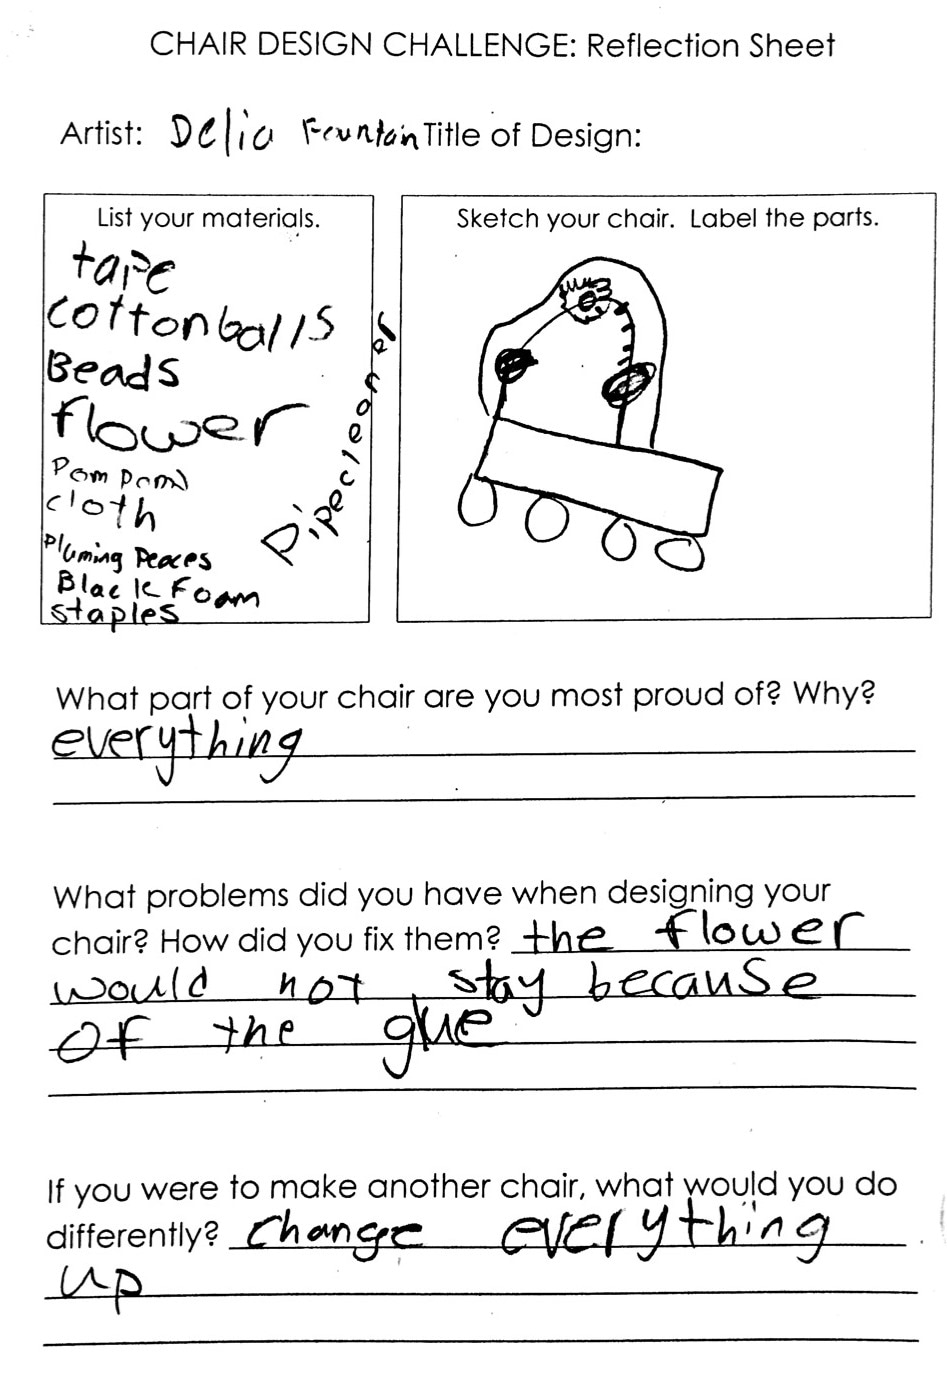
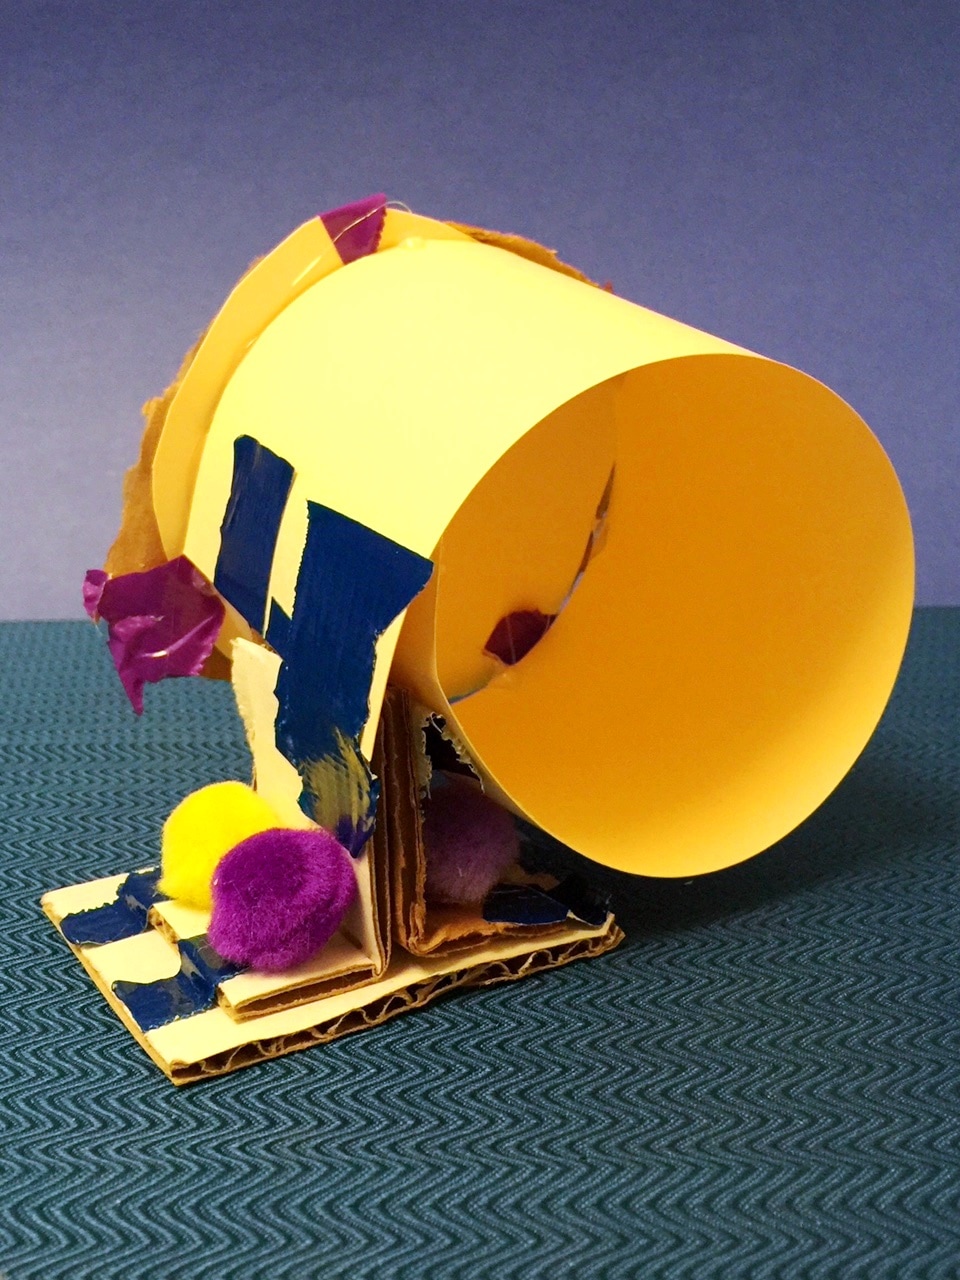
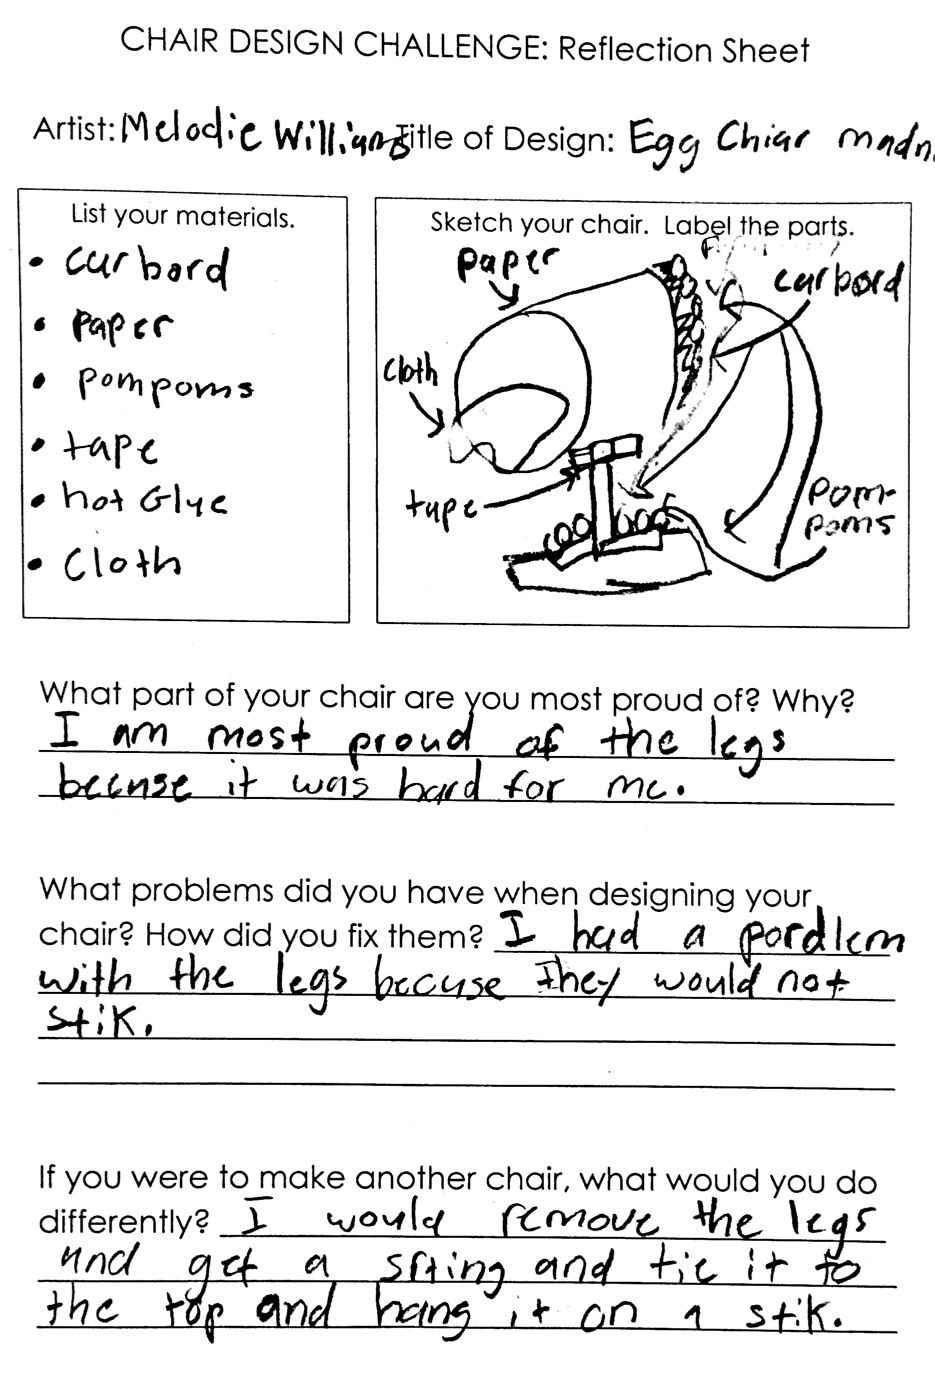
I absolutely LOVED this project, as did the students! We are very excited to share it with you. One of the most fun things about having fourth grade at our school this year has been that I get to explore a whole new set of projects with them. This project was designed to go along with their IB unit "Structures." The goal of our work was to experiment with the structure of a very common object- the chair. I used this video to introduce the idea to students- Just by watching this video, my kids started to get excited about the project. Our first day was spent sketching, planning, and dreaming- and some kids were dreaming BIG! We had plans for race-car chairs, rocket ship chairs, even a chair with a built-in smoothie maker!    Then it was time to get to work! Students spent the next three class sessions constructing their chairs. My job was to dispense the hot glue, so I did not get to circulate around the room like I normally would when students were working. But, this meant that students had to solve their own design problems without my input! I was so happy to see them taking ownership of their designs and really striving to make them successful! The requirements for the project were:
Our construction materials were anything and everything... odds and ends from the hardware store and the craft store, along with anything else I had in my storage cabinets. I did have some special requests for items like glitter and glow-in-the-dark paint, so I accommodated those requests the best I could! This video was another great inspiration- a professional furniture craftsman at work! I love how he tells his story, from starting out as a kid building skateboard ramps, and how he transitioned to the beautiful work he does today! He also does a great job explaining the importance of science and math for his craft. Here are some in-progress pictures.      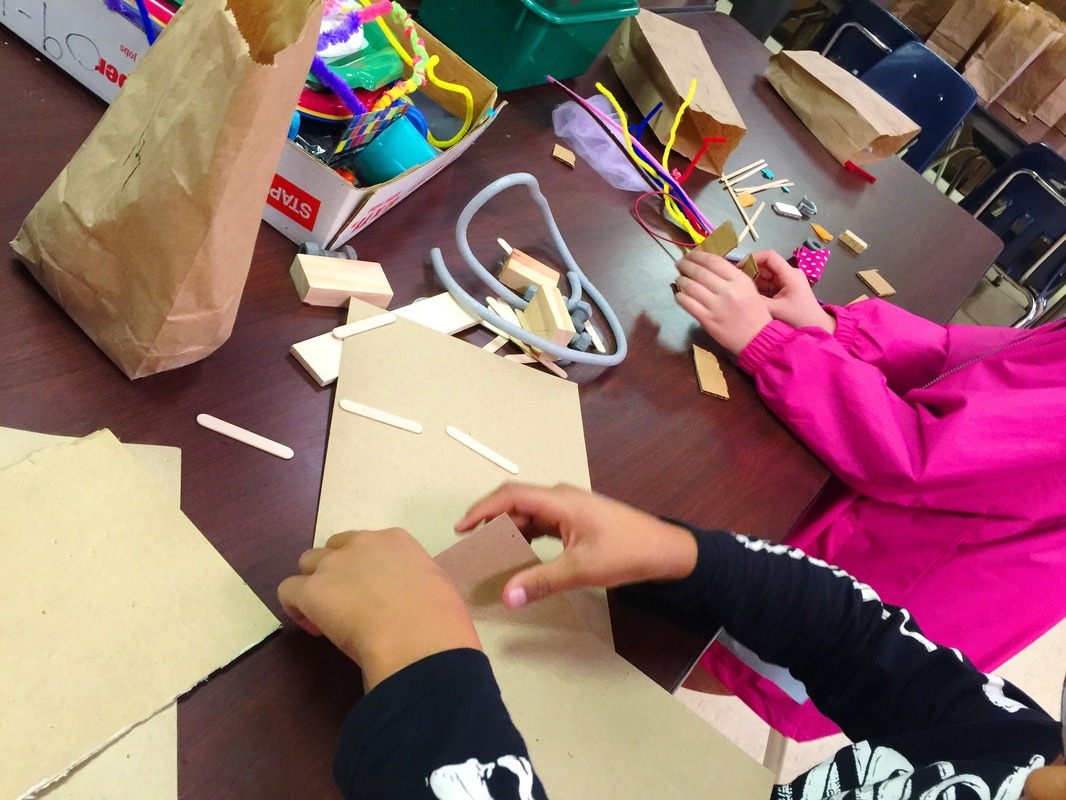   And here are a few of the finished designs! Each student also completed a reflection sheet about their creative process.
 This project will definitely be one we repeat each year!
0 Comments
This is the final week of first grade's "trip around the world"! It was been a really interesting experience, and I can tell the kids have learned a lot. They have been so excited to pretend to visit each new place! This week's focus was Jamaica. I did not know much about the culture of Jamaica before I began researching for this lesson. One of the things I found was that Jamaican culture is a combination of all the people groups that made up the island's population, and much of their traditions, food, language, and even artwork is a blend of these influences. This video gave us a good overview of what daily life might be like in Jamaica, and how their culture is both alike and different from America! One of the interesting things I learned about Jamaica was that back in the British Colonial times, in the time of new settlements and developing trade routes, Jamaica was a source of beautifully hand-crafted wooden furniture. Jamaica had an abundance of rich forests- the country was called "the land of wood and water". Jamaican people were able to harvest the wood and use it to create furniture, which became highly desired by British traders. Much of this furniture was carved, like this example of a Jamaican-made bed from the 1800's.  Other types of furniture were made in the caned style. Caning is a type of weaving which involves lacing reeds or thin strips of wood to a frame. It was common to see caned chairs, sofas, or tables. It is a very intricate and time-consuming process! Caning furniture is a traditional craft that is still evident in modern-day Jamaica.   First graders experienced a little bit of the weaving process by creating paper-weavings. We used the colors of the Jamaican flag, which are black, yellow, and green. The black in the flag symbolizes the strength of the people, the yellow represents sunlight, and the green is a symbol for the natural resources.    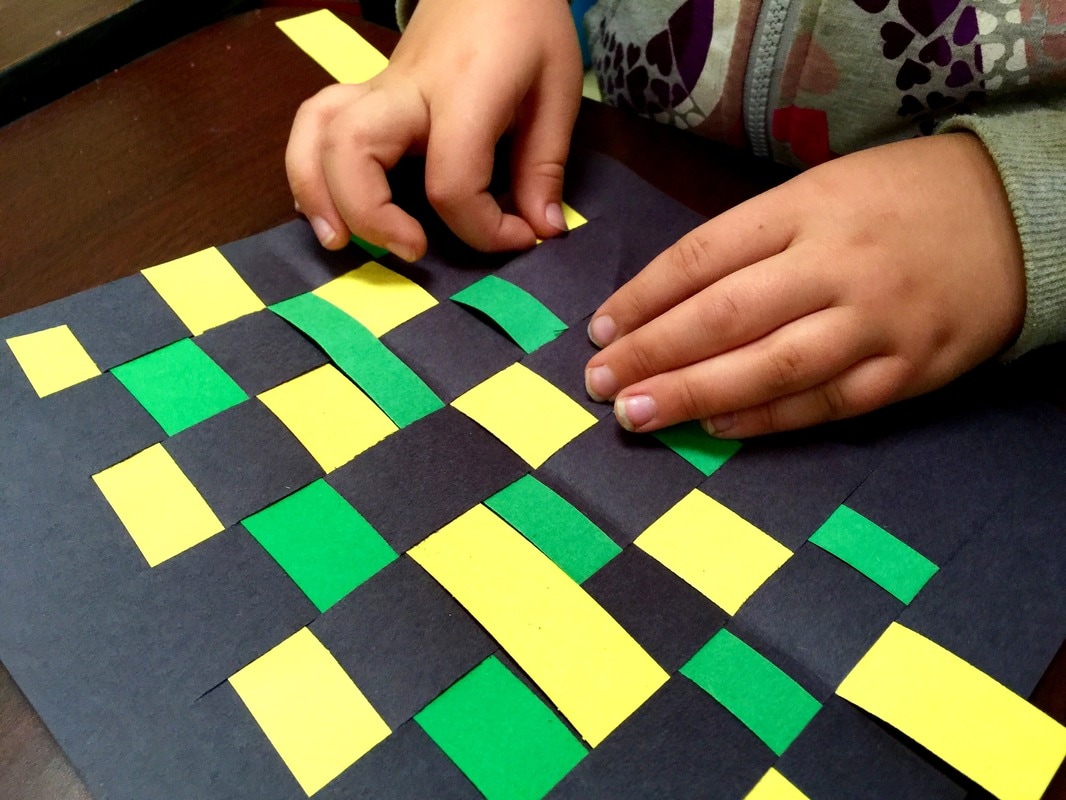    I am SO proud of my students for their hard work on these drawings. Their artwork is amazing! Each student chose one of our state symbols to illustrate. These were their choices:
I asked students to illustrate each symbol using the "zentangle" style of drawing. You can read more about our process in this previous post. Here are the results of about eight weeks of very focused work!                  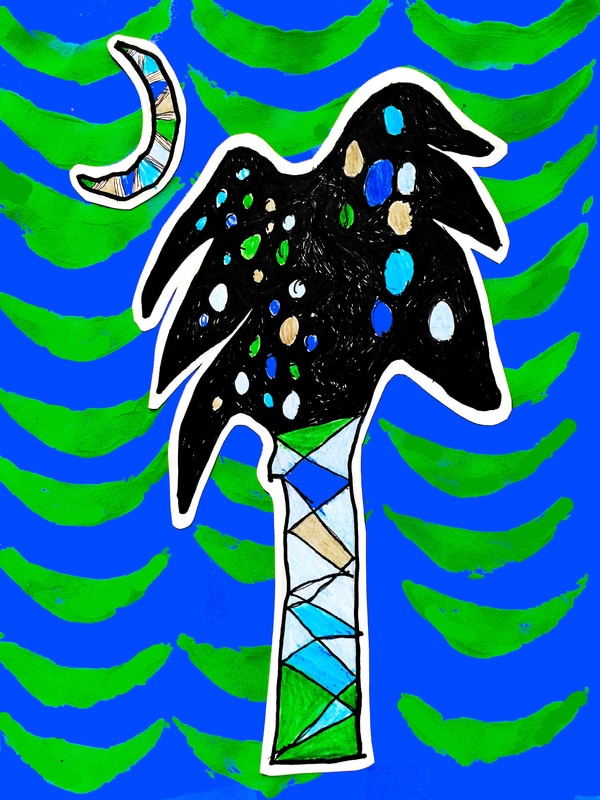           We took a trip to Italy this week. The kids were full of questions! I can tell they are developing their research and questioning skills, since they are asking really relevant questions. We talked about pasta, gelato, getting around on gondolas, the Leaning Tower of Pisa, and we learned how to say "ciao" and "grazie". We also talked a little about the artists of the Italian Renaissance- Leonardo, Michelangelo, Rafael, and Donatello! It is always so fun to teach kids that the Ninja Turtles were named after famous artists! What I wanted students to understand about Italy is that it is a very old country with lots of history. (We discussed this with our study of Egypt, too.) I wanted students to be familiar with modern-day Italy, but also to understand where their traditions come from. We learned that before Italy was a country, it was a civilization called Rome, and that life was very, very different back then! Our art experience this week was to create Ancient Roman Wax Tablets. In Roman times, paper hadn't been invented yet, so if someone wanted to write, they would use a wooden frame filled with hard wax, and they could carve letters into the wax. When finished, they could soften the wax and smooth it back out to use again. Some of these tablets have been discovered as ancient artifacts, and you can see them in museums. 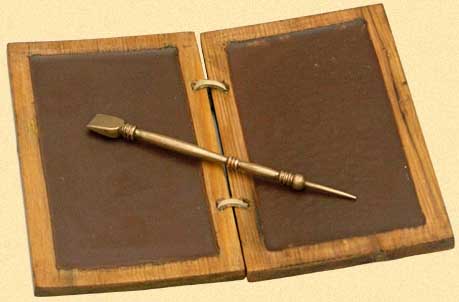 Students were fascinated to learn that the metal stick Romans used to carve the wax was called a stylus. They easily made the connection between the ancient tablets and our modern-day version, the iPad, and were excited to know where the word for the modern stylus originated! To make their own wax tablets, students folded a piece of thick cardstock in half. They drew a wood grain texture on the front, and filled the inside with rectangles of thick, dark crayon.   Next students used a plastic carving tool to scratch in whatever design they chose. Many students chose to write the letters of their names using ancient Latin letters and writing in reverse, as they did in ancient times.   This is Aidan's name written using the Latin alphabet, and written from right to left!
In this week's session, 1st graders learned about a tribe of people living in South Africa- the Ndebele. This group of people is known for the bold geometric designs painted on the outsides of their houses.  Students learned that the tradition of painted houses began as a way for people to communicate- each design had a specific meaning. Also, we learned that the women of the tribe are responsible for the painting, and the craft is passed down from mother to daughter. The society places a great deal of emphasis on the quality of the painting, and a women's success as a wife is judged by the exterior of her home. We enjoyed this video, which gives a glimpse into life in the Ndebele tribe and shows the beautifully crafted art. And here are some of our own Ndebele-style houses! Students began by drawing geometric designs and coloring them with the traditional colors of blue, red, yellow, green, brown, and black. Next we stapled them into a cylinder and glued the roof on top. If students had time, they could fringe the edges of the roof to resemble straw.    Recently our school hosted an event promoting literacy. The theme was "Take Me Out to the Ball Game"- all about baseball. We had baseball books, snacks, games, music- even some real baseball players came to visit! Our art project for the night was inspired by the circular shape of a baseball- we did "Circle Painting"! The concept of Circle Painting was developed as a way to bring harmony and unity to communities through collaborative art-making. (Visit circlepainting.org for more information and to see how Circle Painting has transformed communities all over the world!) The main goal behind our Circle Painting project was for painters to create any design they wished using ONLY circles. Also, the painting is meant to happen in a very respectful and considerate way- you can add to a circle someone has already made, but your additions shouldn't cover up or overtake the original circle. I loved seeing our school community make art together. Students, parents, siblings, grandparents, and even the teachers had a part in making these artworks happen!       And here are some of the finished canvases. They are gorgeous!    This series of projects was designed as a way to reinforce geometry terms while exploring design concepts like balance and symmetry. The first project involved lines and angles. Students used rulers to draw several straight lines in a variety of directions. Then they added points and labeled lines, line segments, and rays. Next, students looked at the angles the lines created. They were given a color key and asked to color acute, obtuse, and right angles according to the key.   Project two was all about partitioning shapes evenly. One of the second-grade math standards is being able to divide circles, squares, and rectangles into halves and fourths. Pairs of students received three of each shape and divided them- one whole, one split in half, and one split in fourths. They learned that folding the shapes were a good way to make sure the parts were even. Students used the resulting pieces to create interesting compositions. Instead of gluing the pieces down, they photographed their completed compositions and then arranged the shapes into a new design!     This group made a robot.  This group designed a flower garden with orange clouds.  And this design is my favorite- a crying monster! Week 3's project allowed students to develop their observational drawing skills while reviewing three-dimensional forms. I gave each student a cube, a rectangular prism, and a cylinder. They were to observe each form's edges and faces and replicate them as closely as possible in their drawings. Many students went further and added the shadows and highlights.     Finally, the last project of this series was a review of polygons. Students used rulers and circle-tracers to create shapes. Then they had to count each shape's sides and determine what type of polygon it was in order to color it the assigned color. Shapes that were NOT polygons (ones with curved sides, created by the circle tracers) were colored black or gray.     Today's activity was one that is incredibly fun and memorable for kids, but also an excellent learning experience! Students used playdough to create figures. I gave them a template with an outline of a figure and their task was to create the person out of playdough. (Of course, remembering to include all the details we've been practicing!)        This lesson was a special request from one of our first-grade teachers. The northern lights are a phenomenon visible in any of the world's northern-most areas, but our focus for the week was on Alaska. The science behind the northern lights is way too advanced for first graders to grasp- we just learned that the lights are created because how the earth's atmosphere reacts to the sun's atmosphere.  We started with this fascinating video of the northern lights (the footage is actually from Scotland rather than Alaska, but it was a beautiful example!) To make our own version of the northern lights, students used colored chalk. They colored the torn edges of some scrap paper, then used a paper towel to blend the chalk dust into the background. The final step was to paint tree silhouettes and add sparkling stars to the sky!        One of the things I enjoy about teaching Art is that I get to support students' academic learning by integrating those concepts with opportunities for them to explore and create. This second-grade project is a good example of this integration. Students created a landscape of their choosing and used math concepts to guide their drawings. Each student received this checklist-  The kids could draw anything their imaginations could come up with- any kind of tree, any kind of building, any kind of weather... as long as they could answer these questions about their drawings. I was pleased to see some really creative ideas! We only worked on these drawings for two weeks, which was not really enough time to get them as finished as they could be. The kids will keep their work in their folders and can pull it out when they have a few free minutes.          |
Archives
March 2018
Categories
All
|


 RSS Feed
