|
The weather lately has been beautiful and spring-like! It has made it seem like winter is really over, even though the forecast calls for cold weather again soon. But to celebrate the nearness of Spring, and to tie in with Black History Month during February, we made paintings inspired by artist Alma Woodsey Thomas.  Alma Thomas got her inspiration from the natural world. She was born in Georgia, but spent most of her life in Washington, D.C., where she worked as an art teacher. She missed the green grass, sunshine, and trees, but could look out the window of her apartment and enjoy the garden planted below. The natural world was the inspiration for most of her paintings. Her painting style was unique. She built shape and form out of small dabs of paint, almost like puzzle pieces that fit together to make the image. Her works are abstract- meaning they don't look realistic. It's sometimes hard to tell what the painting is supposed to represent, but her descriptive titles help the viewer interpret her paintings. Here are some of Alma Woodsey Thomas's paintings, along with what inspired them-        For our own art-making, I asked students to think of something in nature that inspires them- something they feel strongly about and can remember in detail. It could be a happy spring day with birds singing, or the way the air smells after the rain, or maybe a scary, loud, thunderstorm! I gave them lots of ideas, but wanted them to choose for themselves. Their task was to represent their idea using only dots and dabs of color. We used oil pastels first, then painted over it with tempera cake paint. They did a great job!     
0 Comments
 This was a really fun activity for third grade students! The goal of this lesson was for students to experiment with some unusual art-making materials and to notice the unique characteristics of each. We tried to focus on the changes that occurred with each type of material, since "Change" is the main concept of their current IB unit. I set up each table in the art room with a different type of material, or media- our vocabulary word for the day. Students rotated between the stations so that every student got to explore all the materials. For some stations I gave guidance on how to best use the materials, and for other stations it was all about exploration. By the end of the two-day activity, students had explored multiple new ways to make art! The last part of each rotation was for students to make notes about the characteristics of each material and reflect on the changes they observed. At the end of the class, we combined our observations into a group list.  Here are the materials we explored: Ice Paint- Liquid watercolor frozen in an ice-cube tray, with a wooden pick inside to make a handle.  Student observations:
Puffy paint: made with shaving cream, white liquid glue, and a bit of tempera paint.  Student observations:
Watercolor and salt: Coarse salt sprinkled over very-wet watercolor paint.  Student observations:
Baking soda and vinegar paint: I mixed a box of baking soda with several packets of powdered drink mix, and put the mixture in salt shakers. Students sprinkled a layer of powder on their papers and then dripped vinegar on top.  Student observations:
Bubble prints: A mixture of water, dish soap, and tempera paint. The students blew bubbles with a straw and then laid their paper on top of the bubbles to capture a print.   Student observations:
Oil pastel and watercolor resist: Students made marks with a white oil pastel, then painted over them with watercolor to make the lines appear.  Student observations:
Texture tools: Students drizzled paint onto their papers and moved it around with a variety of utensils to create varying textures. 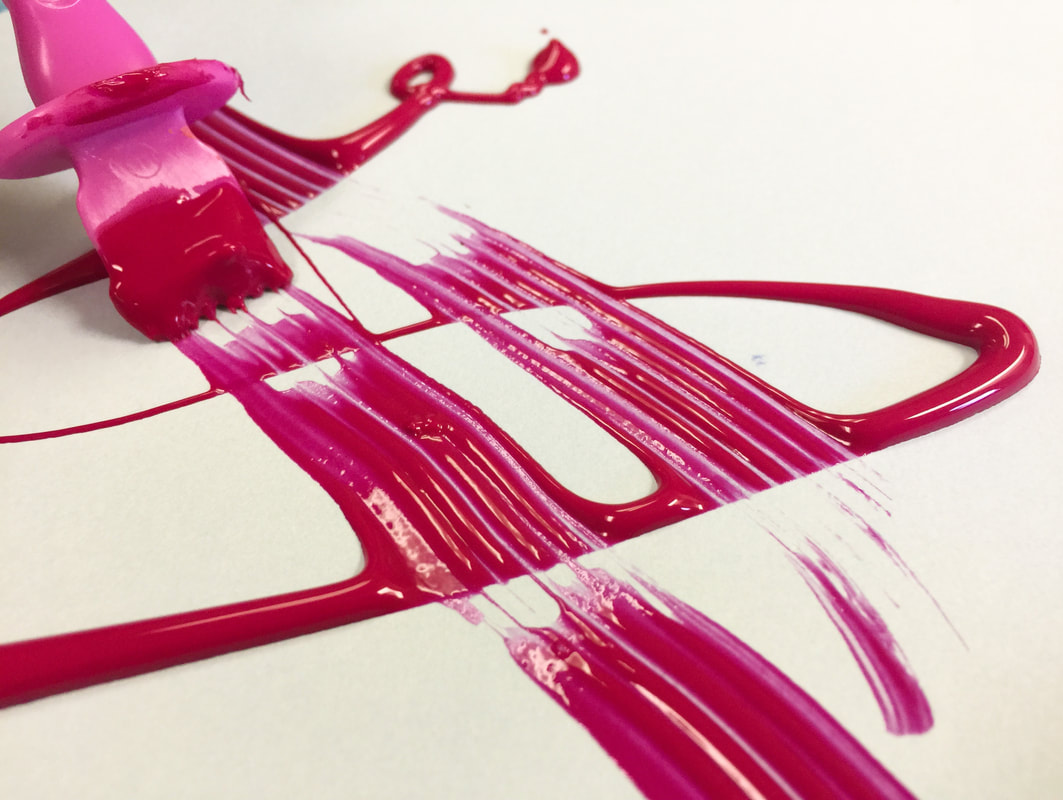 Student observations:
This was a really, really fun lesson, but a really, really messy one, too! It was definitely worth the mess. . . lots of good learning happened!   At the close of the lesson, I shared a few short videos with students. These videos all feature artists who really "think outside the box" as far as materials and techniques go! It was a fun way for students to visualize where this experimentation could eventually take them! This artist uses force and motion and gravity to use paint in a whole new way. This artwork is proof that you can make art out of ANYTHING. This is NOT a kind of art I ever want to try. Yuck!! These are the tiniest works of art you will ever see! This video was the kids' favorite. They begged me to let them try it someday. We might be able to do it on a smaller scale- we will see! My goal for this activity was to show kindergartners how Art can be a way to communicate. Students have been learning about communication in many forms- writing, speaking, singing, even through picture symbols. In this lesson, they experienced art-making to communicate feelings. We looked at several examples of art that portrayed a clear mood. This led to lots of good discussion- we looked at this painting, Picasso's The Old Guitarist, and they immediately said "he's sad!" When I asked them HOW they knew he was sad, they had great answers. Students explained that his head was hanging down, he looks tired, and his clothes are ragged and dirty. It took a little guiding to get them to realize the significance of the color blue, and that it was a symbol for sadness.  This talk of colors led us into the next discussion. We looked at this painting with the bold red slashes, and discussed how red is often a symbol for anger. I told them that sometimes when we're really mad, we even say "I'm seeing red!!" 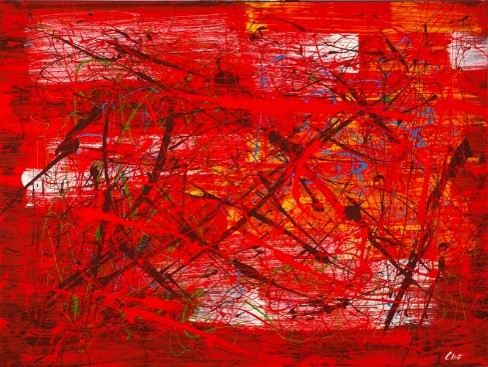 I had each student pretend to hold an imaginary paintbrush and slash their arm through the air like they were making the marks in this painting. I asked them to think about a time they were really mad, and let that energy come out in the movements they were making. Then we looked at some paintings with bright happy colors. One student commented that when you're feeling happy, you might want to jump up and down, and it looked like the shapes in this painting were bouncing and jumping! What a great observation!  We also looked at dark, scary, paintings:  And lonely, empty, artworks:  And artworks that were almost vibrating with excitement!  Then it was time for students to make some expressive marks of their own. I played several selections of music, each with a different emotion- happy, sad, angry, scared, excited, calm, and proud. Each student interpreted that emotion through the marks that they made. Here's a short video demonstrating some of their interpretations! The second day's activity was an extension of learning from the first day. This time instead of focusing specifically on expressing emotion, students painted to music and responded to it. Their goal was to represent the sounds they were hearing with lines on their paper. I told them to picture their paintbrush dancing to the music! Here is the second short video. I was pleased with how thoughtful the students' marks were, and they LOVED painting this way! For a fun end to our lesson, I shared the video below with students. It's a good example of making marks in response to sounds. Each unique sound is represented by an individual line that reflects the changes in pitch and tempo. We talked about how each line was like a symbol for the sound it represented.  This year Hendrix participated in International Dot Day 2017. On this day each year, artists all over the world celebrate the creativity and inspiration found in Peter H. Reynolds' book The Dot.  The Dot is the story of a young artist named Vashti who thinks she can't draw. Her teacher tries to help her by saying "Just make a mark and see where it takes you!" Vashti angrily jabs her pencil into her paper, leaving a black dot behind. The next time Vashti comes to Art, she sees her black dot hanging on the wall! She says to herself "Hmmph. I can make a better dot than that!" And she does! Her teacher's encouragement and support was all Vashti needed to be successful. By the end of the story, Vashti has taken on the role of teacher, and the book ends with her helping a little boy learn to "make his mark!" The book has inspired artists all over the world, and each year in September, International Dot Day is celebrated! This year over 10 million artists in over 170 countries were part of the celebration- and our Hendrix artists were included in that number!  Hendrix artists celebrated by making their own dot-inspired artworks. These paintings will be on display at our school during the month of September. I am looking forward to this being a new tradition for our school!              After we finished our paintings, students loved hearing this message of inspiration from The Dot author Peter H. Reynolds! It was almost like getting to meet him ourselves! We are already excited to celebrate International Dot Day 2018!  This activity is loosely tied to 1st grade's current focus on communities. Students are learning that in order for a community to function, its members must work together. Everyone must do their part, and people must be willing to share the responsibilities! And that is what I asked our kids to do with this project- they had to function as a team, kind of like a mini-community, in order to accomplish a task. They had to share their ideas, listen to others, and make compromises in order to meet their goal of creating a collaborative piece of art. Each team had a bucket containing the same supplies- pipe cleaners, popsicle sticks, newspaper, aluminum foil, and clear tape. They could make ANYTHING they could dream up- but, everyone in the team had to be on board with the idea and everyone had to participate equally.  For the first half of our class time, I had them work without any assistance or guidance from me. I wanted students to experience the inevitable problems, and to have to find solutions independently- I think this is one of the most important skills students can learn from making art.   After about 20 minutes of work, I had students leave their in-progress creations and gather back as a group to discuss the process so far. I asked them to share what problems their teams had encountered and what they had done to get back on track. One team shared that they had run out of tape, but they figured out how to wire pieces together with the pipe cleaners instead. Another team had a disagreement on what to make- one member wanted a princess while another member wanted animals for a zoo- I'll share their creative solution later! With some guidance, students have been able to verbalize how working on this group project was kind of like being part of a community- that you had to help each other and make sure everyone had what they needed. That was my goal for the lesson! After the discussions, teams had a few more minutes to finish their projects. We ended the lesson with an opportunity for each team to share what they made! Here are some of their very interesting creations--  A sled with two people wearing coats and scarves.  A mama snake with her egg in a nest.  I love this one!! It's a lightbulb- see the swirly yellow to show that it's glowing? And the silver ball at the bottom is the chain that you pull to turn the light on and off!  This is a monster- see the eyes made from tape dispensers? The black pipe cleaners are laser beams shooting from the eyes!  This is the beginnings of a city scene- can you see the red stoplight? And the car in the parking lot?  This was the solution to the princess-or-zoo question... In this scene, Rapunzel is being chased up her tower by a gorilla! But the prince is on his way to rescue her!! What a good compromise!  This is a solar eclipse! The shape on the right is the sun- see how the popsicle sticks make rays of sunlight? And the orange pipe cleaners are the sun glowing around the shadow. And the creation on the left is a pair of eclipse glasses!! I LOVED watching our kids work through this project- we'll definitely be doing this again!
Our schedule has changed a great deal this year. It's been quite an adjustment for both the teachers and the students, but things are settling into place well. We are now using a rotation schedule, and we have A-week, B-week, and C-week. One benefit of the new schedule is that students in 1st-4th grades will have hour-long sessions for Art this year, increased from the 45-minute classes we had in the past. Kindergartners will have half-hour sessions, but will come to Art twice as often. It works out that in each three-week cycle of the rotation, all students will have 2 1/2 hours of Art! Each Friday, all art classes will last only 30 minutes, and each classroom will have one Friday session in each three-week cycle. Since our "Friday Sessions" are so short, we'll use these days for skill-builder exercises, rather than continuing our regular art projects. I'm excited to get to try some new activities with students! This session's activity was based on a new book I discovered over the summer, called "Swatch: the Girl Who Loved Color." Here's a preview video from the publisher- "Swatch" is an imaginative little girl who sees colors as wild, free, creatures. She tries to tame the colors and trap them in jars. She soon realizes that the colors aren't meant to be tamed, and instead should remain free. She releases the colors and they swirl together, making a masterpiece.  Swatch describes her favorite colors with wonderful figurative language. She gives colors names like "rumble-tumble pink", "bravest green", and "in-between gray." After we read the book, students were asked to name their own color and write a description of it.                This artist even drew his own interpretation of Swatch, riding the colors through the sky!  And this artist drew herself as Swatch, complete with stripes of face paint like the character in the book! At the end of the lesson, students shared their color creations with each other.  I always try to have my kindergartners paint on the very first day of Art. I know that might seem like a lot to expect, since many of them have never been in school and have never even held a paintbrush (some not even a pencil!) but I like that it makes their first art experience a memorable and engaging one. This year, I introduced the painting process with my new favorite book- "To Be An Artist".  The book celebrates all different types of art forms. It teaches that making art is not always just drawing, painting, and sculpting- playing instruments, singing, dancing, weaving, sewing, acting, and even creative writing are all ways of making art! My favorite thing about the book is that it is written with a global perspective. The images from the book are of children from all over the world!     After seeing the children in the book making art, we were ready to make our own artworks. My goal for this lesson was really just to get a paintbrush in each child's hand- I wanted to give them the experience of painting, rather than focus on making a finished product. Students worked with a partner to make large collaborative paintings that we added to each day. By the end of the week, and after multiple painting sessions, lots of little hands had contributed to each artwork!        Here are some of the finished paintings- they are so bright and beautiful!    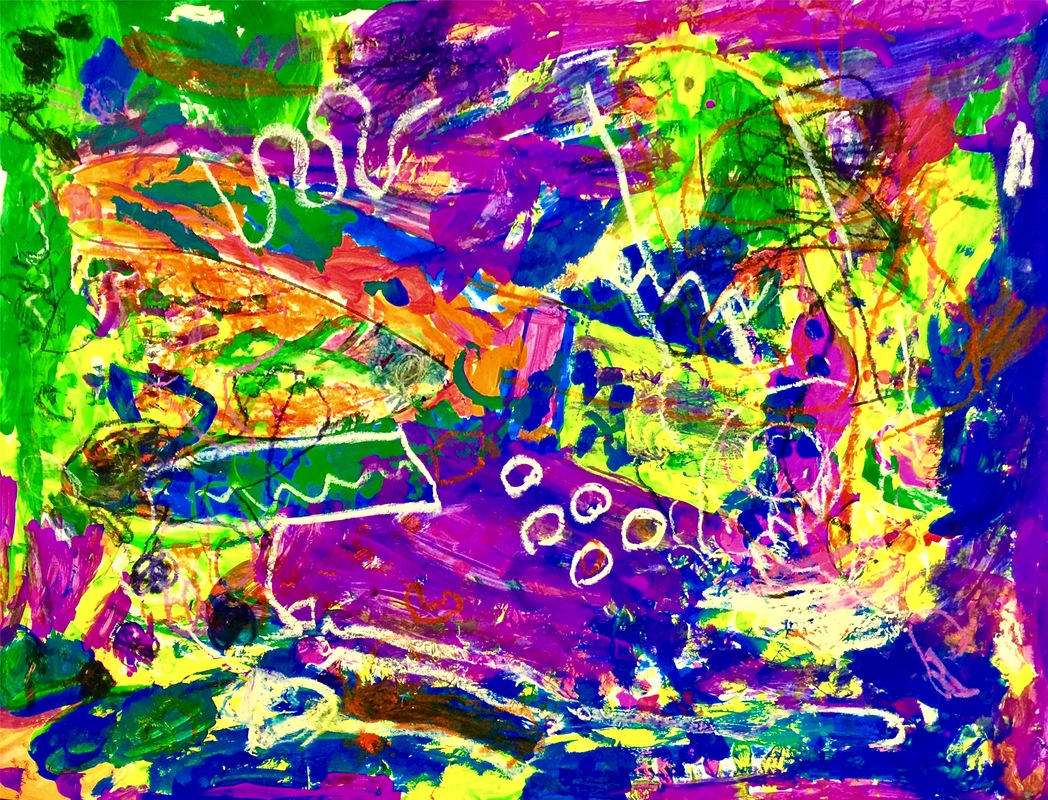   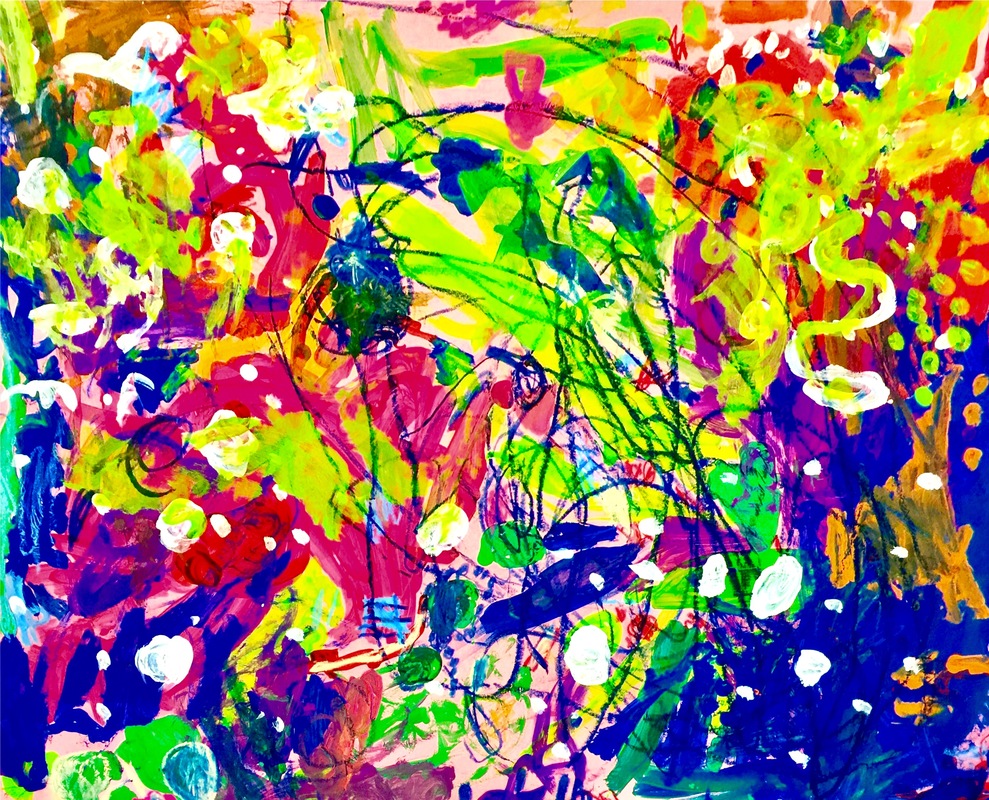 This map-making project concludes second grade's art lessons for the year. This project fits with the map skills unit students have just completed in social studies. In Art, students learned about cartography- the art of making maps! I started the lesson by showing this 2-minute clip from the Wizard of Oz. It's the scene where Dorothy sees Oz for the very first time. I asked students to imagine that like Dorothy, they were experiencing a new land for the first time. What kind of land would it be? How would things look different? We used these imaginative maps as our inspiration...    (Map images are from the Etsy shop PaintandInk.) My kids were SOO excited to begin this project!! Normally this close to summer, students get a little wild and hard to manage, but these second-graders were the most focused I have seen them all year! They LOVED this project! The requirements for the maps were that they had to show both land and water, have a title, and have a legend/key and a compass rose. Anything else was up to them! I wish I'd started this project a little sooner- we didn't have time to finish. I let students take their maps home with them to complete since we ran out of time. Next year I'll start this project a couple of weeks sooner! Here are some of the in-progress map drawings.      This was a brand-new lesson I developed for kindergarten. It's similar to content I teach to older grades, and I was unsure if kindergartners would be able to grasp the abstract thinking required. I think they did very well! This activity is meant to support K5's Symbols unit. They studied symbols in math (like addition or subtraction signs) symbols in our community (such as road signs) and even symbols in our culture, like the bald eagle and the Statue of Liberty! In Art, our objective was to explore ways that art communicates ideas without using words, just like symbols are a way of representing ideas. This is a big concept for kindergarten brains to grasp! We started by comparing these two artworks:
These two paintings have very similar content- both features musicians- but the emotion in each painting is completely opposite! In our whole-group discussion, we identified that the differences in the artworks' moods come from both the COLOR (one painting is a dull, blue, tone, which communicates sadness and despair, while the other is bright, cheerful reds and pinks) as well as the ENERGY (the guitarist's body language is sad- his head and body are drooping- but the jazz musicians are standing tall and looking up! You can almost see them dancing!) We looked a little further into the idea of energy as communication through this video of a dancer using her body to portray feelings. I asked to students to look at how her body moved and try to identify how she may be feeling. This next video was the students' favorite part of the lesson! They loved getting to see familiar characters, yet analyzing them in a new way! We watched each character's part of this "Inside Out" video separately. After watching the part introducing Joy, I asked the students to think about what her body was doing- dancing, jumping, and flipping! Then each student painted a line representing that feeling- their lines were dancing, jumping, and flipping too!  The next character was Sadness- we compared her entrance to Joy's. Sadness enters the screen by plodding slowly along- no jumping and flipping for her! So the students painted slow, even, lines.  Next was Anger- we watched the video to see his harsh, bold, slashing movements, and the students replicated this in the lines they painted.  The character of Disgust was really hard! Fear was tricky as well- we imagined that he was so scared he was shaking, and so the students made nervous, quivering, lines.  To finish, students chose colors they thought matched each feeling and painted the white spaces of their artwork. Most students chose yellow to represent happiness, blue to show sadness, and red for anger. The other emotions were a little more subjective!     Overall, this activity allowed for lots of critical thinking, and I'm already excited to teach it again next year! Fourth grade's art show project ties in with our current focus on Japanese culture, culminating in our annual Cherry Blossom Festival. The artwork fourth graders created for the show was inspired by the work of contemporary Japanese artist Yayoi Kusama. Click here to read a summary of Kusama's life and career.  Yayoi Kusama is nicknamed the "princess of polka-dots." She uses a dot theme in almost all of her work. She is a painter, sculptor, and fashion designer.   Fourth graders had a LOT of creative freedom with this project. I told them the only requirements were that their art has to have a circle theme, and that it had to fit in the frame. Other than that, the possibilities were endless! They could choose paint, crayon, marker, oil pastel, collage, chalk, or anything else I had available.    I absolutely love how unique each of these artworks is. It's amazing how you can see each student's personality in their work!             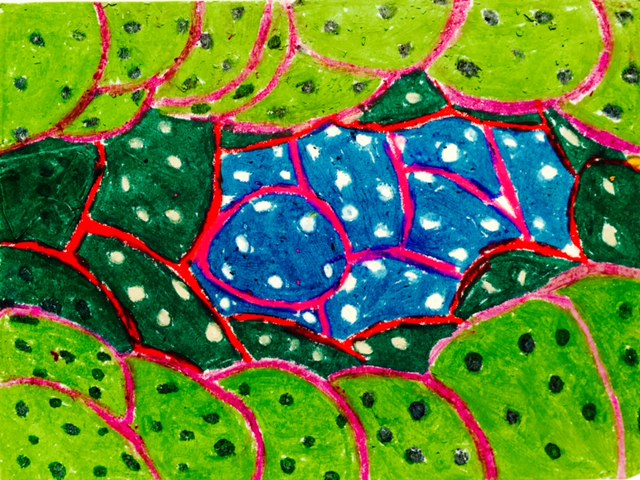    I asked students to write a short statement explaining where their ideas came from. Here are some of their thoughts: “I was inspired by Yayoi Kusama’s mix of little and big circles.” “My artwork reminds me of seeds flying through the sky.” “I was inspired by the colors and details that her pictures had. She had lines in her background so I added them to mine.” “My artwork reminds me of cinnamon rolls because one of my circles looks like a cinnamon roll twist.” “I was inspired by the bright colors in her paintings. My artwork reminds me of the bright colors I see in Mexico.” “My art reminds me of a paintball gun shooting the wall.” “I was inspired by cartoons, and my artwork reminds me of the animals from Put Me in the Zoo by Dr. Seuss.” “My artwork reminds me of all the ice cream flavors at the shop.” “I think this piece of art would match the song Raindrops Falling on My Head!” “My artwork reminds me of planets in the galaxy.” “What inspired my art was doughnuts with sprinkles.” “My artwork reminds me of when springtime flowers pop up and bloom.” “I was inspired by a paint tray with all the colorful circles on it.” |
Archives
March 2018
Categories
All
|


 RSS Feed
