|
My younger students spent last week practicing drawing geometric forms. It teaches them to draw from observation- to notice the length of lines and the overlapping of shapes. It teaches them to draw what they actually see. We started by drawing cubes. It was interesting that in almost every class, a student told me, "But we already know how to draw cubes!" They meant this type of drawing:  I explained to them that this was a "math-style" cube. You draw it the same way, every time, without having to look at an actual cube. You are drawing it based on information from your BRAIN, rather than from your EYES. I asked each student to pick up one of the foam cubes and hold it in front of them at eye-level. Then we lifted them higher, and lower, and twisted them to the left and to the right. We observed how the lines and angles and shapes changed depending on how we looked at the cube. To start the drawing practice, I had students draw just the cubes to begin with. I set a timer for five minutes and asked them to draw the cube over and over until the timer stopped. It was not a race or a contest to see how many they could draw- instead, I wanted them to focus on drawing it more realistically and accurately each time. At the end, I asked the students to look back at their first cube and compare it to their last- most of them agreed, the more they drew it, the better they got!  a second grade example  a first grade example  a kindergarten example Next, students chose a variety of shapes and arranged them into an interesting composition. At the beginning of the week, I let each student pick from the whole tub of shapes, but as the week went on I made bags of shapes to save time, and just let them pick the color. 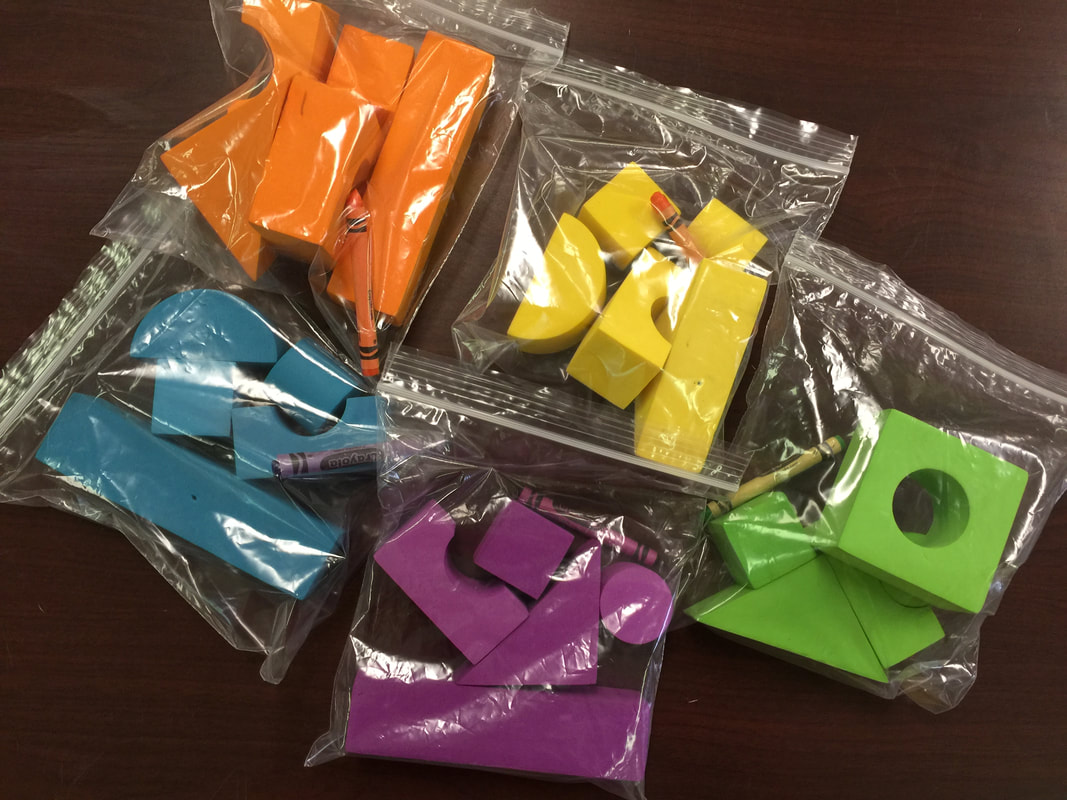  This drawing task was a challenge for kids- some of their brains were just not quite ready to grasp transferring a three-dimensional shape into a flat drawing. But some of them really got it! It was interesting to see the varying ability levels in each grade level. Some of the kindergarten students were more successful than some of the second graders! It just depends on how ready their brains were. But, it was a good exercise for all students. It helps them begin to look at objects like an artist. I tell them all the time, "You use your brain to make art just as much as you use your hands!" I worked very hard to keep it from being a frustrating lesson for the students who weren't quite ready. I made sure they each knew that I just wanted them to TRY this drawing, and that it was just practice and we wouldn't be hanging them up in the hallway.  second grade  first grade  first grade  kindergarten 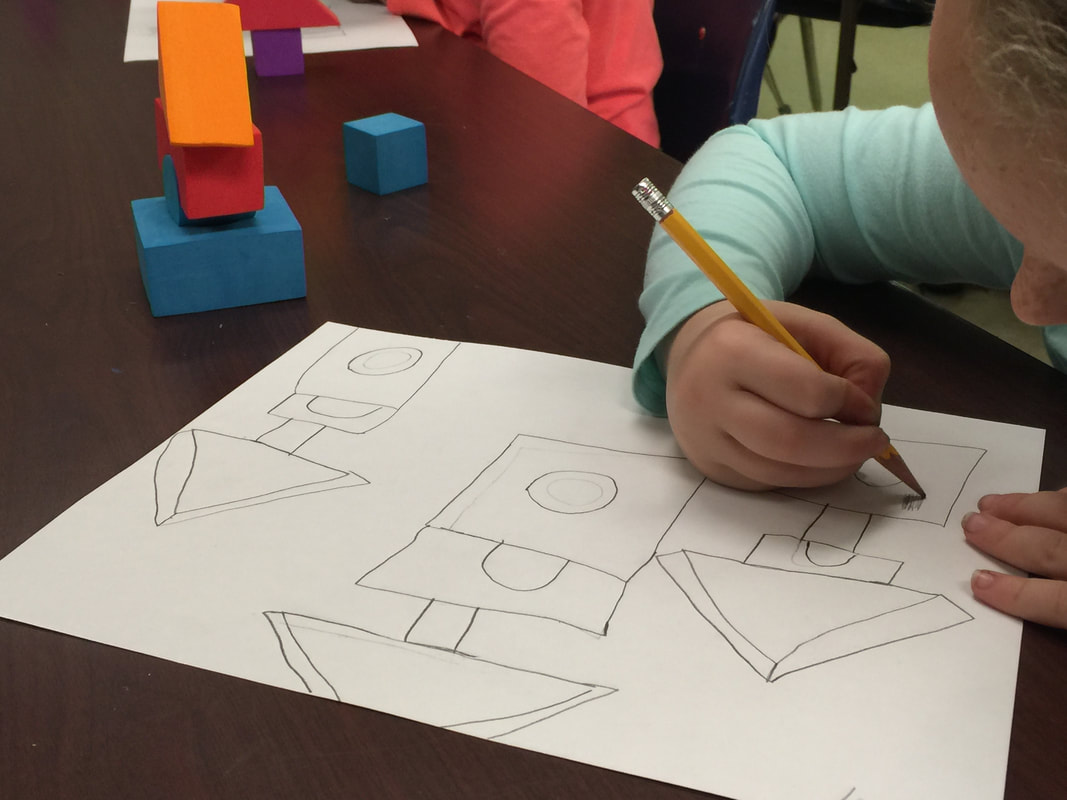 second grade  first grade  first grade  second grade The next step was to introduce kids to the concept of shading- showing the darks and lights, the highlights and shadows. Again, some kids were not quite ready to grasp this, but some did great!  first grade  kindergarten  first grade  kindergarten  second grade I am interested to see if this drawing practice makes a difference in the observational drawings we'll do in the future!
0 Comments
Third grade students tackled a big subject in their latest project . . . Art as a method of bringing social change. We began by talking about some of the reasons artists make art- sometimes it's simply for enjoyment or to bring beauty to the world, but sometimes it's for a greater purpose, like to educate viewers about a topic or encourage them to think about something from a new perspective. Students were already familiar with the idea of an author writing for a specific purpose- such as to entertain, persuade, or inform- and were able to apply those concepts to art-making. I asked students to think about our society, and to choose something they didn't like about the world we live in. I offered a few ideas to get them started, such as bullying, pollution, or animals in need, but encouraged students to think of an issue that has affected their own lives. Their goal was to create an artwork that would communicate a message about their chosen topic and would inspire change in their viewer. This project was very student-driven. I offered students access to many different art supplies and encouraged them to choose what they were comfortable with and what would best communicate their ideas. Students could choose from paint, markers, colored pencils, white or colored paper, and various collage materials. Allowing the students this much choice really helps students to be invested in their work and committed to doing their best. Here are some of the finished projects. While the artworks are not as polished as I would like them to be, I think the message behind these works makes them each successful. Several students chose topics that were very personal to them. I was proud of them for being risk-takers and being willing to share their feelings!  "I am sad because there are kids that do not have friends. I wish kids would have friends and never be lonely. Some kids don’t have friends and that makes me sad. I wish kids were not lonely. I would like to help people that don’t have friends. I would like to change the world by giving everybody friends and nobody being mean." 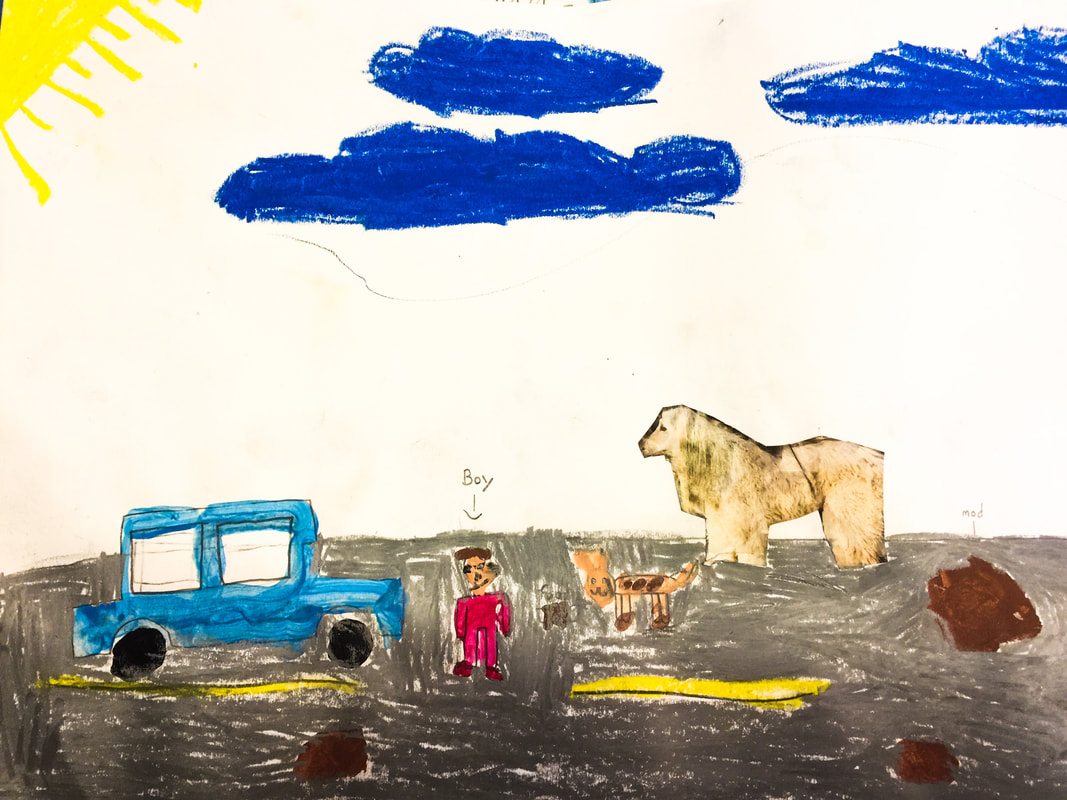 "Please help the dogs. Help dogs that are homeless. Help them by giving them food and water. I drew a person giving food and water to a dog. We can help collect money and food for the animal shelter."  "My change is for my family to stop fighting. Then we will be a happy family. Then we will have a good life. My picture shows my family. We are being nice to each other in my painting. It shows hearts so you will see we are a happy family." 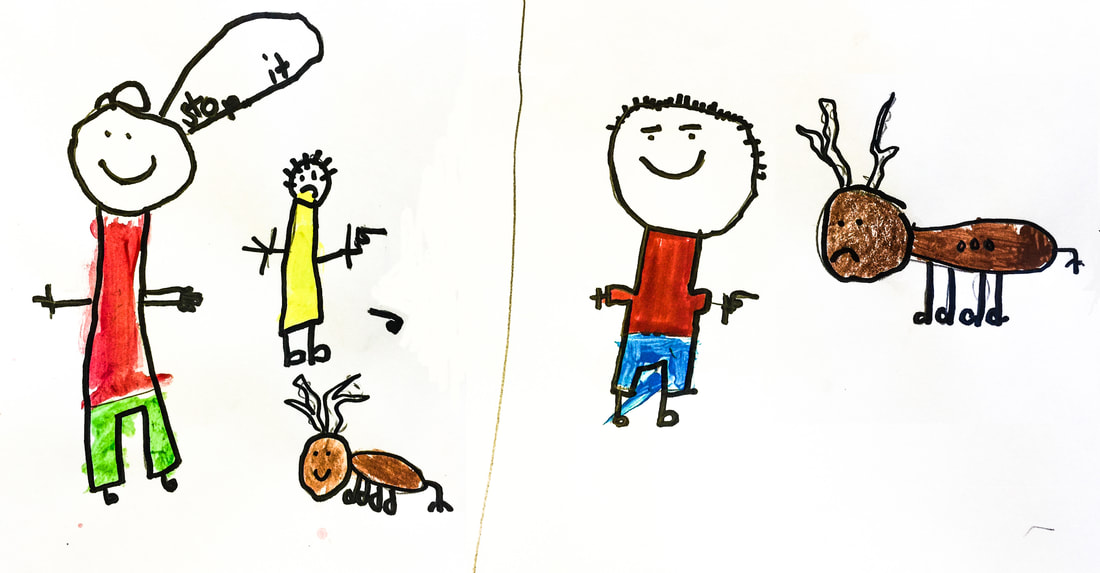 "We need to stop killing deers. Hunting is bad because it hurts the animals. We should keep the deers alive because they are beautiful and Santa needs the deers."  "The change I want to make is to change the world by being a teacher. I want to help children learn about math. My art has six children and a teacher and the children have notebooks open and they have pencils in their hands and there are chairs and desks and a board. Teachers are important because they help us learn."  "We need to stop oil in the ocean. Otters and beavers get stuck. They also get stuck in the soda holders. They choke and they can’t get out. People have to save them. My art shows an otter. There are blue tears on his face. The black oil is all around him."  "I want to see everyone accepting each other. I want to see new colors and people liking the new colors. I showed this because people need to change and love each other in life. We can change our ways in life and make better choices."  "My change is to make people not be on the road in a storm. You will get a message when a storm is about to happen and will get cover. People will all have homes and be protected and be safe."  "My change is to stop littering. My art shows if you don’t stop it this is what’s going to happen. Just look at it- there are no trees, there is nothing left because of littering. You should start now or later. If we do this everything will last forever. It will help Earth a lot."  "People should stop smoking. It is dangerous. It smells bad. It hurts our lungs. It makes us very sick. It makes your lungs black. You will have a crazy voice when you use a machine to talk." 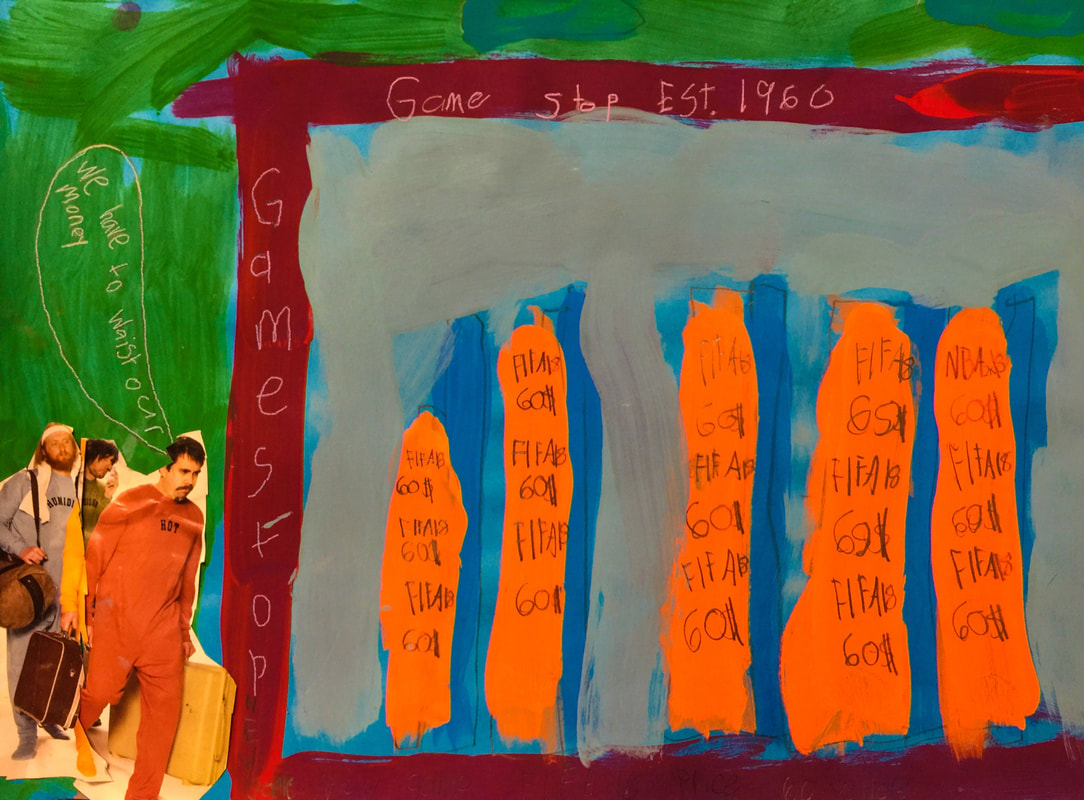 "My change is to make stuff not cost much money. Some people don’t have enough money to buy stuff. In my picture stuff costs $60. There are three men holding a suitcase and their faces are mad. We should tell the president to lower the prices. We can also tell the people that work at the stores."  "My change is to stop killing animals. I feel depressed when I see one die. My art shows a person killing a dog/cat. Then it shows two dogs eating. It says let them eat food too. It also says to donate money to animal shelters to start the change. You should spread the word to other people."  "I want people to stop drinking. I know people that drink. I don’t want them to get in trouble. My painting shows that my uncle died in a wreck with a tree. I know where he crashed. It is too late for him. But not too late for other people. This painting shows my mom. She is crying because my uncle died. The sign shows no drinking. I painted the tree and the crashed car."  "People are crashing cars and they die from the crashing. They don’t want to die. They crash because they don’t watch where they are going and they are on their phones and they don’t see where they are going. My change is for them to stop looking at their phones and look where they are driving." On the last day of the project, I introduced students to some master artists whose work addresses social issues. Typically I show other artworks at the start of a project; however this time I intentionally waited until students' work was well underway. I wanted them to think for themselves rather than copying imagery from another artist. Here are a few of the works we looked at:  Keith Haring: themes of love and peace Keith Haring began his art career by creating large chalk drawings that he displayed in subways cars in New York City. His work was seen by the many people riding the subway each day. His imagery often shows love and friendship. As his career grew, he began painting murals in buildings like schools and hospitals. His later work focused on raising money to find cures for illnesses.  Marisol Escobar: feminist issues This sculpture is a portrait of President Lyndon B. Johnson. The small figures he is holding in his hand appear to be birds; however, when you look closer you realize they have people's faces. They faces are those of his wife and two daughters. The bird shapes are a reference to his wife, Lady Bird. The contrast in size makes him seem very powerful, while the female figures seem less important- almost like pets. This artwork points out the unbalanced power between the male and the females.  Romare Bearden: celebrating African-American communities Romare Bearden was part of the Harlem Renaissance in New York City. Some of his most famous works are his collages featuring African-American neighborhoods. He wanted to celebrate the communities and give others a glimpse of what life was like. This image, which is part of a large artwork called The Block, shows a group of street musicians performing outside a barber shop.  Kerry James Marshall: civil rights Kerry James Marshall was a child in the 1960's, and grew up during the civil rights movement. His artwork celebrates the leaders of the time and the sacrifices they made. In this painting, a woman is creating a shrine to the leaders of the time. She is dressed all in black to symbolize mourning their loss, and is painted wearing wings like an angel.  Chris Jordan: waste, excess, and consumerism This artist is the most contemporary, and the one that students were most interested in. Chris Jordan creates digital collages representing all the things we waste every day. The above artwork is a copy of Seurat's painting Sunday Afternoon on the Island of La Grande Jatte- but when you look closer, you see it's made up of soda cans! He explains that this artwork is made of 106,000 cans- the amount the US uses every thirty seconds. The gallery on his website is quite interesting, and really puts into perspective the resources our country wastes. Here are his other works I showed to students: Building Blocks: representing the 1.2 million students who drop out of high school each year Car Keys: shows the 260,000 gallons of gasoline used by U.S. cars in one minute Plastic Bottles: the 2 million plastic drink bottles we use every fifteen minutes We finished up with this video featuring an artist from Uganda, "Mr. Art", and how he hopes to inspire change in his city of Kampala through his artwork.  This was a really fun activity for third grade students! The goal of this lesson was for students to experiment with some unusual art-making materials and to notice the unique characteristics of each. We tried to focus on the changes that occurred with each type of material, since "Change" is the main concept of their current IB unit. I set up each table in the art room with a different type of material, or media- our vocabulary word for the day. Students rotated between the stations so that every student got to explore all the materials. For some stations I gave guidance on how to best use the materials, and for other stations it was all about exploration. By the end of the two-day activity, students had explored multiple new ways to make art! The last part of each rotation was for students to make notes about the characteristics of each material and reflect on the changes they observed. At the end of the class, we combined our observations into a group list.  Here are the materials we explored: Ice Paint- Liquid watercolor frozen in an ice-cube tray, with a wooden pick inside to make a handle.  Student observations:
Puffy paint: made with shaving cream, white liquid glue, and a bit of tempera paint.  Student observations:
Watercolor and salt: Coarse salt sprinkled over very-wet watercolor paint.  Student observations:
Baking soda and vinegar paint: I mixed a box of baking soda with several packets of powdered drink mix, and put the mixture in salt shakers. Students sprinkled a layer of powder on their papers and then dripped vinegar on top.  Student observations:
Bubble prints: A mixture of water, dish soap, and tempera paint. The students blew bubbles with a straw and then laid their paper on top of the bubbles to capture a print.   Student observations:
Oil pastel and watercolor resist: Students made marks with a white oil pastel, then painted over them with watercolor to make the lines appear.  Student observations:
Texture tools: Students drizzled paint onto their papers and moved it around with a variety of utensils to create varying textures.  Student observations:
This was a really, really fun lesson, but a really, really messy one, too! It was definitely worth the mess. . . lots of good learning happened!   At the close of the lesson, I shared a few short videos with students. These videos all feature artists who really "think outside the box" as far as materials and techniques go! It was a fun way for students to visualize where this experimentation could eventually take them! This artist uses force and motion and gravity to use paint in a whole new way. This artwork is proof that you can make art out of ANYTHING. This is NOT a kind of art I ever want to try. Yuck!! These are the tiniest works of art you will ever see! This video was the kids' favorite. They begged me to let them try it someday. We might be able to do it on a smaller scale- we will see! Third Grade celebrated fall colors this week! We did an inquiry-based color mixing activity. I asked them to closely study a fall leaf, notice the wide variety of colors, and recreate as many as possible by mixing and blending basic colors of paint. Students were to be inquirers and find the answers to these questions:  Rather than give instructions on how to make the colors, I wanted students to figure it out for themselves through experimentation. I wanted them to notice the effects of adding new colors- for example, what change would adding brown cause? What about adding brown and green together? What if I added peach or yellow next? Students were very successful in matching the colors. I was pleased with their enthusiasm and perseverance! We worked on this for the full hour, and they still weren't ready to clean up when our time was over!         Some students had time to think of creative names for their color creations. They had some really fun ideas!    We had a special guest on Friday! Our principal, Mrs. Humphries, was able to come in and paint with us for a while!  She is a pretty talented color-namer!  Our school has an event coming up that we call our "Hendrix Family Fiesta". Part of being an IB school means celebrating all the cultures that make up our school family. This event will honor the traditions and celebrations of Mexico! While researching traditional art techniques of Mexico, I learned a LOT! I wish we had longer than one class period to explore Mexican art and craft together, but we only had one hour. Though Mexico has a very rich history in the arts, I decided to focus our learning on something our students would be familiar with - the technique of papel picado, or "punched paper". This craft originated in the Mexican state of Puebla, in the town of Huixcolotla, and spread to other parts of the country.   The traditional technique involves a skilled craftsman using a variety of chisels and a hammer to punch through many sheets of paper at once. The design can take hours to create, and templates are made so that a design can be repeated. The subject matter of the designs often features the beauty of nature- like flowers, birds, or fruits, but can really be any design. The technique is a tradition usually passed down from parent to child. These images are of papel picado craftsmen using the traditional method.   We watched a small portion of this video to get a better idea of how the process works. We started watching at about the 1:34 time. I learned from my research that different colors of papel picado are used for different types of celebrations. Pinks, oranges, and purples are often used to celebrate Dia de los Muertos, while different shades of purple are used at Easter. The colors of the Mexican flag are used to celebrate Mexico's Independence Day, and rainbow colors are used for the Christmas season as well as non-religious events. Our version of the papel picado technique is very simple, but still beautiful! Students folded colored paper using a pleating fold, then used scissors to cut out simple shapes. When opened, the papel picado looks like delicate lace! We used masking tape to connect the pieces together.          I think our students really enjoyed getting to experience this traditional art-making technique. I hope it helped students to respect and honor traditions of the past. I am looking forward to celebrating more at our Fiesta later this week!   This year Hendrix participated in International Dot Day 2017. On this day each year, artists all over the world celebrate the creativity and inspiration found in Peter H. Reynolds' book The Dot.  The Dot is the story of a young artist named Vashti who thinks she can't draw. Her teacher tries to help her by saying "Just make a mark and see where it takes you!" Vashti angrily jabs her pencil into her paper, leaving a black dot behind. The next time Vashti comes to Art, she sees her black dot hanging on the wall! She says to herself "Hmmph. I can make a better dot than that!" And she does! Her teacher's encouragement and support was all Vashti needed to be successful. By the end of the story, Vashti has taken on the role of teacher, and the book ends with her helping a little boy learn to "make his mark!" The book has inspired artists all over the world, and each year in September, International Dot Day is celebrated! This year over 10 million artists in over 170 countries were part of the celebration- and our Hendrix artists were included in that number!  Hendrix artists celebrated by making their own dot-inspired artworks. These paintings will be on display at our school during the month of September. I am looking forward to this being a new tradition for our school!              After we finished our paintings, students loved hearing this message of inspiration from The Dot author Peter H. Reynolds! It was almost like getting to meet him ourselves! We are already excited to celebrate International Dot Day 2018!  I wanted to take a minute to explain the behavior expectations for when your children are in the Art room. I always express to students that the Art room is a shared space, and about 700 students use it each week. This means we have to make good use of the limited time we have together and make each class period as productive as possible, as well as take good care of our materials and equipment so everything will be ready for the next group of kids! Each classroom in our school begins the year by developing a list of expectations called an "Essential Agreement." This is IB terminology for behaviors each member of our class agrees are necessary for a functional and pleasant place to learn. I ask each student to sign their name to our Art Room Essential Agreement. This signature creates a contract between each student and the other members of the class. I explain to the students that it's like making a promise. When misbehaviors occur, I can remind each student of the promise he or she made to follow our expectations.  In each class session, I select one student to honor for doing a particularly good job. Their reward is a cupcake sticker. Let me explain what cupcakes have to do with making art! It's all based on this rubric:  I explain to students that making Art is like decorating cupcakes. Sometimes students turn in work that is like the first cupcake on this poster- it's not even finished. The next category is what we call the "sloppy cupcake". The student made minimal effort and did not take pride in their work. I describe the third cupcake as being "fine". It's finished, all the requirements have been met, but it's nothing special. This represents artwork that's good, but not great. The final category on the rubric is our "fancy cupcake." THIS represents the kind of work I'm looking for- work that goes above and beyond expectations! This quality of work is what I reward with a matching cupcake sticker. So if you see your child bring home a sticker like this, understand that it represents a job very well done! It's important that children understand that this reward is NOT based on talent or skill, it's earned through EFFORT. All students, even those who struggle with Art and may not have a lot of natural talent, will earn a cupcake sticker at least once each year. I make sure that every student in the class is honored one time before any student earns a second sticker. As you may know, Hendrix participates in the Positive Behavioral Interventions and Supports program. The "PBIS" philosophy encourages good choices in our students. PBIS supports the use of a common language between all areas of a school. That common language is evident in what we call our "PACK expectations". We ask students to be "Part of the PACK" here at school. PACK is an acronym for being principled, appreciative, cooperative, and knowledgeable. Each area of our school has a system of expectations using this vocabulary. Our PACK expectations for Special Area classes are described in this chart:  Each time students attend a Special Area class, the teacher records their behavior on this chart and returns it to the classroom teacher. This helps us all maintain high standards for our students' behavior in all areas of the school. Each Special Area teacher tracks the points earned by each homeroom class, and the classes work toward earning reward days. In Art, our reward days involve fun activities like playdough, painting with shaving cream, or drawing outside with sidewalk chalk! Occasionally students fail to follow the expected behaviors in the Art room. When that happens, students first receive a warning. I keep cards with a stop sign picture on them, and if a student is making a bad choice (such as talking when they're not supposed to, or mistreating supplies, or not following directions) I place a stop sign card on that student's desk. This is a visual reminder that they need to "stop what they are doing and make a better choice," as the card reads. Usually this is all it takes to get a student back on track! If the problem behavior continues, that student will lose the privilege of making Art for the remainder of the day, and will instead complete one of these "Better Choices Sheets." This form is designed to help a student think about what happened and realize why it was a problem, as well as give them a chance to explain what was going on and how the problem started. I have two versions of Better Choices Sheets- one for older students, and one for younger kids with pictures to circle instead of writing a sentence. The form has a place for me to describe to parents what happened, and asks the parent to sign the form and have their student return it to me the next day. Fortunately these Better Choices Sheets are not a common occurrence here in our Art room- students would much rather be participating in making Art!  Parents, if you ever have a question or concern about our routines or expectations in the Art room, please let me know! To enhance their study of Native American culture, third grade artists got to make their own Native American paintbrushes this week! Long ago, people had to use whatever resources were available to meet their needs. They had to make the tools that were needed to get the job done. Paintbrushes were one of those tools! To start, we looked at modern-day paintbrushes and learned some terminology:  Students had already studied Tomie DePaola's book The Legend of the Indian Paintbrush. It tells the story of a young boy named Little Gopher and his journey to capture the beautiful colors of a sunset. The book describes how Little Gopher makes paintbrushes from animal hair and bone, and stretches buckskins for painting surfaces.   I asked students to create their own paintbrushes from natural materials like Little Gopher did in the story. Each brush needed to have a handle, bristles, and a ferrule- the part that attaches the bristles to the handle. I provided a few supplies- rubber bands and tape- but the method of construction was up to each student.       The next step was to actually try painting with these brushes! Each student used bright colors of paint to try to replicate Little Gopher's sunset painting.    We had just enough time left to do a little reflecting on these hand-crafted paintbrushes compared to modern-day brushes. Most students were thankful we live in a time where we can buy the things we need instead of having to make them!  "This was an awesome experience but I would rather be here because I could not live a day there. I love being creative but that's too much. It's easier being here. I love doing that kind of stuff but I'd rather do it here."  "In the old days people had to make paintbrushes. In the now days people buy paintbrushes from stores. I would buy a paintbrush. People don't make paintbrushes in the now days. They don't want to make paintbrushes. "  "It was so cool to build a paintbrush by myself. I am very glad I had the materials to build it. It was a fun experience, though I am glad I live in the time I am in." To further compare paintbrush-crafting methods of then and now, we finished up with this "How It's Made" clip of a modern-day paintbrush factory! Last year's group of third graders had a similar experience with making paintbrushes- click here to see examples! This project for third graders was inspired by the book Looking Down by Steve Jenkins. It is a wordless picture book representing a view of the world from above. The first page shows Earth from very far away- it's just a tiny dot! Then we move closer and see the texture of the moon, then closer to see shapes of the continents. Then roads and cities appear along with bodies of water like rivers and streams. Each turn of the page brings the viewer in even closer. Eventually we see a young boy on the sidewalk in front of his house. The next page shows a magnifying glass in his hand. The final page is a detailed view of the ladybug he's studying so closely. Each illustration is created with beautifully textured collage artwork.       I chose this book to share with students because they are finishing up a unit on landforms- rivers, streams, islands, peninsulas, mountains, plateaus, and more. I asked the kids to list them all for me and they went on and on! I wanted them to understand how these landforms are represented on a map, and that we look at them from an aerial perspective- as if we're looking down from outer space. Each student (or pair of students) chose an image I printed out from Google Earth. They used collage techniques, similar to those in the book, to recreate the landforms in the image. Their goal was to represent the shapes and textures as accurately as possible.              This was a one-day version of a similar project we did last year- the previous version involved painting and took about five class periods to complete. We just didn't have that much time this year! In our next art session, I'm planning to show students these artworks by sculptor Laura Moriarty. Her work connects really well to students' current learning about how the mountains and valleys of the earth are formed. We didn't have enough time this week, so I'll be sure to squeeze it in next time! Moriarty's wax sculptures are inspired by the folding and buckling and layering of the earth's surface. They are gorgeous!!   Here's a video of the artist at work- the way she folds and layers the wax is designed to mimic the way the earth folds in on itself to create layers of rock. Our schedule has changed a great deal this year. It's been quite an adjustment for both the teachers and the students, but things are settling into place well. We are now using a rotation schedule, and we have A-week, B-week, and C-week. One benefit of the new schedule is that students in 1st-4th grades will have hour-long sessions for Art this year, increased from the 45-minute classes we had in the past. Kindergartners will have half-hour sessions, but will come to Art twice as often. It works out that in each three-week cycle of the rotation, all students will have 2 1/2 hours of Art! Each Friday, all art classes will last only 30 minutes, and each classroom will have one Friday session in each three-week cycle. Since our "Friday Sessions" are so short, we'll use these days for skill-builder exercises, rather than continuing our regular art projects. I'm excited to get to try some new activities with students! This session's activity was based on a new book I discovered over the summer, called "Swatch: the Girl Who Loved Color." Here's a preview video from the publisher- "Swatch" is an imaginative little girl who sees colors as wild, free, creatures. She tries to tame the colors and trap them in jars. She soon realizes that the colors aren't meant to be tamed, and instead should remain free. She releases the colors and they swirl together, making a masterpiece.  Swatch describes her favorite colors with wonderful figurative language. She gives colors names like "rumble-tumble pink", "bravest green", and "in-between gray." After we read the book, students were asked to name their own color and write a description of it.                This artist even drew his own interpretation of Swatch, riding the colors through the sky!  And this artist drew herself as Swatch, complete with stripes of face paint like the character in the book! At the end of the lesson, students shared their color creations with each other.  |
Archives
March 2018
Categories
All
|
 RSS Feed
