|
This lesson is the start of a three-week long unit inspired by plants. First graders are currently studying plants in their science curriculum, so these art projects are designed to complement that. The goal of this week's activity was to encourage students to observe details in each leaf and be able to recreate them. Students will need this skill in a couple of weeks when we do detailed "scientific illustrations" of plants. Each student chose a half of a leaf and then created the other half. Ideally we would have used real leaves, but it's too early in the spring for trees to have leaves yet. So we used these photos from the internet instead.      
0 Comments
This lesson was a special request from one of our first-grade teachers. The northern lights are a phenomenon visible in any of the world's northern-most areas, but our focus for the week was on Alaska. The science behind the northern lights is way too advanced for first graders to grasp- we just learned that the lights are created because how the earth's atmosphere reacts to the sun's atmosphere.  We started with this fascinating video of the northern lights (the footage is actually from Scotland rather than Alaska, but it was a beautiful example!) To make our own version of the northern lights, students used colored chalk. They colored the torn edges of some scrap paper, then used a paper towel to blend the chalk dust into the background. The final step was to paint tree silhouettes and add sparkling stars to the sky!        I love teaching kids about color and the science behind it! It's one of my favorite things to teach, so I was excited when fourth graders started that part of their curriculum recently. They have been learning all about light- white light, how it can be divided into a spectrum of colors, and how objects either reflect or absorb light so that we can see that object's color! It's confusing for kids when they hear that all the colors of light blend to make WHITE, when I've been teaching them since kindergarten that all the colors of paint blend to make BLACK! With the help of this 5-minute clip from a Bill Nye episode, I hope they are beginning to understand. Now that they are learning about the color spectrum in science, it's a good time for us to talk about the color wheel in art. My students are already familiar with the color wheel- I teach them that it's a tool artists use to organize color. I start teaching it in Kindergarten, and tell them it's like a round rainbow. Now that fourth grade has the vocabulary word "spectrum" we can approach it a little more scientifically.  If you are unfamiliar with the color wheel, here's a one-minute introductory video. This is more information than I expect my kids to know, but it is a good overview of all the reasons artists need to understand how colors work together! The goal for today's activity was for students to mix colors to make their own complete color wheel, using just the three primary colors of red, blue, and yellow. I explained the color variances using fractions- green is half yellow and half blue, while yellow-green is 3/4 yellow and only 1/4 blue. This was all explained on this worksheet I made.  The dots in each circle represent spots of paint- each student was to use a q-tip to dot the correct color and amount of paint, then mix it all up to make the color! I told them it was kind of like following a recipe when cooking.    Here's an example of a completed color wheel.  The last step was for students to write some "color recipes" using fractions. This ties in very well with their current math focus.   They did a great job, and I hope this helped them better understand light, color, AND fractions!
I am very pleased at the amount of success students had with this project! We began these paintings when third grade was in the middle of their unit about rocks and minerals. They experienced an in-school field trip where they got to go mining for real gemstones! Each student took home a collection of beautiful rocks. The students were so excited when I told them they would get to design their own crystals!  One of my favorite parts of this project was that I got to sneak in a lot of math skills. Students got lots of practice using rulers, though we used them more for making straight lines than measuring. We also talked some about lines, line segments, and vertices. I also briefly reviewed types of angles with them. Also, this drawing process was more complicated than our usual projects, so it was a good opportunity to practice following multi-step directions- which is a critical test-taking skill! After the crystal drawings were completed, then we talked about color. Students were required to plan a specific color scheme for this project- they couldn't just pick whatever colors they wanted. They needed to select a group of three analogous colors- these are colors that are all together on the color wheel. These were the colors of paint they would use. Next, students had to identify the complement of their analogous colors. Complementary colors are directly across from each other on the color wheel. It means they are like opposites. For example, red and green are complements, and I tell students that when you put red next to green, it makes the red look the "reddest" it can look. And green next to red makes the green look even "greener."  Students first used a crayon in the complementary color to color a few sections- this was our "accent color". Next, they painted the other spaces with the analogous colors. Can you see how the contrast makes each color "pop"? 
To give these crystals a little sparkle, students traced their lines with metallic markers. And it's hard to tell in the photos, but there's also a little glitter added to some of the spaces! The last step added a little scientific flair- students pretended this was a new gemstone they had just discovered, and they had to give their stone a name, tell how much money it was worth, and also tell one interesting fact- maybe something about how the stone was formed, where it was found, or how old the stone was. They came up with some really creative answers! Second grade is in the middle of a unit about weather. Part of their instruction involves identifying types of clouds- cumulus, cirrus, and stratus. What could be a better way to learn how clouds look than to go outside and observe them? So we took our painting supplies and headed outside to observe and paint. Fortunately, the weather cooperated for most classes! A couple of classes did not get to go outside yet, but they will have a turn in the coming weeks.     Here are some finished paintings!  Second grade students have just begun a new IB unit involving weather. This week's learning has been all about air. To go along with this topic, we painted with air in the Art room! Each table had some watered-down paint and some eyedroppers. The goal was to get the paint on the paper and then move it around using ONLY air- no brushes, no fingerpainting. I demonstrated several ways of using air (blowing gently, blowing concentrated air through a straw, fanning a puddle with a piece of cardboard) and then it was the students' turn to experiment! 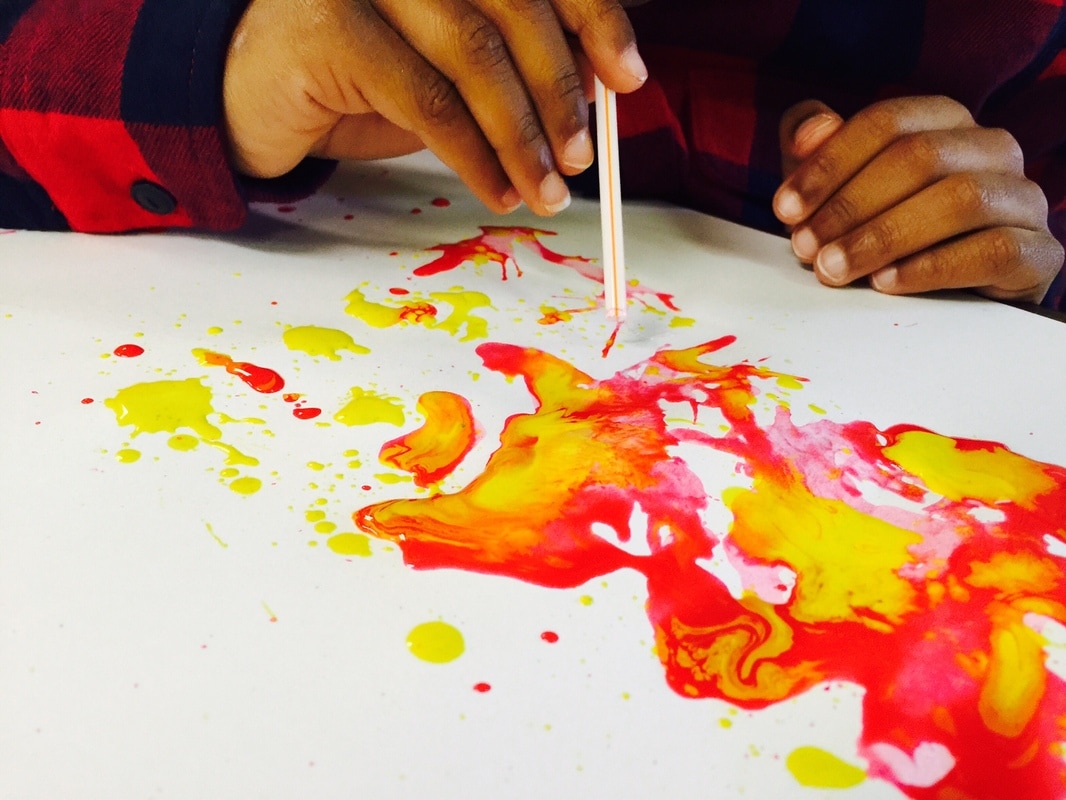     After a few minutes, I stopped them and we had a quick discussion. I asked them what they noticed about how the air worked. One student volunteered that if you blew gently, the paint moved slowly, and if you blew really hard, the paint moved very fast and spread out much further! I was really proud when a student used the word "force" to describe the difference!
Then I asked them what they thought this had in common with weather. They immediately connected it to the wind. We compared the force we used to blow the air to the wind's strength during different weather conditions. They were able to make comparisons between the gentle blowing being like a calm breeze, and the forceful blowing being like hurricane-level winds! We also had to talk a little about color theory... I had given the students red, yellow, and blue paint and the colors swirled and mixed as it moved on the paper. We had a quick review of the concepts behind primary colors (red, yellow, blue) and secondary colors (orange, purple, green- the colors that are made when the primaries mix.) It was a fun day with lots of memorable learning! Fourth graders are finally ready to share the results of their latest project! This project ended up taking about seven weeks. That's about twice as long as we typically spend on a project, and that hard work has definitely paid off! Our inspiration for this artwork came from fourth grade's current study of patterns in weather and how different weather conditions affect the environment. The structure of this project is based on the designs of contemporary Israeli artist Yaacov Agam. Agam is a painter and sculptor whose work is kinetic, meaning it involves movement. He developed a new style of art that has come to be known as an agamograph. These agamographs are made of painted strips that appear to change depending on where the viewer is standing. Watch this video to see an example of one of his agamographs- do you see how the painting completely changes as the camera moves from one side to the other?! To make their own agamograph, students first had to decide what weather pattern they wanted to illustrate. (They could also choose day and night.) Next students created two separate artworks showing the exact same scene but with a change in the weather. We used a tracing technique to make sure the scenes were identical and would line up correctly when the agamograph was put together.  After their two scenes were finished, students had to assemble their agamographs. This process was really tricky and had a lot of opportunities for mistakes, but the students did great! I was so proud of the commitment and dedication students showed for this project- they showed an amazing amount of perseverance and were willing to work until the job was done right!  Here are just a few of the finished examples. I am SO impressed with the results!!  A rainstorm turning to a rainbow: by Sophie  A daytime and nighttime scene: by Sherlyn  A before-and-after of a tornado: by Meredith  Changing seasons: by Jordan  A storm that causes a flood: by Melvin * Here's where I got the idea for this project-- http://reliefteachingideas.com/concertina-fold-changing-pictures/ Third graders have just started a new science unit on rocks and minerals. Last week, they had an in-house field trip where they got to experience mining for gemstones! In support of this learning, our next big art project will be a geometric gemstone painting project. To get us started, students spent this week's art class making detailed observational drawings of rocks.       Third graders have been learning about natural resources and how their availability affects societies. This is a very complicated concept for third-grade minds! To help make the idea a little more concrete, we looked at the artist Andy Goldsworthy. Goldsworthy's art is made from items he finds in nature. He gains his inspiration from the materials that are around him. In the winter, he may decide to use icicles to make a sculpture, or he might make a design with colored leaves in the fall. He could use flower petals in spring, or river rocks in summertime. I wanted students to understand that the materials he chooses is dependent on their availability- just like societies are limited to using resources that are available to them. Students watched a short video about Goldsworthy's work and then we had a class discussion about his designs. The students were fascinated by the idea that his work was temporary- you couldn't "keep" it! This lead to a great discussion of WHY artists make art- it's not always about the end result, sometimes we make art just for the process of making it! Next students got to make their own nature designs! I put out baskets of natural supplies like leaves, bark, rocks, flower petals, and sticks, and encouraged them to explore the materials any way they wished. Many students chose to make radial designs. They could work in teams or individually, and used iPads to photograph their work. I had planned for this to be a one-week-only experience, but every single class requested to do this the next week, too! So we did!      The fourth grade science curriculum has recently focused on the properties of light and how shadows are formed. To accompany that learning, we went outside in search of interesting-shaped shadows to turn into artwork! First students used markers to trace the shadows, and then used the traced designs as the start of abstract paintings.    |
Archives
March 2018
Categories
All
|
 RSS Feed
